Changing a project name later, Editing the name of the first session, Loading projects – Teac HS-4000 User Manual
Page 41: 5 – projects
TASCAM HS-4000
41
5 – Projects
DEL button
Use this to erase the character to the right of the cursor.
Shift button
Touch this to switch between numerals and symbols and
uppercase and lowercase Roman letters.
Caps button
Use to input uppercase letters.
Space button
Use to input a space.
<- / -> buttons
Use these to move the cursor.
Enter button
Touch this to confirm the input name.
• When the PROJECT NAME screen is open, you can also use
an external keyboard to input names.
2. Touch the Enter button on the PROJECT NAME screen or
press the DATA dial to confirm the project name.
Character input limitation
The maximum number of characters allowed is indicated by
the yellow background in the project name display area. Excess
characters have a gray background and are discarded when the
Enter button is pressed.
Changing a project name later
1. Select the project that you want to change on the PROJECT
screen. The background of the selected project name
appears yellow.
2. Touch the MENU button on the PROJECT screen to open a
pull-up menu.
3. Touch the EDIT NAME button in the pull-up menu to open
the PROJECT NAME screen.
NOTE
When multiple projects are selected, the EDIT NAME button
in the pull-up menu is not available.
4. Use these to input the project name. The input method is
the same as explained above.
5. Touch the Enter button on the PROJECT NAME screen or
press the DATA dial to confirm the project name and return
to the PROJECT screen.
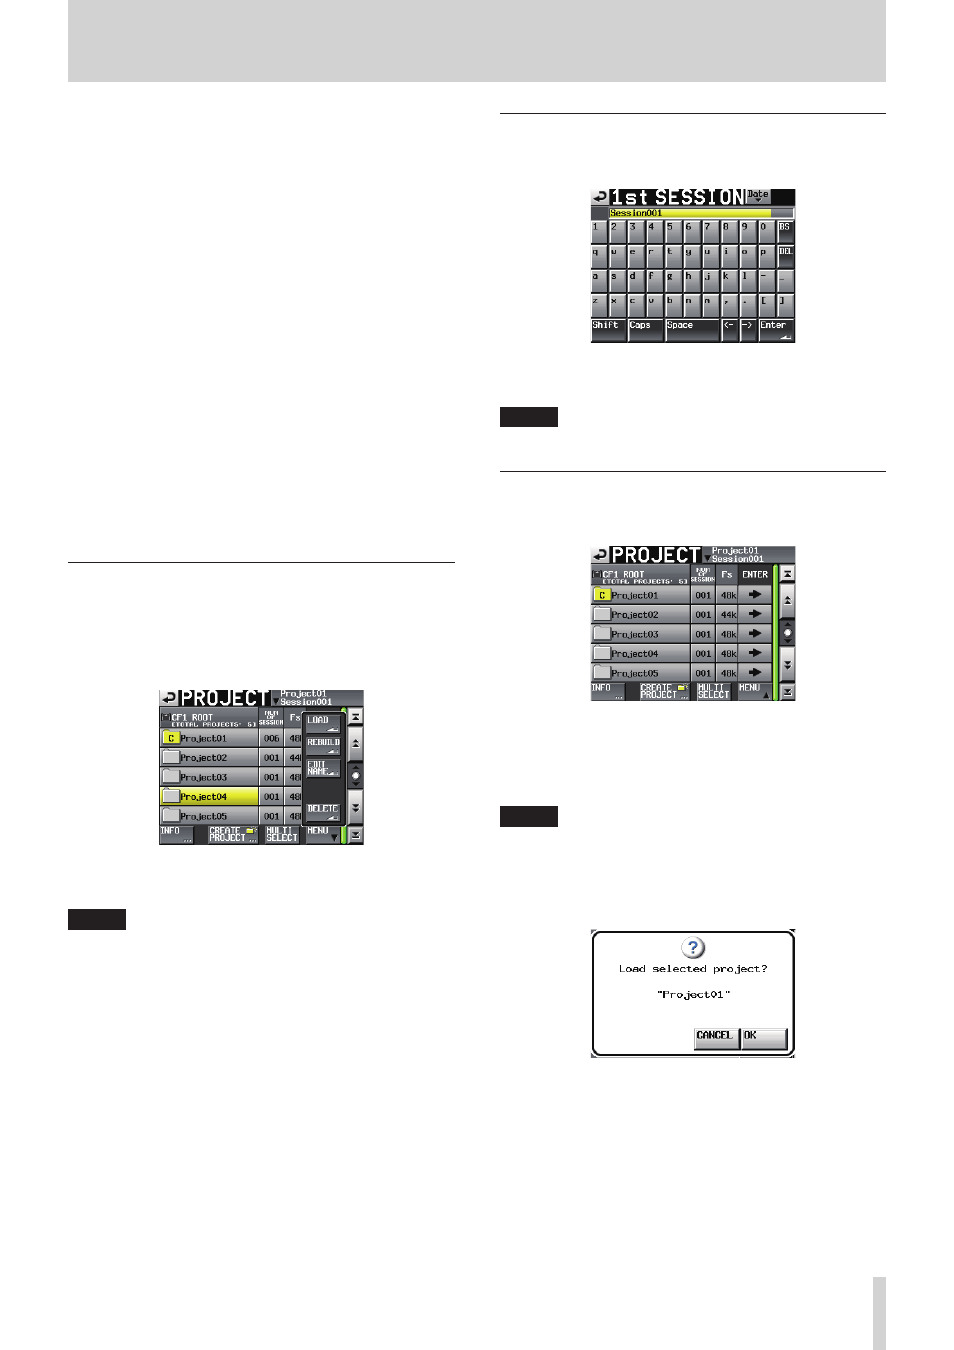
Editing the name of the first session
Touch the Session Name button on the CREATE PROJECT screen
to open the 1st SESSION screen, as shown below.
Use the same input method as in “Editing the project name” on
NOTE
Session names cannot be changed later.
Loading projects
1. Press the PROJECT key on the front panel to open the
PROJECT screen.
2. Select the project that you want to load.
3. Touch the MENU button on the PROJECT screen to open a
pull-up menu.
4. Touch the LOAD button in the pull-up menu.
NOTE
When multiple projects are selected, the LOAD item is not
available.
5. Touch the OK button or press the DATA dial when a confir-
mation pop-up message appears.
After loading completes the Home Screen opens.