Experiment #48: blinking leds, Experiment #77: stable-current source – Elenco 130-in-1 Electronics Playground User Manual
Page 65
-65-
Connect terminals 13 and 14 to turn on the power
and finish the wiring sequence for this circuit. You’ll
notice that both LED 1 and LED 2 alternate going on
and off. By substituting different values for the 100
μF
capacitor you can change the speed of the blinking.
In place of transistor multivibrators, TTL
multivibrators are becoming widely used today. Think
of some reasons why? Make notes on any reasons
you think TTL multivibrators would work better than
regular transistor multivibrators.
TTL multivibrators use much less space than
transistor multivibrators. TTL ICs also exert less
current than comparative transistor arrangements.
Notes:
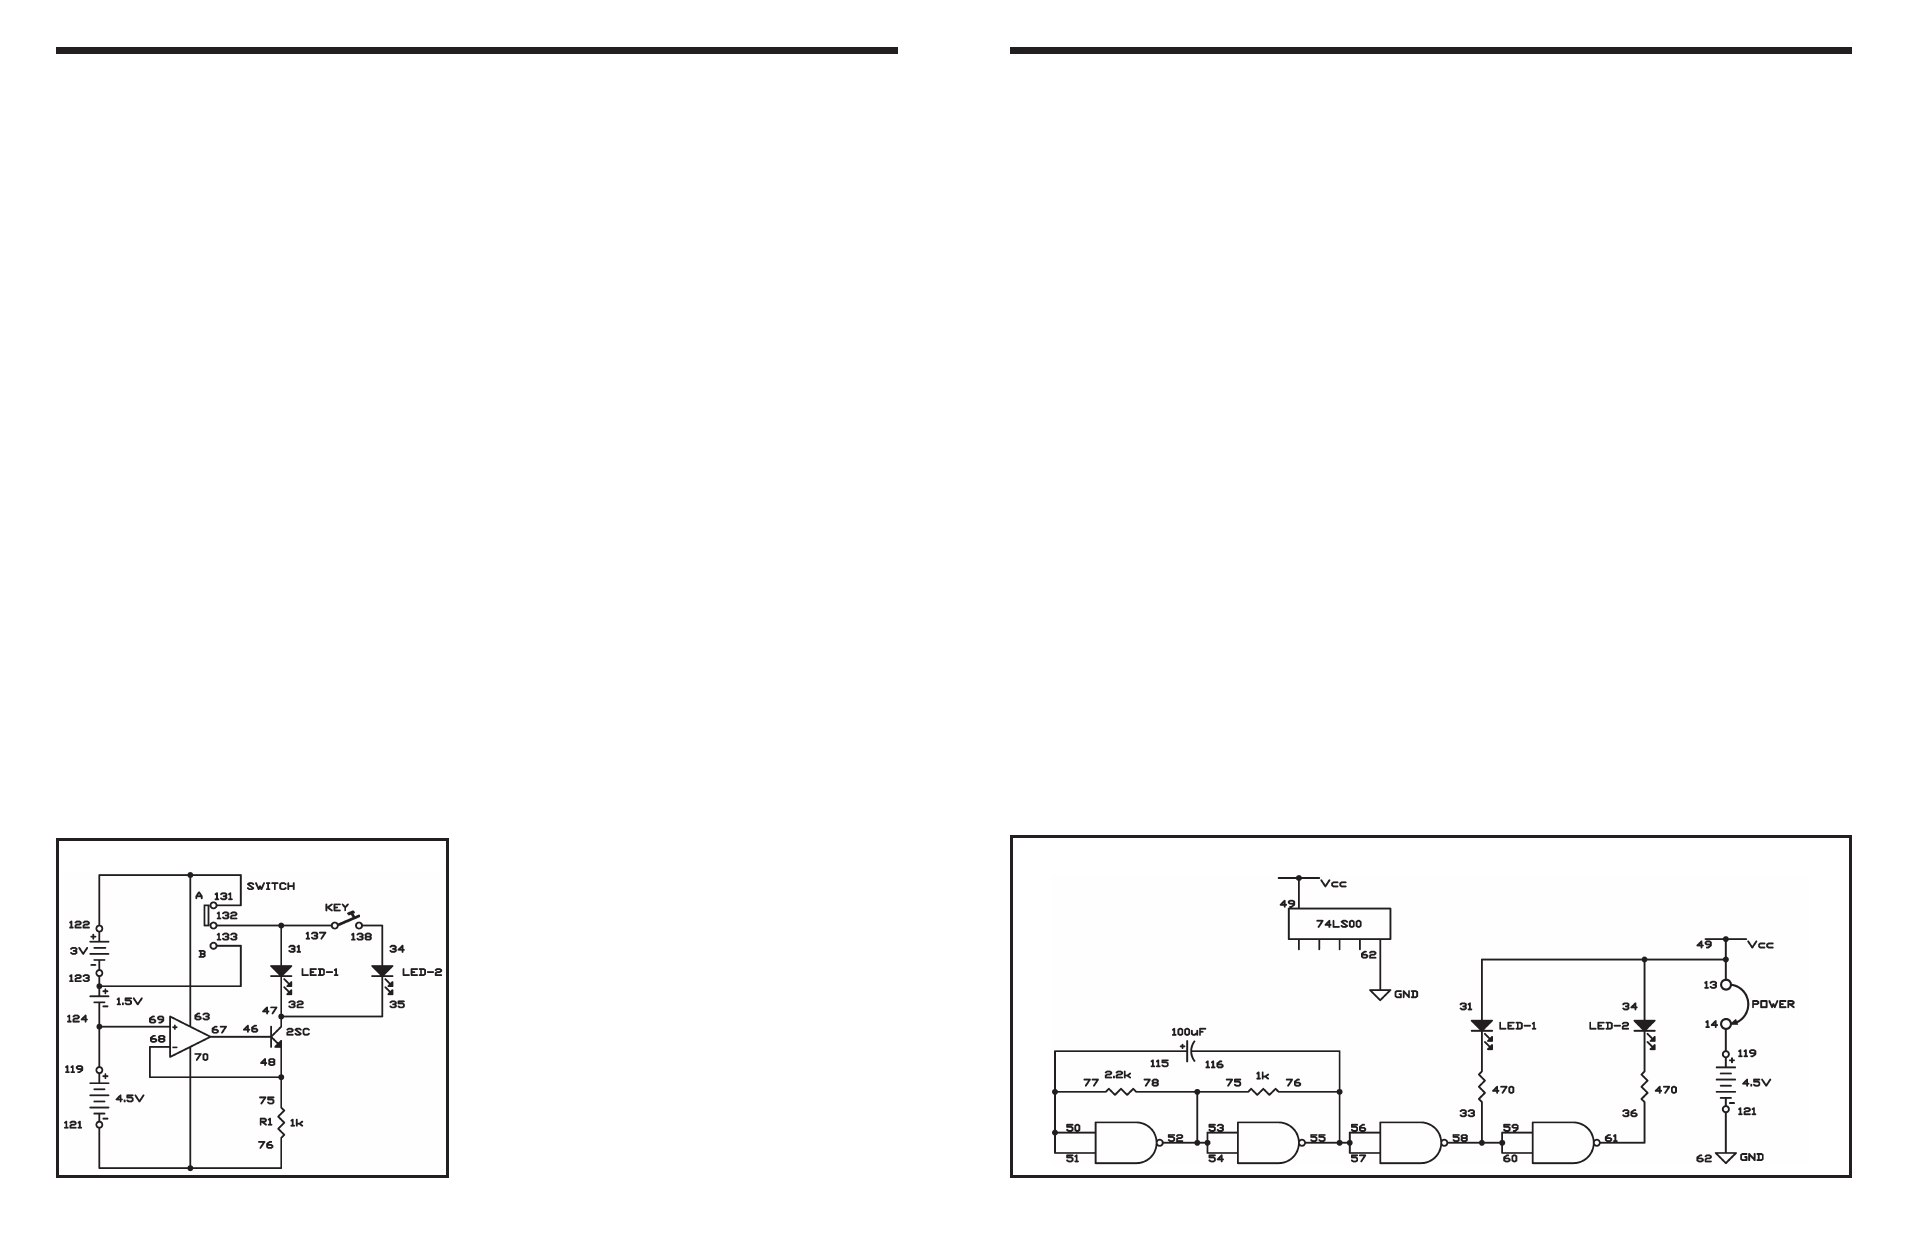
EXPERIMENT #48: BLINKING LEDS
Wiring Sequence:
o 13-49-31-34
o 14-119
o 33-60-59-58
o 36-61
o 50-51-77-115
o 52-53-54-78-75
o 55-57-56-76-116
o 62-121
o 13-14 (POWER)
Schematic
-96-
In this experiment, we will make a constant current
circuit, using an operational amplifier and a
transistor. This circuit maintains a constant current
even when the input voltage is changed, because
more energy is used up in the circuit.
View the schematic. When the current is modified,
the voltage across R1 is also modified. The output of
the operational amplifier changes corresponding to
the feedback signal from R1. This output from the
amplifier controls the base voltage of transistor Q1
allowing it to maintain the continual current.
First set the switch to position A, and press the key
while monitoring LED 1. When the key is pressed it
gets dimmer. This occurs because both LED 1 and
LED 2 are in the circuit when the key is closed. The
total current through the circuit is the same, but now
it is split between LED 1 and LED 2, so LED 1 gets
dimmer.
Set the switch to position B with the key off. Do you
notice any changes in LED brightness from position
A to position B? Setting the switch to B modifies the
supply voltage from 9V to 6V. However, the current
remains constant again, so the LED brightness is not
affected.
Notes:
EXPERIMENT #77: STABLE-CURRENT SOURCE
Schematic
Wiring Sequence:
o 31-132-137
o 32-35-47
o 34-138
o 46-67
o 48-68-75
o 63-131-122
o 69-119-124
o 76-70-121
o 123-133