Experiment #7: meowing cat, Experiment #121: audio continuity tester – Elenco 130-in-1 Electronics Playground User Manual
Page 18
-143-
-18-
Are you bothered by mice, do you not have a
mousetrap? You should try this next experiment to
help you instead—see if the sound of this cat can
keep the pests out of your life.
Just follow the drawing below and the wiring
sequence. To start the experiment switch the set to
B. Press down on the key and release it immediately.
You will hear the meow from the cat coming from the
speaker. If you adjust the control knob while the cat’s
meow is fading away, what effect on the circuit
operation does it have? Now set the switch to A and
try it once more. Now it sounds as if the cat is
begging for a dish of milk in a low, long sounding
tone.
To produce a variety of sounds try experimenting
with this circuit. Whatever you do just don’t change
the value of the 0.05
μF capacitor to more than 10μF
or reduce the value of the 10k
Ω resistor— or else the
transistor could get damaged.
Notes:
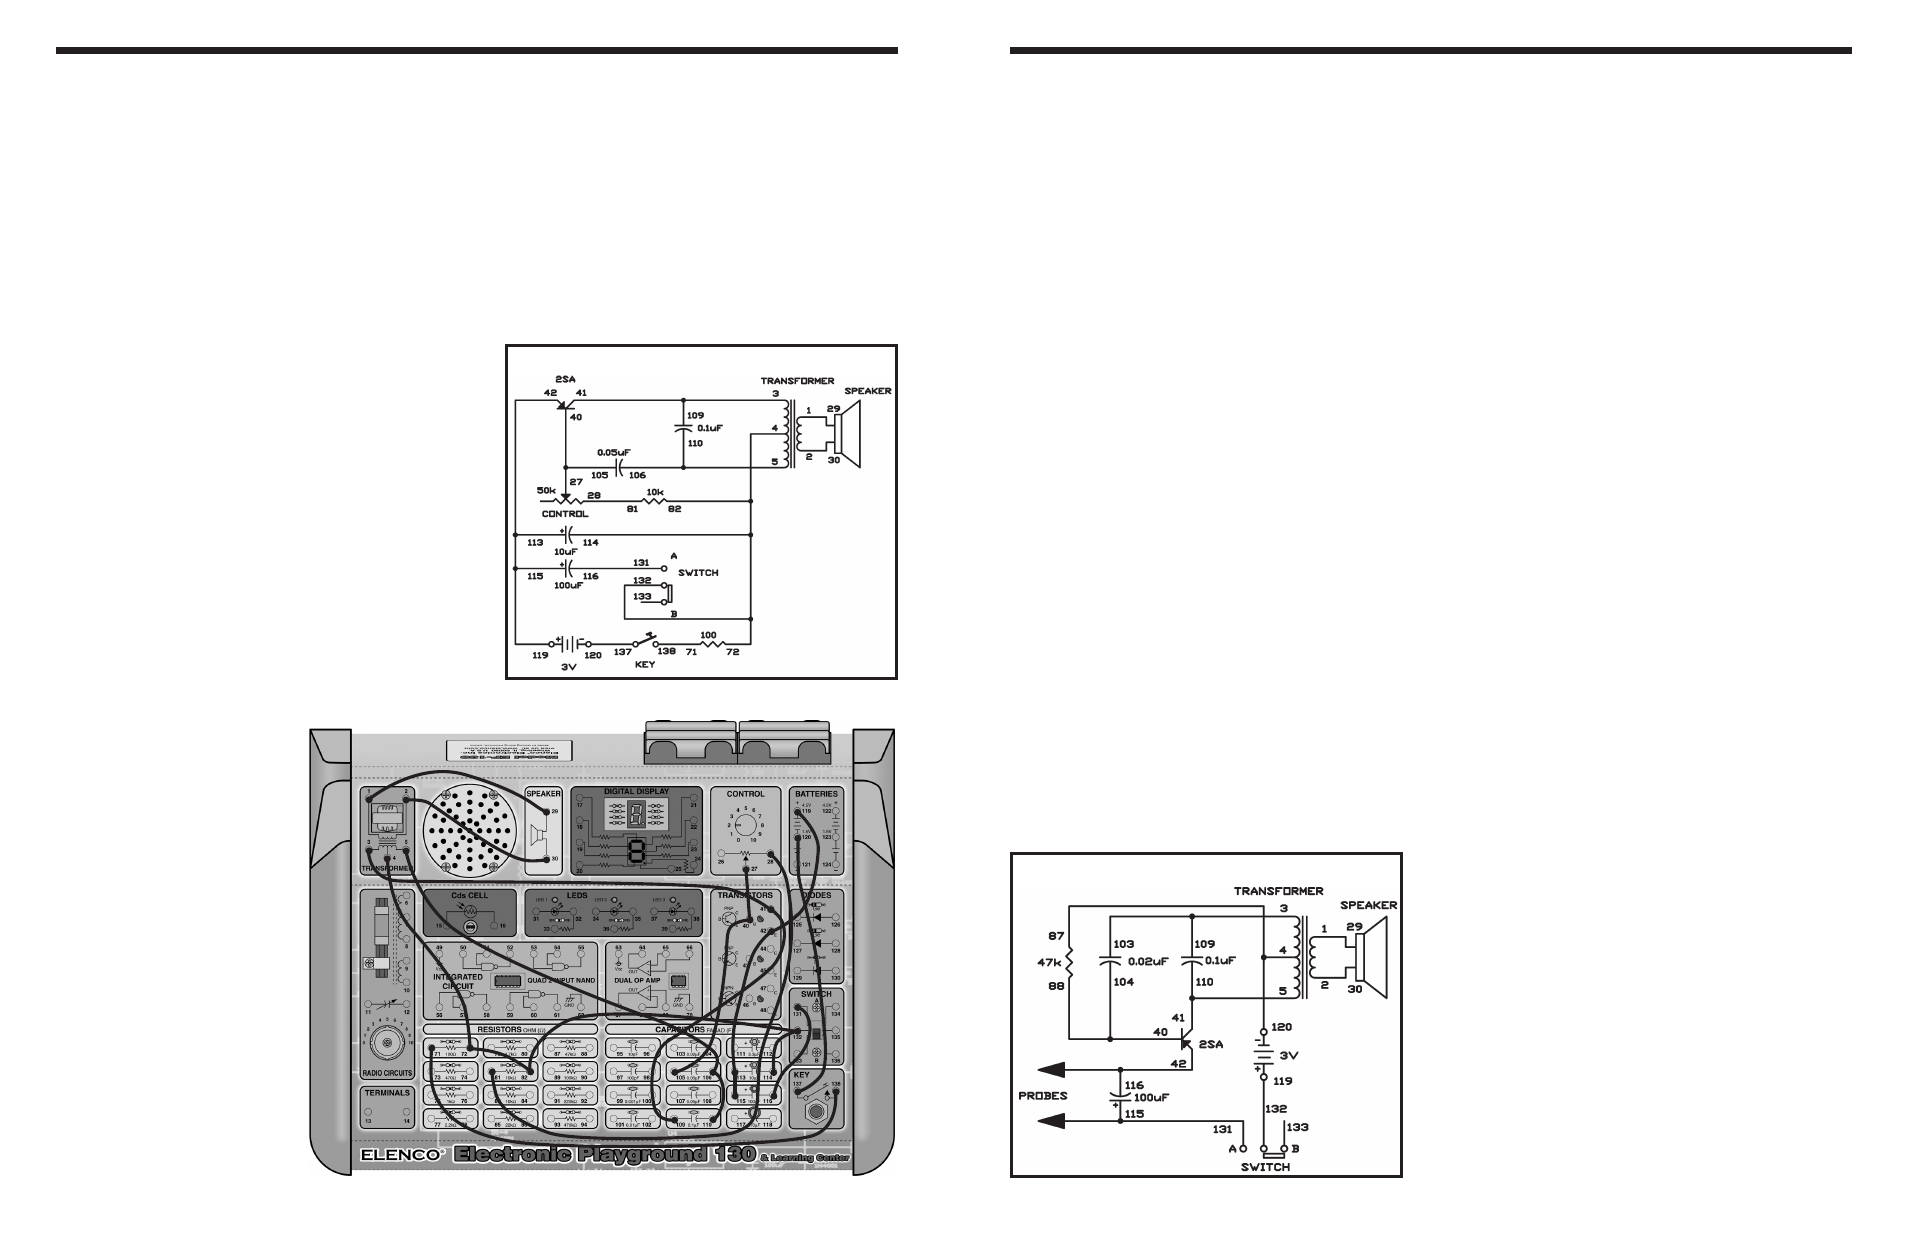
EXPERIMENT #7: MEOWING CAT
Wiring Sequence:
o 1-29
o 2-30
o 3-41-109
o 4-72-82-132-114
o 5-106-110
o 27-40-105
o 115-113-42-119
o 71-138
o 81-28
o 116-131
o 120-137
Schematic
This circuit emits a sound if the material you are
checking transmits electricity. This is convenient when
you are looking at wires, terminals, or other things and
cannot look at a signal lamp or LED. Your ears will
detect the results of the test while your eyes are busy.
If the component or circuit you are testing conducts
electricity, it will complete the circuit for a pulse-type
oscillator. You can use this to test most of the
components in this kit. For diodes and transistors,
remember that electricity only flows through them in
one direction (unless they are damaged).
In the schematic, you will see that the output from the
transistor goes through the transformer to the 0.02
μF
capacitor and then to the base of the transistor. The
TEST terminal is connected to the emitter of the
transistor. The transistor starts to oscillate when
something that allows electricity to flow is connected
to the terminal.
You can safely check almost any component with this
continuity checker because it uses a very low current
of about 15mA or less. You might want to try
measuring the continuity of pencil lines on paper,
water, metallic surfaces, and many other things.
Notes:
EXPERIMENT #121: AUDIO CONTINUITY TESTER
Schematic
Wiring Sequence:
o 1-29
o 2-30
o 3-103-109
o 4-87-120
o 5-110-41
o 88-104-40
o 42-116-PROBES
o 115-131-PROBES
o 119-132