Reznor RXH (Outdoor PreevA) Unit Installation Manual User Manual
Page 25
Form I-RDH/REH/RHH/RXH (12-14), P/N 215210 R14, Page 25
6.4.3 Screened Outside
Air Hood for 100%
Outside Air Opening,
Option AS2
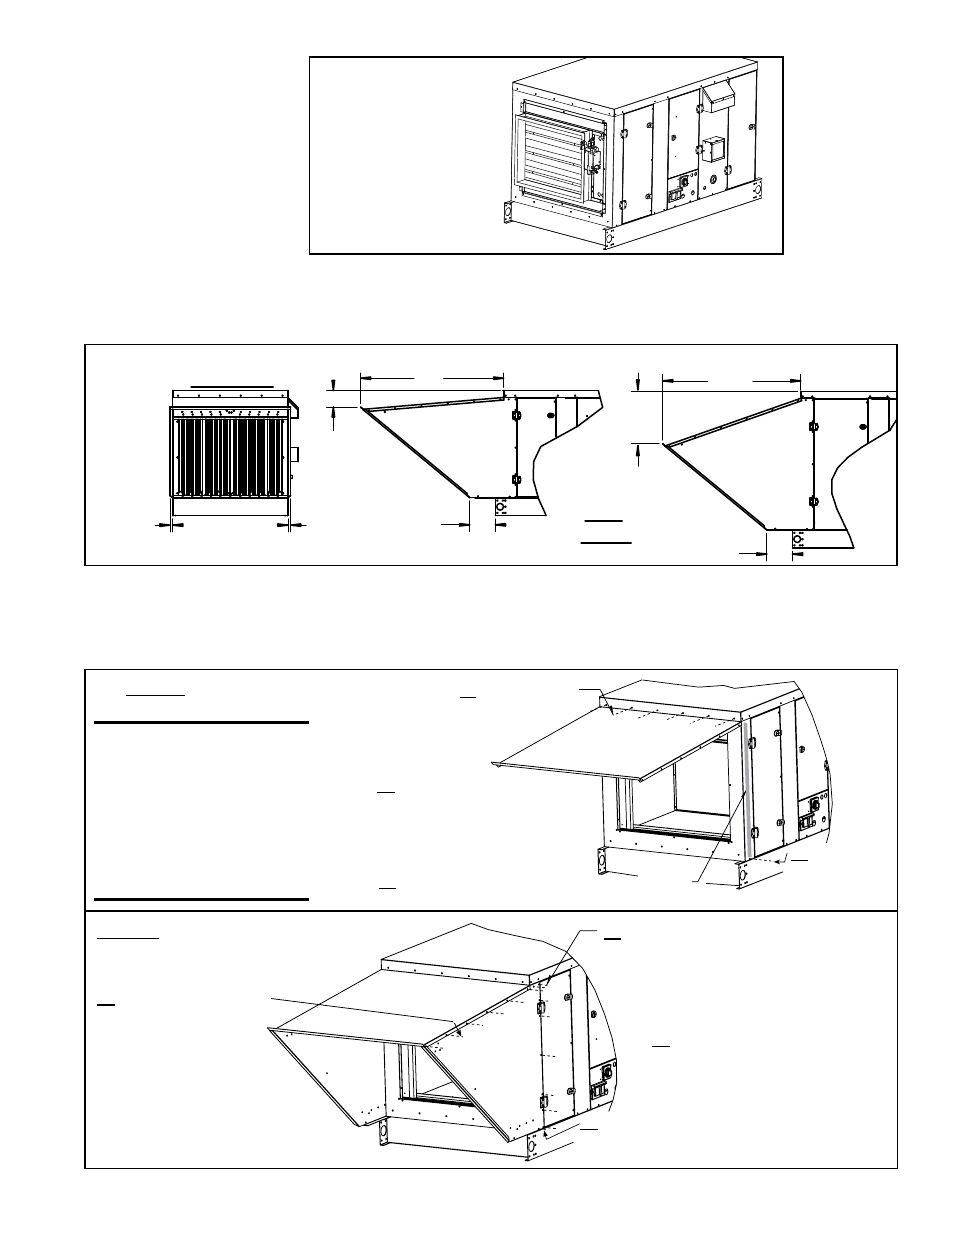
The outside air hood is a weatherized, screened hood designed to be field assembled
and installed around the horizontal inlet air opening of the mixing box, a cooling coil
cabinet, or the blower cabinet. The hood includes moisture-eliminating louvers.
A parts list and illustrated instructions are included with the option package.
FIGURE 19A - Dimensions of Option AS2, Screened Outside Air Hood with Moisture Eliminating
Louvers
13/16”
21mm
13/16”
21mm
4-13/16”
123mm
42”
1,066mm
7-9/16”
192mm
RDH 75-150;
REH 10A-60B;
RXH 000A-B
RDH 175-400A;
REH 30D-120E;
RHH 130,180,
260, 350;
RXH 000C-E
40-1/2”
1029mm
15-5/16”
389mm
7-9/16”
192mm
Inlet View
Side
Views
Installation Instructions
Follow the illustrated instructions in
FIGURE 19B. To avoid possible damage, it is rec-
ommended that the outside air hood be installed after the system has been placed on
the roof. The air hood should be installed before the blower is operated. Do not install
the hood while the system is in operation.Installation of larger sizes requires at least
two persons. All screw ends should be inside the hood.
FIGURE 18B -
Model RDH unit
with Option AR8,
On/Off Damper
(no mixing box)
STEP 1 - Attach top of outside
air hood. Prepare to attach sides.
1a) Remove row
of screws across
cabinet top.
Hood Top
(Edge must go under
cabinet top.)
1b) Slide the edge of the hood
top under the edge of the
cabinet top and re-insert the
screws removed in Step 1a.
1c) On BOTH sides of the unit, run a bead of
silicone down the cabinet post behind the hinges.
1d) On BOTH
sides, remove
this screw.
(Save the screws.)
FIGURE 19B - Outside
Air Hood Assembly
STEPS
CAUTION: It is
recommended that the
inlet to the outside air
hood NOT be facing
into the prevailing wind.
Allow 14” minimum
clearance from the
bottom of the air hood to
the mounting surface.
STEP 2 - Attach sides of outside
air hood.
NOTE: Select screws carefully.
Hood Top
(attached in STEP 1)
Right
Side
2a) Position the side,and reinsert the
screw removed in STEP 1d). Continuing
to support the side panel, go to STEP 2b).
2c) Attach the side of the hood to the
cabinet with self-tapping screws. Use
the 1/2 hex head/no slot screws with
the drill point. Use all the holes (each
side requires eight screws).
2d) Repeat the
procedure to install
the other side.
2b) Position side panel
over the cabinet and
inside the hood top.
Attach the side of the
hood to the top with
sheetmetal screws. Use the
1/2 screws with the slotted
head and standard point.
Left Side
(Top of side
panel must
be inside
the top.)