AERCO SmartPlate User Manual
Page 69
SmartPlate Installation, Operation & Maintenance Manual
CHAPTER 8 – CORRECTIVE MAINTENANCE
OMM-0069_0E
AERCO International, Inc.
100 Oritani Dr. Blauvelt, NY 10913
Page 69 of 138
SP-100
Phone: 800-526-0288
PRI: 11/26/2013
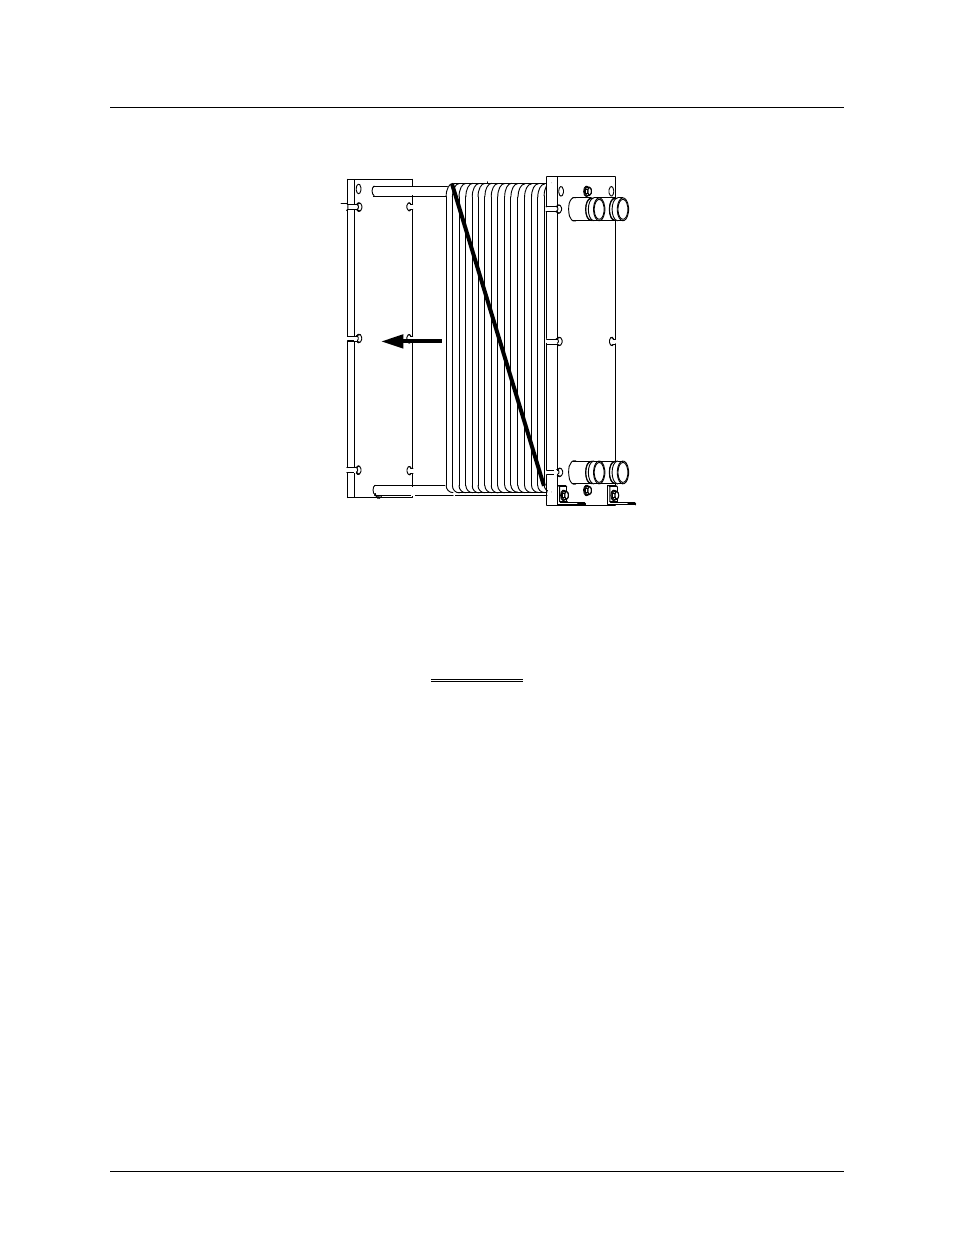
12. With the tightening bolts removed, the pressure plate can be slid back (Figure 8-10) and
channel heat transfer plates can also be slid back for inspection or cleaning.
Figure 8-10. Heat Exchanger With Pressure Plate Slid Back
8.7.2 REMOVAL AND INSERTION OF PLATES
To remove and insert the channel (heat transfer plates), proceed as follows:
WARNING
TO AVOID HAND INJURIES WHEN HANDLING PLATES, USE
PROTECTIVE GLOVES.
NOTE
If defective gaskets are detected during removal of plates, they
must be replaced using the procedures in paragraph 8.8.
1. Push the pressure plate back away from the plate pack.
2. When removing the plates, number or stack them in sequence.
3. Hang the plates with their backs towards the pressure plate (the side without gasket),
unless otherwise specified.
4. Always consult the plate pack numbering or markings to insure the proper plate sequence.
5. Install plates one at a time and push them towards the frame plate (Figure 8-11).