AERCO SmartPlate User Manual
Page 61
SmartPlate Installation, Operation & Maintenance Manual
CHAPTER 8 – CORRECTIVE MAINTENANCE
OMM-0069_0E
AERCO International, Inc.
100 Oritani Dr. Blauvelt, NY 10913
Page 61 of 138
SP-100
Phone: 800-526-0288
PRI: 11/26/2013
8. At the rear of the SmartPlate Heater, place a wooden block, or other suitable support,
under the Brazed Plate Heat Exchanger to provide support while removing the mounting
bolts in the following steps.
9. If the SmartPlate is a Model SP150, remove the two support brackets at the rear of the
Heat Exchanger.
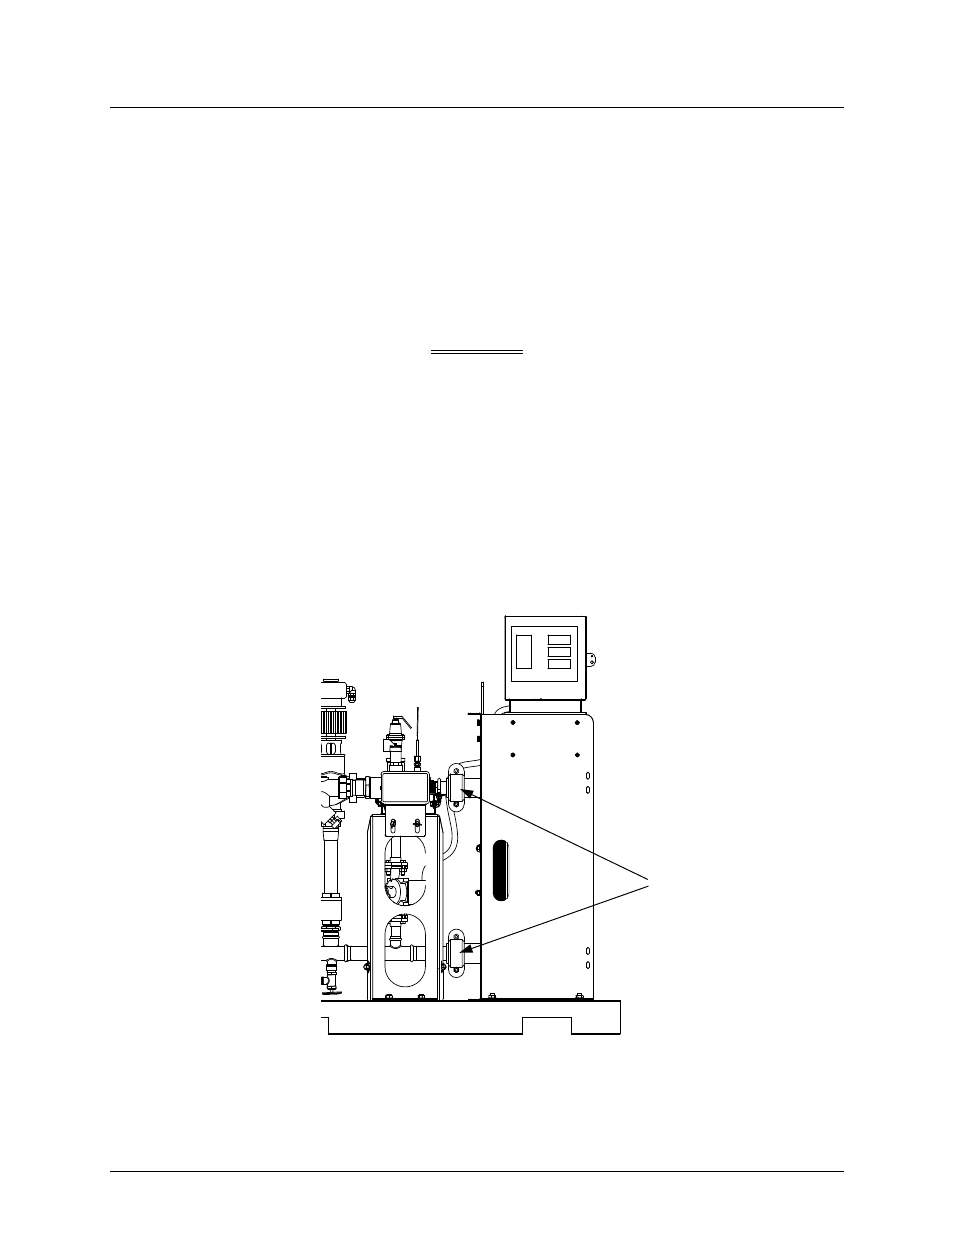
10. Use a ratchet with a 9/16” socket through the hand holes in the sides of the Heat
Exchanger Mounting Bracket and a 9/16” wrench on the outside to remove the four (4)
bolts, washers and nuts secure the Heat Exchanger to the Support Frame.
WARNING
THE SINGLE-WALL HEAT EXCHANGER CAN WEIGH UP TO
300 POUNDS, DEPENDING ON THE SMARTPLATE MODEL
SIZE. THEREFORE, USE EXTREME CARE WHEN REMOVING
IT FROM THE MOUNTING BRACKET.
11. Carefully pull the Heat Exchanger away from the Mounting Bracket. It may be necessary
to jiggle it to separate the grooved pipes from the Victaulic couplings.
12. To replace the Heat Exchanger with a new assembly, simply reverse the previous steps.
Support the replacement Heat Exchanger and ensure it is properly aligned when installing
the bolts squarely in the holes of the Support Frame. Tighten the bolts and all four
Victaulic couplings.
VICTAULIC
COUPLINGS
Figure 8-3. Domestic Water Side – Partial View