AERCO SmartPlate User Manual
Page 38
SmartPlate Installation, Operation & Maintenance Manual
CHAPTER 5 – OPERATION
Page 38 of 138
AERCO International, Inc.
100 Oritani Dr. Blauvelt, NY 10913
OMM-0069_0E
PRI: 11/26/2013
Phone: 800-526-0288
SP-100
6. After the boiler water and domestic water have been drained from the Heater, replace the
1/4" plug removed in step 4 and tighten the Victaulic coupling loosened in step 3.
CAUTION
Step 7 applies to SmartPlate Double-Wall Models ONLY. Skip this step for
all Single-Wall Models.
7. For SmartPlate Double-Wall Models, it is also advisable to separate and clean the plates
using the procedures in Chapter 8, paragraph
8.6.2. Leave the double-wall heat exchanger
in an un-tightened or slightly tightened condition. Cover the heat exchanger with dark plastic
to protect it from welding light and dirt (rubber gaskets are sensitive to welding light). Do not
store organic solvents or acids in the room. Avoid heat or ultraviolet light.
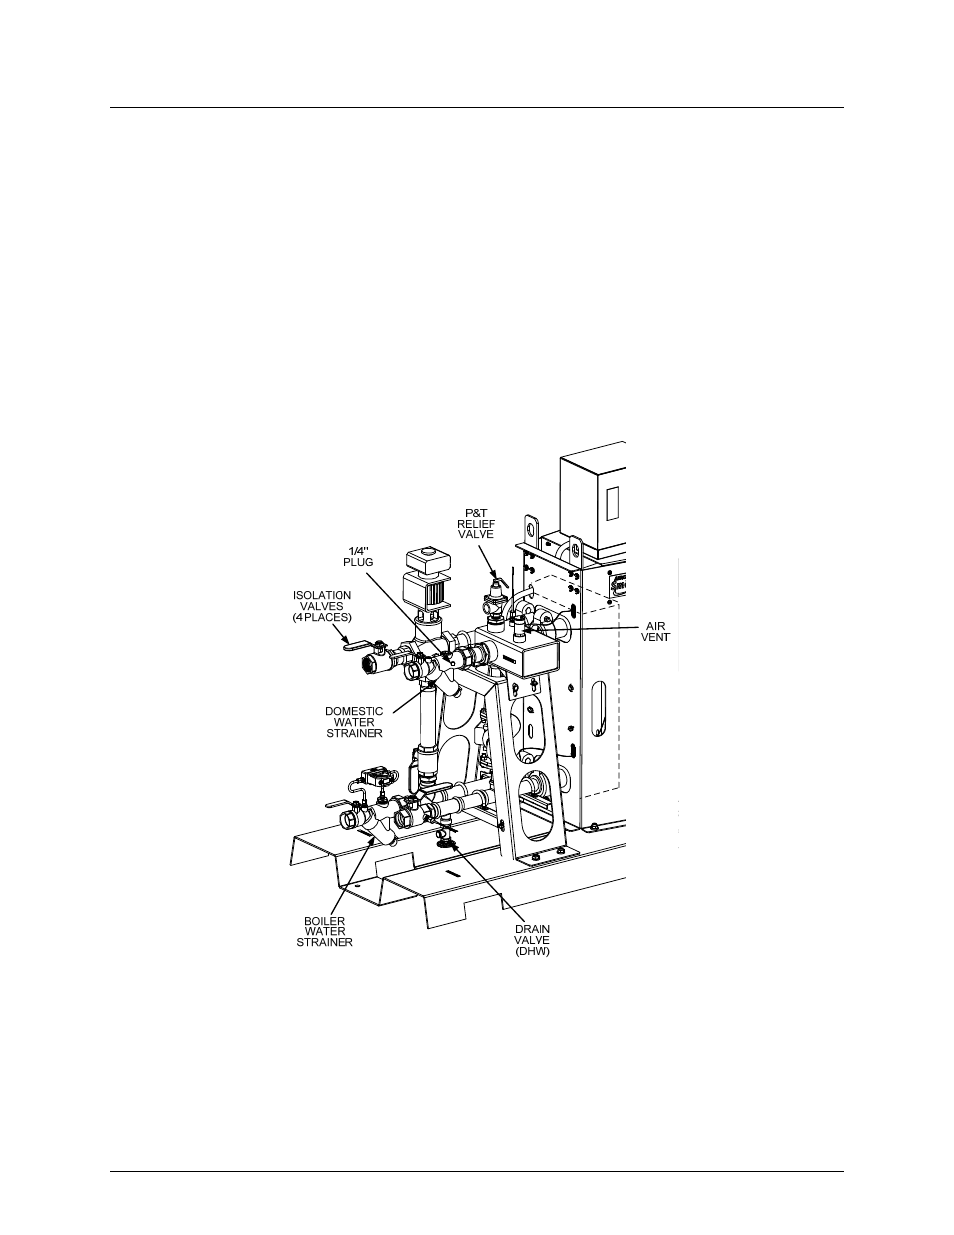
Figure 5-2. Typical SmartPlate Piping
8. To place the SmartPlate back in service, fill the unit and perform the pre-operational
checks and start-up procedures described in paragraphs 5.2 and 5.3.