2 connecting the drive to a controlnet network – Rockwell Automation Flex/WebPak 3000 DC Drive ControlNet, Network Communication Board, 915FK2101 User Manual
Page 15
Installation
2-3
Step 9. Reattach the carrier shield ground wire to the drive power supply.
Step 10. Reattach the carrier shield to the carrier.
Step 11. Close the carrier and fasten it with the captive screw.
Step 12. Reinstall the drive cover.
2.2
Connecting the Drive to a ControlNet Network
See figure 2.5 for cabling and termination connections.
Refer to the
ControlNet Cable Planning and Installation Manual, 1786-6.2.1, for a
detailed description of how to add a node to the network.
Step 1. Lock out and tag all power to the drive.
Step 2. Connect the ControlNet cable tap(s) to the ControlNet media and the
network option board.
To connect to the network option board, twist the ControlNet cable tap(s)
onto the BNC connectors. You will hear the tap(s) click into a locked position.
Step 3. Remove the lockout and tag. Apply power to the drive.
If a problem is detected during diagnostics, a fault or alarm will occur. Refer to the
FlexPak 3000 Software Reference Manual, D2-3405, or the WebPak 3000 Hardware
Reference Manual, D2-3443, for information on faults and alarms.
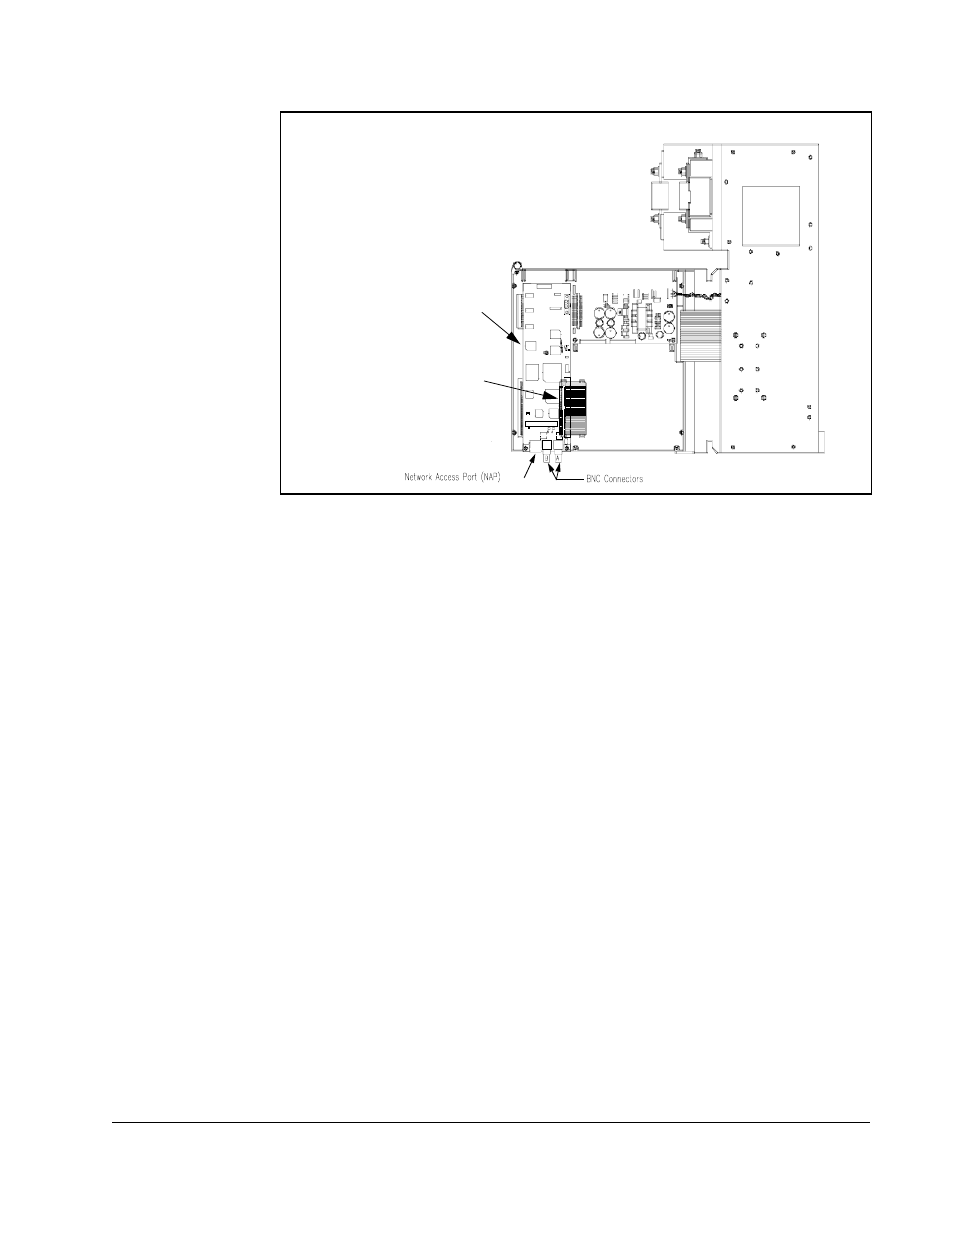
Figure 2.4 – Installing the Network Communication Option Board
Attach Network board to
carrier’s molded standoffs
using captive screws (qty. 3)
Plug option board ribbon cable
into Network board