Standard analog i/o setup, Standard analog i/o setup –10, Figure 3.5 analog option installation – Rockwell Automation 1336Z SPIDER - FRN 2.xxx-5.xxx User Manual
Page 34
3–10
Installation/Wiring for Stand-Alone Drives
Standard Analog I/O Setup
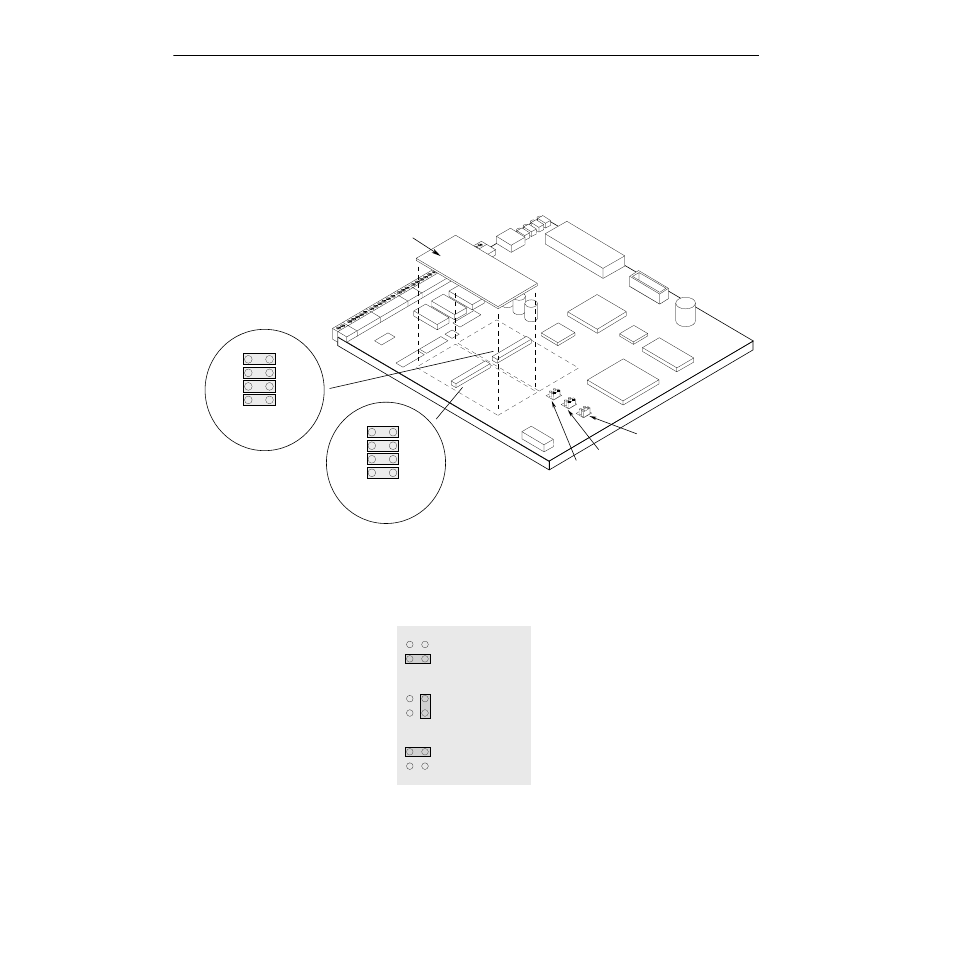
The 1336 SPIDER has a series of jumpers to connect the standard I/O
to TB2-TB3 when no analog options (LA1, LA2, etc.) are present.
The connectors at Slot A and Slot B (see below) each have four
jumpers connecting pins 1-2, 3-4, 5-6 and 7-8. These jumpers must be
in place for the inputs and outputs to be active at TB2-TB3.
Figure 3.5
Analog Option Installation
In addition, each input can be configured for 0-10V, 0-20 mA or
potentiometer. Placing a jumper across the top of the connector (J8,
J11, J13) configures that input for 0-10V operation (see below). The
bottom provides 0-20 mA and the right-side provides potentiometer
operation. Please note that all three are factory set at 0-10V.
Slot A
Slot B
J8
J13
J11
J2
Slot A
Jumpers
Slot B
Jumpers
TB3-2
Common
TB1-2
Output 1
TB2-7
Output 0
TB2-6
Input 2
Text Does Not Appear on Board
(for explanation purposes only)
Remaining Pins
Not Shown
TB2-4
Common
TB2-3
Input 1
TB2-2
Input 0
TB2-1
Pot Ref. (5V)
Text Does Not Appear on Board
(for explanation purposes only)
Remaining Pins
Not Shown
Analog Option Board
(Slot B)
0-10V
J13 (TB2-3, Input 1)
(Pot Configuration Shown)
0-20 mA
Po
t
P
ot
Po
t
0-10V
J8 (TB2-2, Input 0)
(0-10V Configuration Shown)
0-20 mA
0-10V
J11 (TB2-6, Input 2)
(0-20 mA Configuration Shown)
0-20 mA