Figure 10 – Rockwell Automation 20-COMM-ER 20-COMM-ER Dual-Port EtherNet/IP Communication Adapter User Manual User Manual
Page 61
Rockwell Automation Publication 20COMM-UM015B-EN-P - July 2013
61
Configuring the I/O Chapter 4
• The Setup tab includes a DriveExecutive icon link to conveniently launch
DriveExecutive software (when installed on computer) to match the
adapter I/O configuration with the controller, and to assign the Datalink
parameters in the drive. This reduces I/O mismatches.
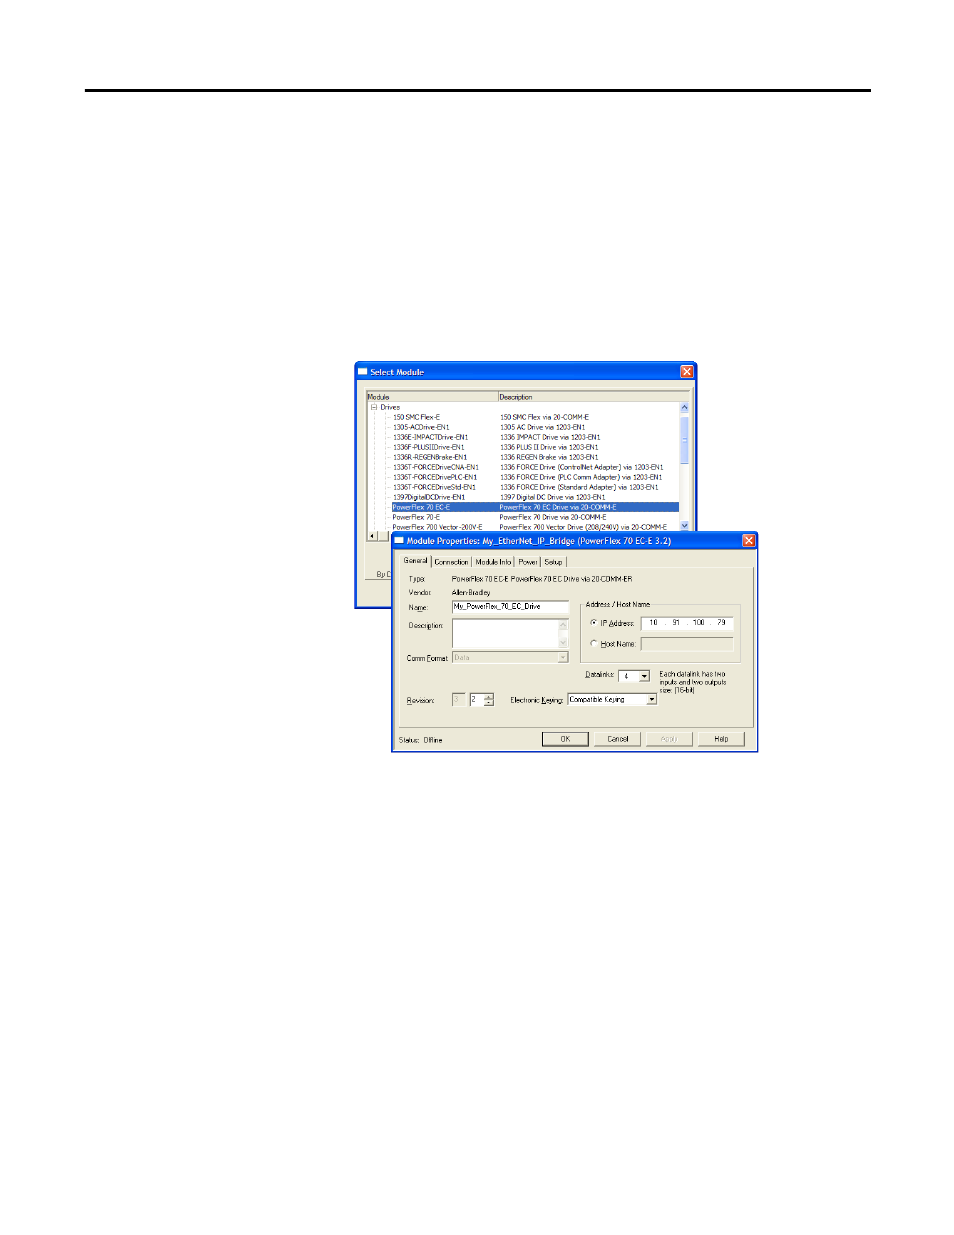
Figure 10 - Classic Profile Screens for Drives
When Datalinks are used, you must enable the desired Datalinks and assign
names to their non-descriptive controller tags. When a Datalink is enabled, you
must set the following adapter I/O parameters:
• Parameter 25 - [DPI I/O Cfg] turns on the enabled Datalink bit so the
20-COMM-ER adapter will communicate that Datalink’s information
with the drive.
• Parameter 37 - [M-S Input] turns on the enabled Datalink bit so the 20-
COMM-ER adapter will input that Datalink’s information from the
controller.
• Parameter 38 - [M-S Output] turns on the enabled Datalink bit so the
20-COMM-ER adapter will output that Datalink’s information to the
controller.
TIP
Since the RSLogix 5000 Classic Profile has been significantly improved upon by
RSLogix 5000 Device Add-on Profiles, version 16.00 or later, we recommend using
RSLogix 5000 Device Add-on Profiles to take advantage of its benefits (more
intuitive, time saving, and less likely to make I/O configuration errors).