Apple Compressor (4.0) User Manual
Page 55
Chapter 4
Assign settings and preview media
55
3
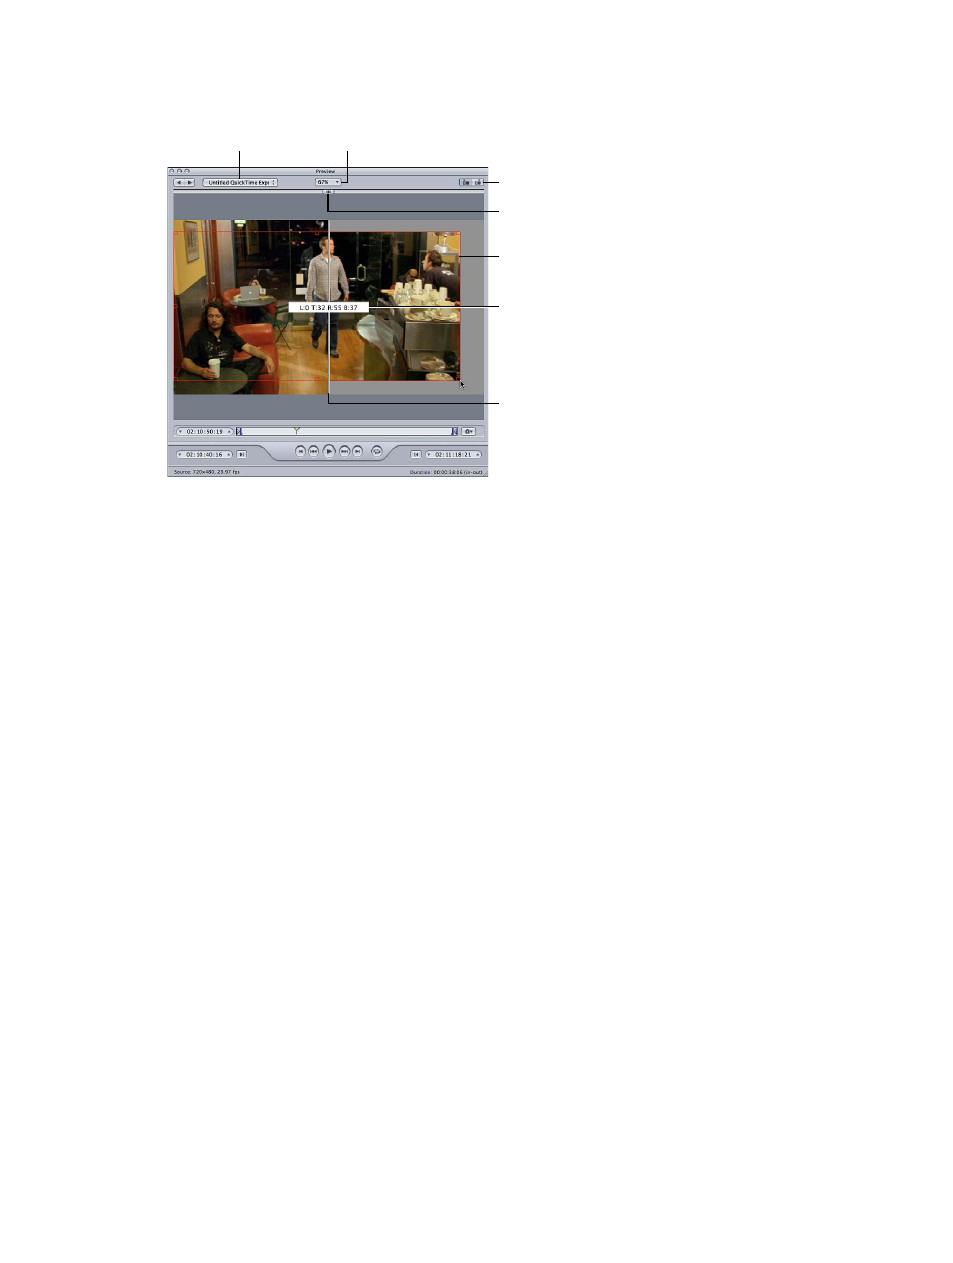
Click the Setting View button in the upper-right corner of the Preview window, and do any of the
following to assign settings:
Split-screen slider
Source View and
Setting View buttons
Cropping boundary
and handles
Split-screen divider
Cropping dimensions
(also seen in Source
Inset fields in the
Geometry pane)
Batch Item
pop-up menu
Preview Scale
pop-up menu
•
Choose a screen size from the Preview Scale pop-up menu, or drag the Preview window to a
size you like.
This doesn’t affect the display frame size of the actual output media file. That can be set only in
the Geometry pane of the Inspector window.
Note: When you adjust the frame size of a setting (in the Geometry pane) while viewing it
in the Preview window, the frame size may not be resized accordingly. If this occurs, choose
Sample Movie or a different target from the Batch Item pop-up menu and then choose this
target again. It will display the correct frame size.
•
Drag the split-screen slider left or right across the top of the screen to move the split-screen
divider over more or less of the transcoded portion of the clip.
•
Use the cropping boundary to adjust the display frame size of your output media file.
You can check the results of your cropping by clicking the Source View and Setting View buttons.
Note: The more you reduce the clip image by cropping it, the larger the scale factor of the
output image will be (as the framing geometry conforms to the settings of the output aspect
ratio rather than to the source file settings). This effect is similar to zooming in on an image,
which results in larger pixels and overall image degradation. So make sure that you don’t crop in
so far that the image is enlarged past its original size relative to the original size of the frame.