Apple Compressor (4.0) User Manual
Page 48
Chapter 4
Assign settings and preview media
48
3
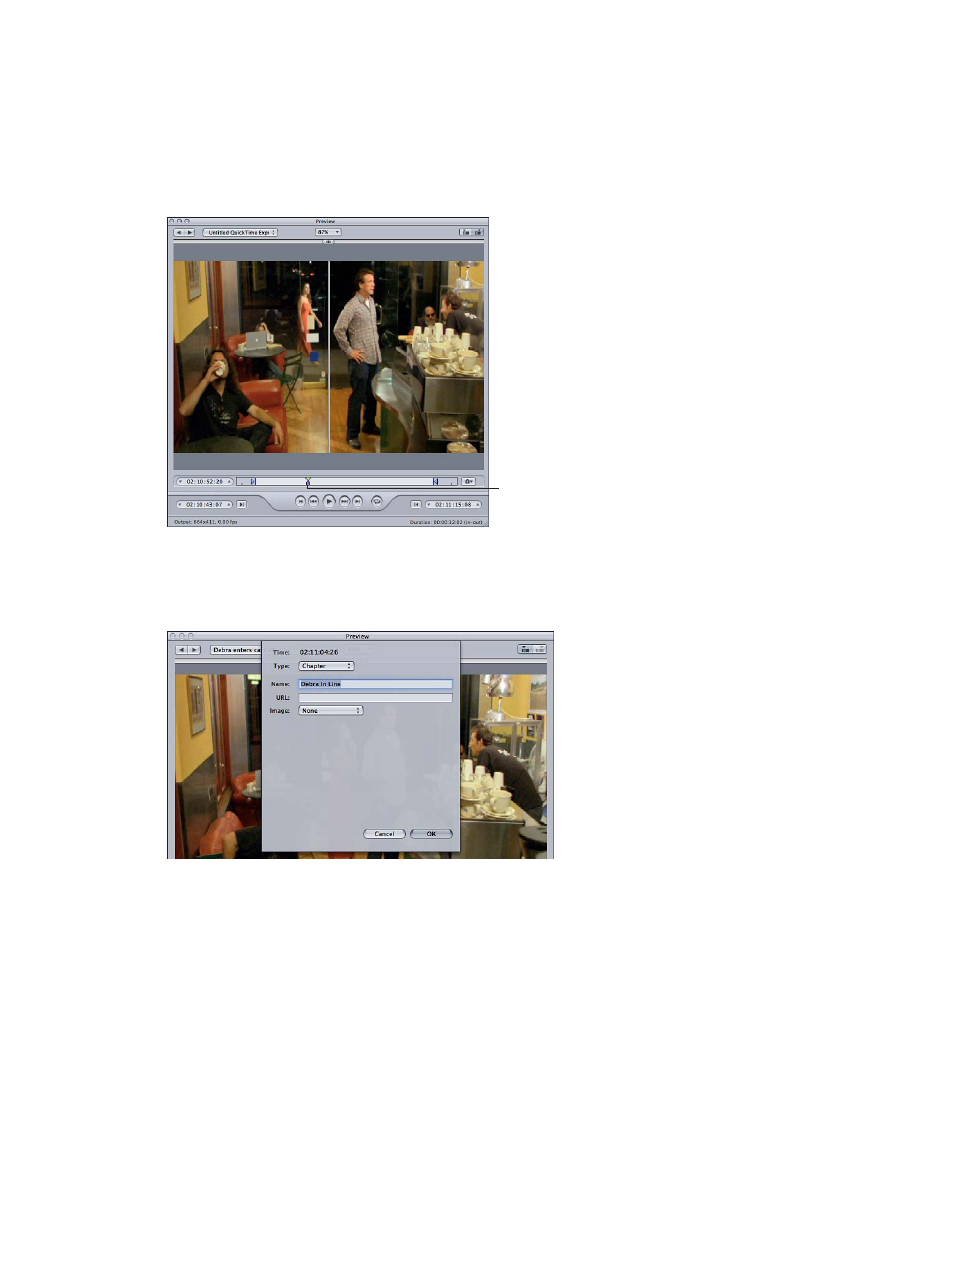
To determine where the marker is to be placed, do one of the following:
•
Drag the playhead to where you want to add a marker.
•
Enter a timecode value in the playhead timecode field.
4
To add a marker, choose Add marker from the Marker pop-up menu (or press M).
A purple chapter marker appears in the timeline.
A purple marker appears
under the playhead after
the marker is added.
5
Choose Edit from the Marker pop-up menu (or press Command-E).
A dialog for editing the marker appears.
6
Enter a name for the chapter marker in the Name field.
For chapter markers, this name appears in the output media file, where it can be seen with
QuickTime Player and in playback devices.
7
If you want to assign an image to the chapter marker, choose one of the following from the
Image pop-up menu:
•
Frame in source: By default, the frame displayed is the frame on which the marker is placed. To
use a different frame as the image, enter a different timecode value.
•
From File: Drag an image to the image well. You can also click Choose to open a file-selection
dialog and select a still-image file to assign to the marker.
8
Click OK.