Configuring communications – Watlow CLS User Manual
Page 54
46 CLS User’s Guide
Installation
Configuring Communications
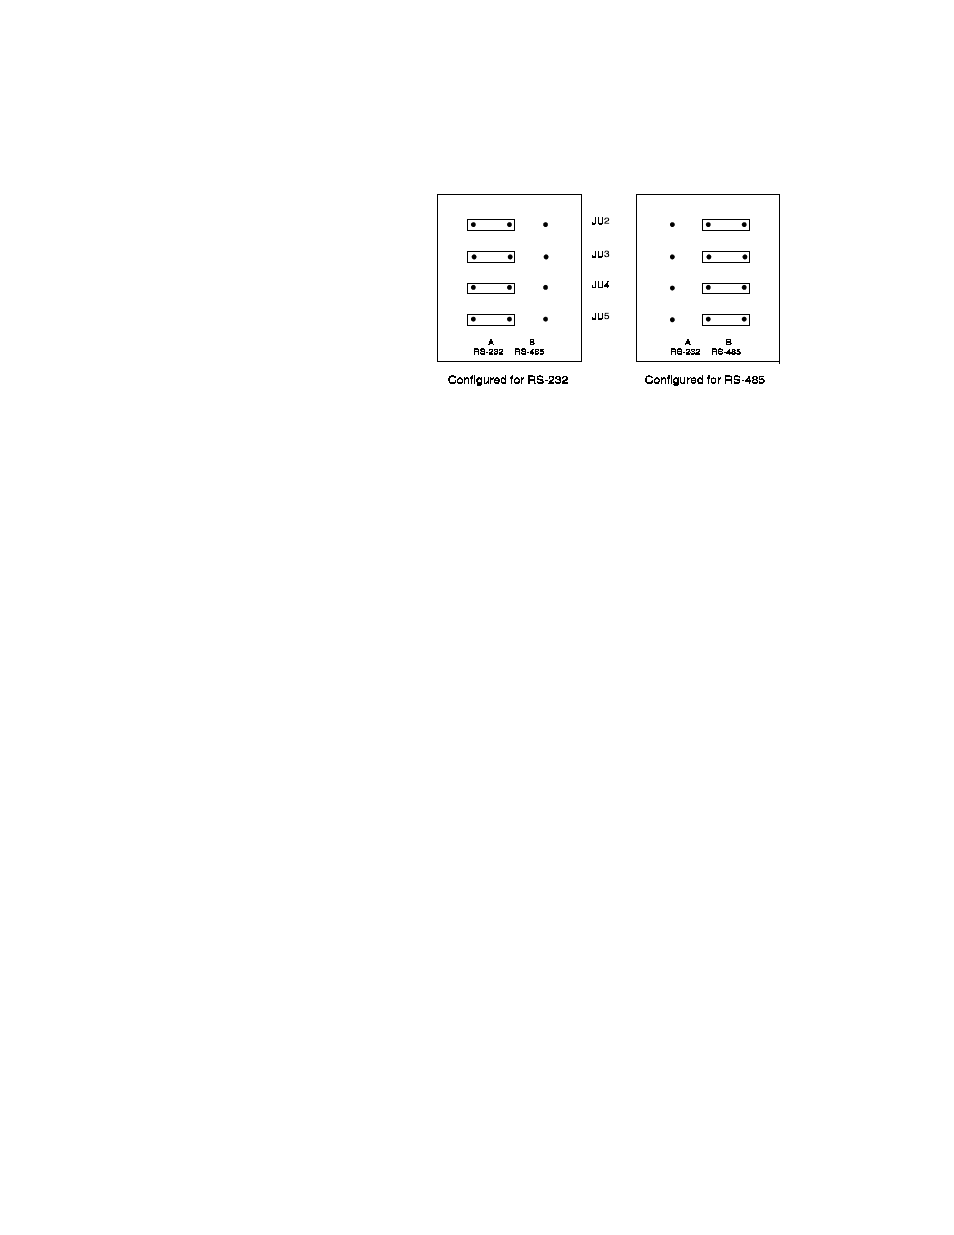
Your controller is shipped configured for RS-232. To switch between
RS-232 and RS-485, change the jumpers as shown here.
You'll need tweezers and a Phillips head screwdriver to switch between
RS-232 and RS-485. Follow these steps:
1.
Power down the unit.
2.
Remove the controller's metal casing. If you haven't removed the
casing before, please don't try to figure it out yourself; see Chang-
ing the PROM in the Troubleshooting section for step-by-step
instructions.
3.
Find jumpers JU2, JU3, JU4, and JU5 (above).
4.
(This part of the explanation assumes that you're changing the com-
munications from RS-232 to RS-485. If you're not, follow the next
two steps but move the jumpers from the B position to the A posi-
tion.) Use tweezers to carefully grasp the jumpers and gently slide
them off the pins.
5.
Use tweezers to gently slide the jumpers onto the B pins. Move
jumpers JU2, JU3, JU4, and JU5 to the B position, as shown above.
6.
If you have changed the controller to 485 communications, put the
200 ohm terminating resistor on the RX line of the last controller in
the system. (If you're only using one controller, it's the last control-
ler in the system.) Place jumper JU1 in the B position . All other
controllers in the system should have JU1 in the A position.
7.
Put the casing back on. If you haven't removed or reinstalled the
CLS's casing before, see Chapter 7: Troubleshooting for instruc-
tions.