Paper path areas – Xerox 50 User Manual
Page 52
GETTING TO KNOW YOUR COPIER/PRINTER
2–18
DOCUMENT CENTRE CS 50 USER GUIDE
2
3
4
5
6
7
2
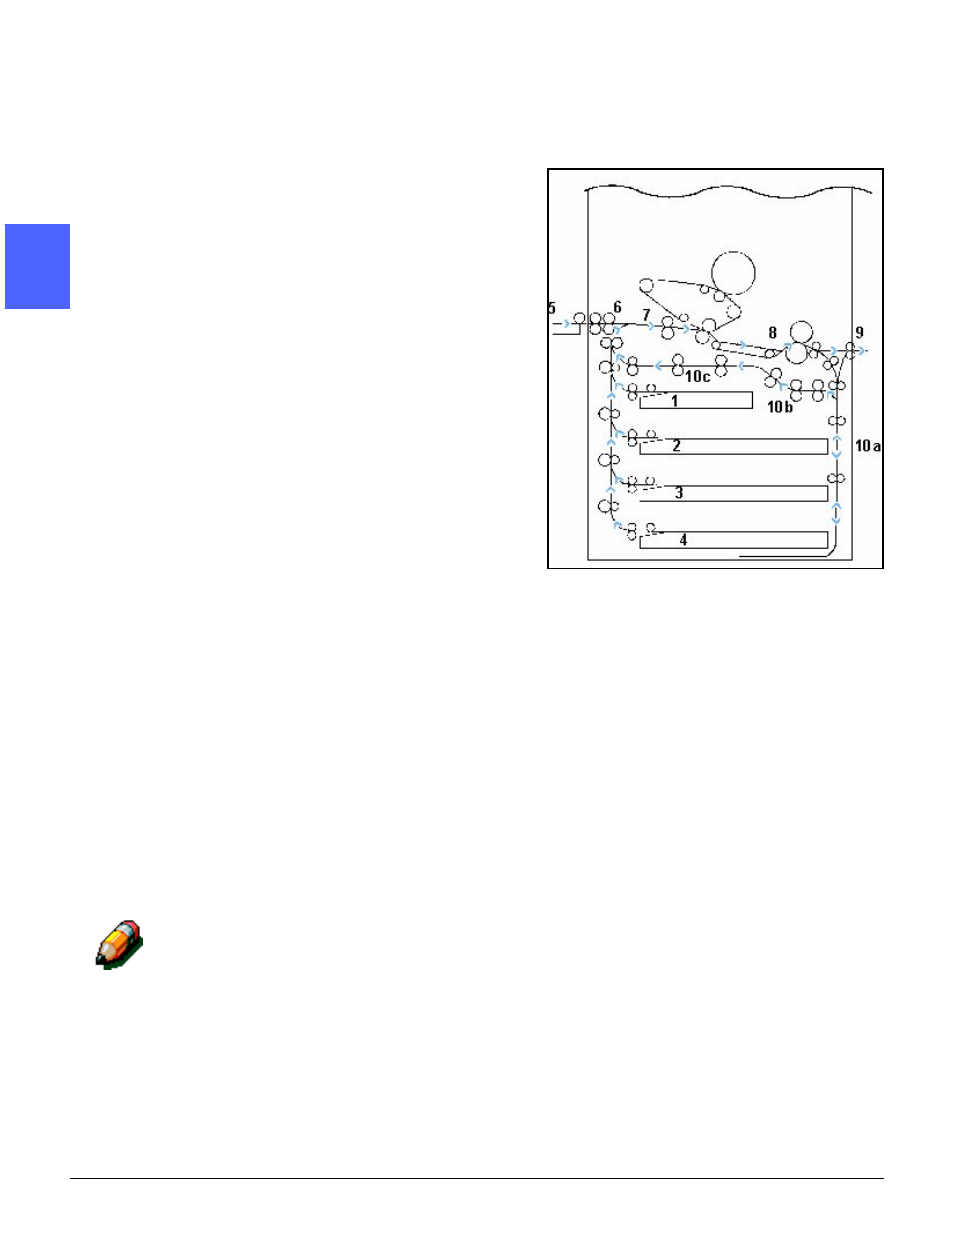
Paper Path Areas
1
Paper Tray 1
2
Paper Tray 2
3
Paper Tray 3
4
Paper Tray 4
5
Paper Tray 5
6
Preregistration Area
7
Transfer Belt
8
Fuser
9
Output Tray, Sorter/Mailbox or Finisher/Mailbox
10
Duplex path (10a, 10b, 10c)
As illustrated in Figure 17, the paper is fed from
the selected paper tray (1-5) to the Paper
Transport rollers.
The Paper Transport rollers deliver the paper to
the Preregistration Area (6) in the Paper Path
Module.
From the Preregistration Area, the paper is
registered onto the Transfer Belt (7), and the
image is transferred.
The paper proceeds to the Post Transfer Area and
into the Fuser (8), where the image is fixed to the
paper permanently.
From the Fuser, the paper passes either through
the Post Fuser Area and into the Output Tray,
Sorter/Mailbox or Finisher/Mailbox (9) or into the
duplex path (10a, 10b, 10c).
NOTE: All paper fed to the copier/printer from
Paper Tray 5 will always be delievered to the
Output Tray.
Figure 17: Paper Path