IDEC MicroSmart User Manual
Page 87
2: M
ODULE
S
PECIFICATIONS
« FC4A M
ICRO
S
MART
U
SER
’
S
M
ANUAL
»
2-67
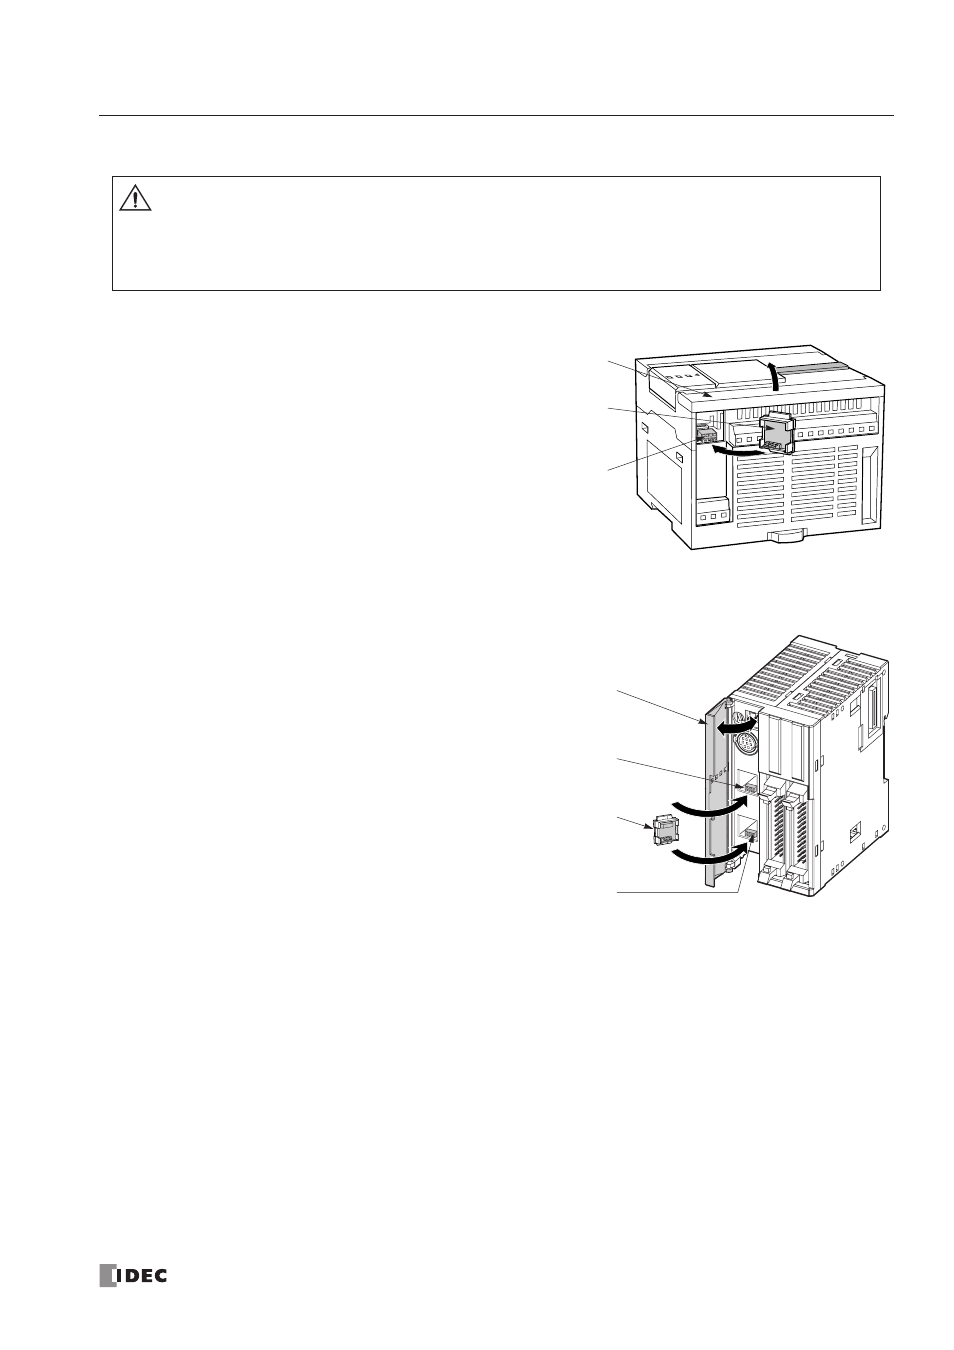
Installing and Removing the Memory Cartridge
All-in-One Type CPU Module
The cartridge connector is normally closed with a
dummy cartridge. To install the memory cartridge,
open the terminal cover and remove the dummy car-
tridge from the CPU module. Make sure of correct
orientation of the memory cartridge. Insert the mem-
ory cartridge into the cartridge connector until it bot-
toms. Do not insert the memory cartridge diagonally,
otherwise the terminal pins will be deformed.
After installing the memory cartridge, close the ter-
minal cover.
To remove the memory cartridge, hold both edges of
the memory cartridge and pull it out.
Slim Type CPU Module
Cartridge connectors 1 and 2 are normally closed
with a dummy cartridge. To install the memory car-
tridge, open the hinged lid and remove the dummy
cartridge from the CPU module. Make sure of correct
orientation of the memory cartridge, and insert the
memory cartridge into cartridge connector 1 or 2
until it bottoms. After installing the memory car-
tridge, close the hinged lid.
Only one memory cartridge can be installed to either
cartridge connector 1 or 2 on the slim type CPU
module. A memory cartridge and a clock cartridge
can be installed at the same time.
To remove the memory cartridge, hold both edges of
the memory cartridge and pull it out.
Caution
• Before installing or removing the memory cartridge, turn off the power to the
MicroSmart
CPU
module. Otherwise, the memory cartridge or CPU module may be damaged, or the
MicroSmart
may not operate correctly.
• Do not touch the connector pins with hand, otherwise electrostatic discharge may damage the
internal elements.
Terminal Cover
Car tridge
Connector
Memor y Car tridge
FC4A-PM32
Hinged Lid
Car tridge Connector 1
Memor y Car tridge
FC4A-PM32
Car tridge Connector 2