Chapter 10: eactivity application, 1 creating an eactivity, Eactivity application-specific menus and buttons – Casio ClassPad II fx-CP400 User Manual
Page 173: Creating an eactivity, Basic steps for creating an eactivity

Chapter 10: eActivity Application
173
Chapter 10:
eActivity Application
The eActivity application lets you input and edit text, mathematical expressions, and ClassPad application data,
and save your input in a file called an “eActivity”.
A basic eActivity can contain text along with application data,
which is embedded as a row or a strip. A row can be a “Text
Row”, a “Calculation Row”, or a “Geometry Link”. A strip can be an
“application data strip” (Main, Graph & Table, Geometry, and so on).
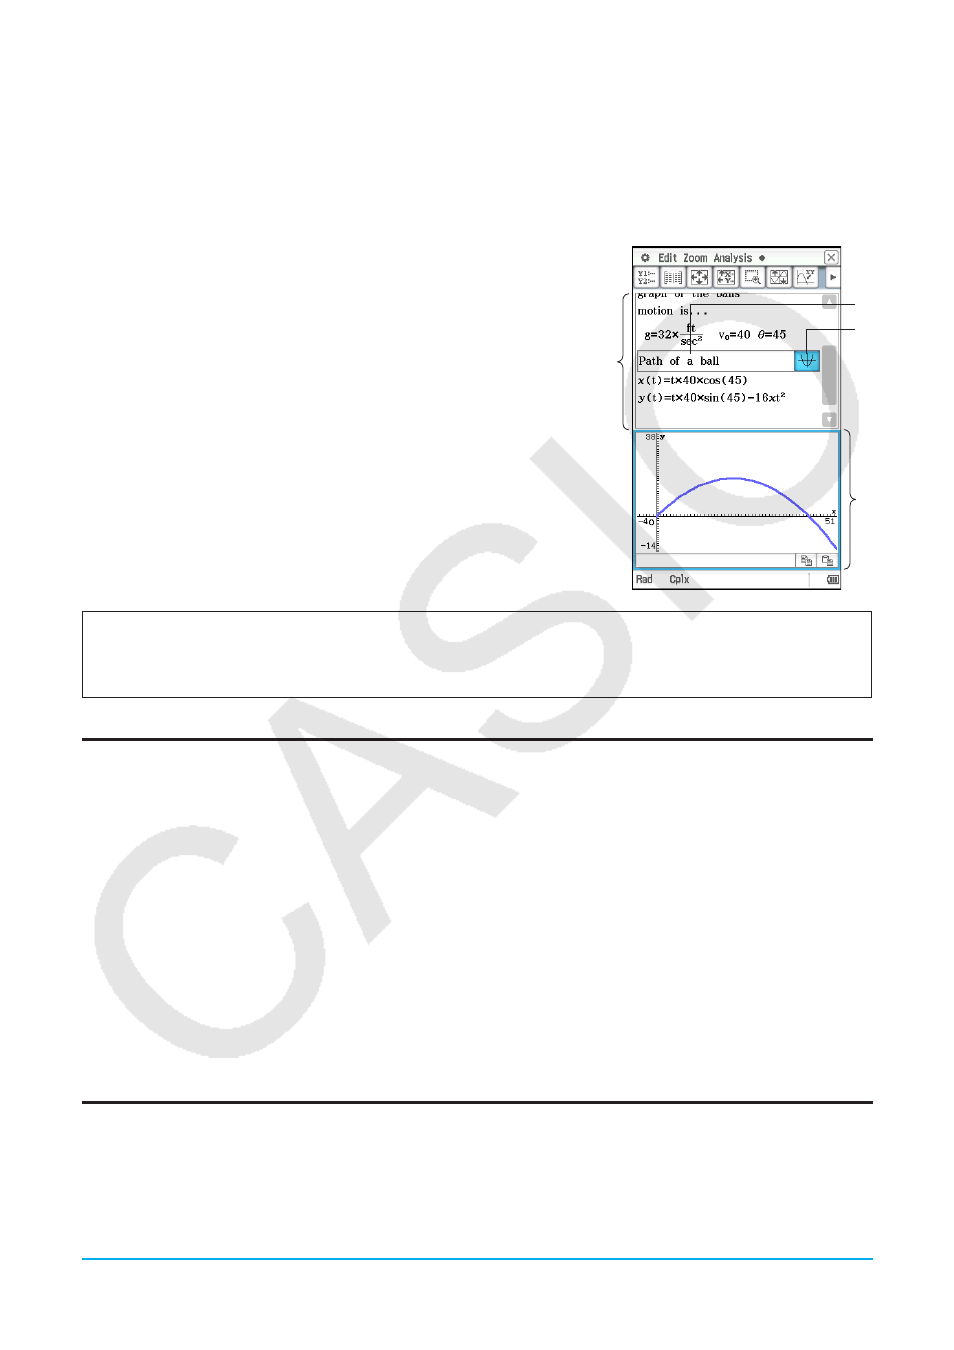
Example eActivity windows
1 eActivity window
2 Graph strip
3 Expand button
4 Expanded graph window
1
3
4
2
Tip:
A variety of eActivity files are available for download at the CASIO Website.
After you download an eActivity file, you will need to transfer it from your computer to your ClassPad. See the
instructions provided at the CASIO Website for more information.
eActivity Application-Specific Menus and Buttons
• Clear variables that contain numbers, list and matrices ........................................... Edit - Clear All Variables
• Insert a row or strip .............................................Insert - Calculation Row (page 175); Text Row (page 174);
Geometry Link (page 177); Strip(1) or Strip(2) (page 175)
• Add help text to the currently selected strip ................................................................. Insert - Add Strip Help
• Insert a command ................................................................................................................. Action (page 59)
• Open or save a file ......................................................................................................................................{
• Bold the text that is currently selected (Text Input mode only) ...................................................................B
• Convert a text row to a calculation row or a calculation row to a text row ..........................................u / <
10-1
Creating an eActivity
Basic Steps for Creating an eActivity
1. Start the eActivity application.
• This displays the eActivity window as it appeared the last time it was used.
• If you are already in the eActivity application and there is data on the display, tap [File] and then [New].
Note that [New] clears data from the display without saving it.
