Casio ClassPad II fx-CP400 User Manual
Page 168
Chapter 8: Geometry Application
168
u To replace the current animation with a new one
1. Select the point and curve for the new animation.
2. Tap [Edit], [Animate], and then [Replace Animation].
• This discards the currently set animation and sets up an animation for a new point and curve set. Tap
[Edit], [Animate], and then [Go (once)] to see your new animation.
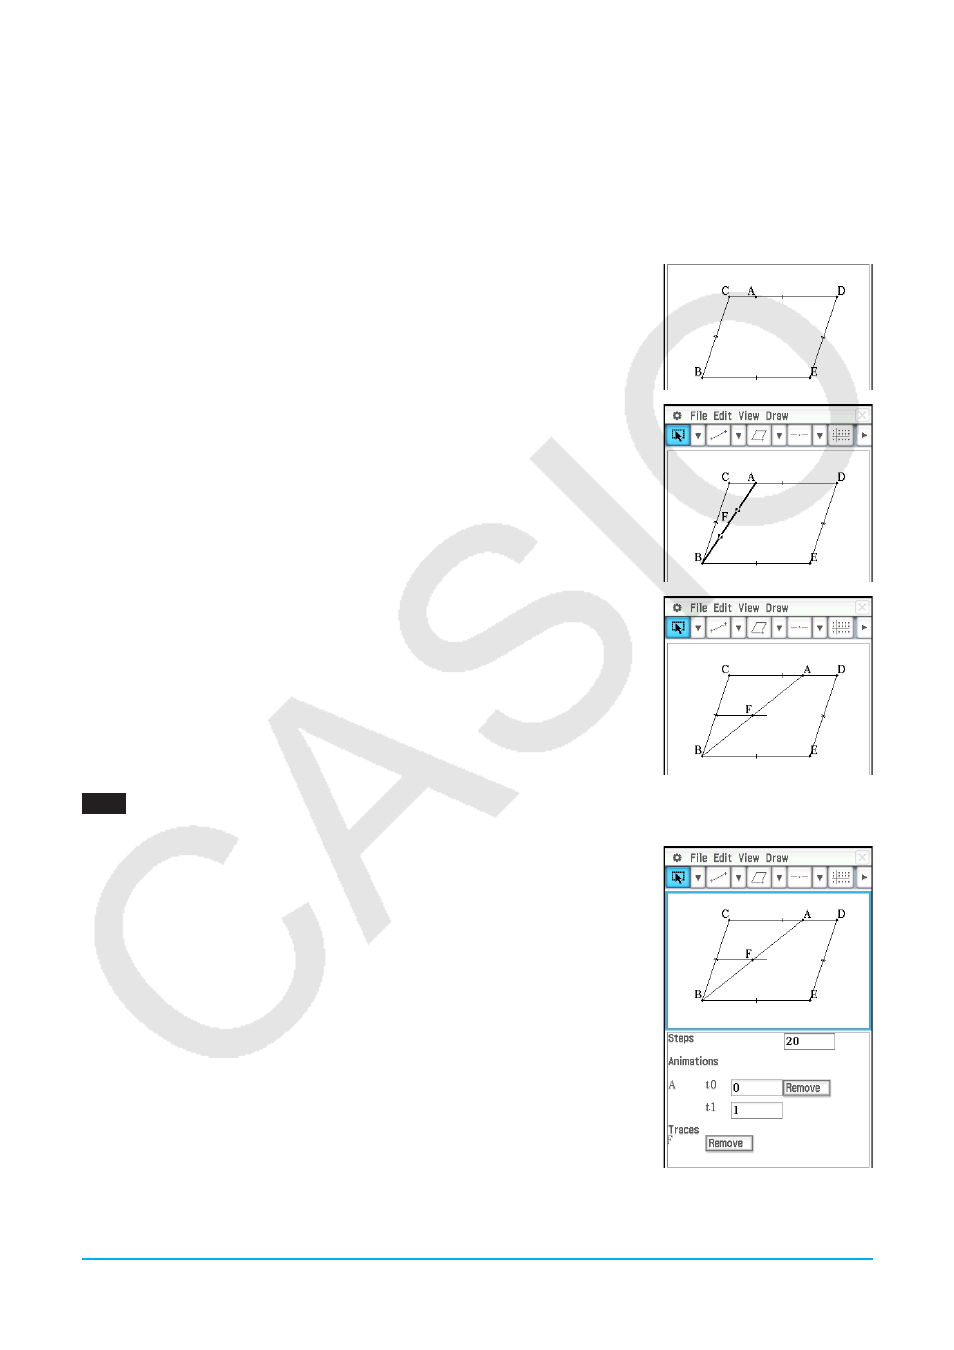
u To trace a locus of points
Note:
Using trace leaves a trail of points when the animation is run. The
procedure below is a continuation of the procedure under “To add an
animation and run it”.
1. Draw a line segment that connects point A with apex B.
2. Draw the center point of line segment AB.
• Select line segment and then tap [Draw] - [Construct] - [Midpoint].
3. Select the center point of line segment AB (point F) and then tap [Edit] -
[Animate] - [Trace].
4. Tap [Edit], [Animate], and then [Go (once)].
• This draws a line using point F as the locus, that is parallel to and whose
length is half that of side CD of the parallelogram.
0804
To create an animation that traces the locus of specific points
u To edit an animation
Note:
The steps below continue from the procedure under “To trace a locus of
points”.
1. While the animation you want to edit is on the display, tap [Edit], [Animate],
and then [Edit Animations].
• This displays the animation editing window in the lower window. The upper
window contains the animation that we just completed in “To trace a locus
of points”.
2. Edit the animation following the procedure below.
Steps:
This setting specifies how many steps point A takes to move along side CD.
The initial default value is 20, which can be changed to value from 2 to 100.
Animations:
The “A” under “Animations” indicates that point A is the point moved by the
animation. When you are building multiple animations, a list of all applicable points appears here.
Tapping [Remove] deletes the applicable animation.