Installing the internal fan, Removing the external fan – Yaskawa iQpump Micro User Manual
Page 209
BV0012G
2V0020G
4V0007G to 4V0011G
2V0030G to 2V0069G
4V0018G to 4V0038G
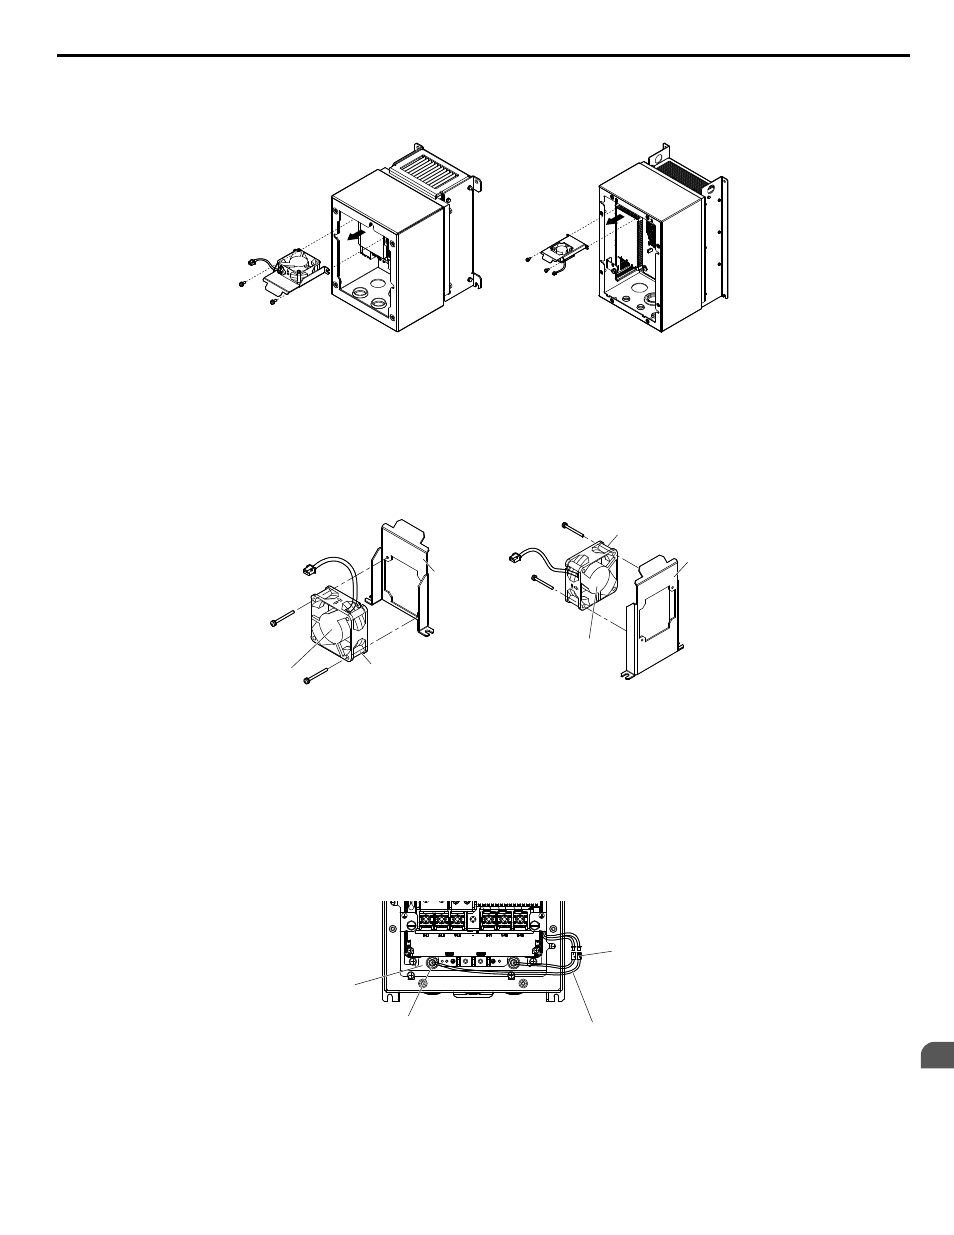
Figure 6.7 Removing the Internal Fan
n
Installing the Internal Fan
1.
Fasten the replacement internal fan into place.
Note:
Pay special attention to the fan label direction, fan lead wire routing, and fan support bracket direction when connecting the
fan and the fan support in the drive.
A
A
B
B
C
C
BV0012G
2V0020G
4V0007G to 4V0011G
2V0030G to 2V0069G
4V0018G to 4V0038G
A – Label
B – Cooling fan
C – Fan support
Figure 6.8 Internal Fan Replacement
2.
Install the fan unit back into the drive enclosure in its original position.
3.
Plug the fan connector (CN7) back in.
n
Removing the External Fan
1.
Remove the front cover.
Refer to IP66/NEMA Type 4X Enclosure Front Cover Removal and Installation on page
2.
Unplug the fan connector (CN7).
A
D
C
B
A – Fan
B – Fan relay cable
C – Fan connector (CN7)
D – Rubber bushing
Figure 6.9 External Fan Components
Note:
The external fan is installed outside of the waterproof/dust-proof enclosure.
3.
Remove the screws to take the fan guard out of the drive. Push the rubber bushing out of conduit hole and take the
internal fan out of the drive.
6.3 Drive Cooling Fans
YASKAWA TOEP YAIQPM 03B YASKAWA AC Drive - iQpump Micro User Manual
209
6
Periodic Inspection & Maintenance