7 channel 2.4 ghz aircraft computer radio system, 14 maxima series receiver connection diagrams – HITEC Flash 7 User Manual
Page 15
7 Channel 2.4 GHz Aircraft Computer Radio System
7 Channel 2.4 GHz Aircraft Computer Radio System
Section 1: Introduction
14
Maxima Series Receiver Connection Diagrams
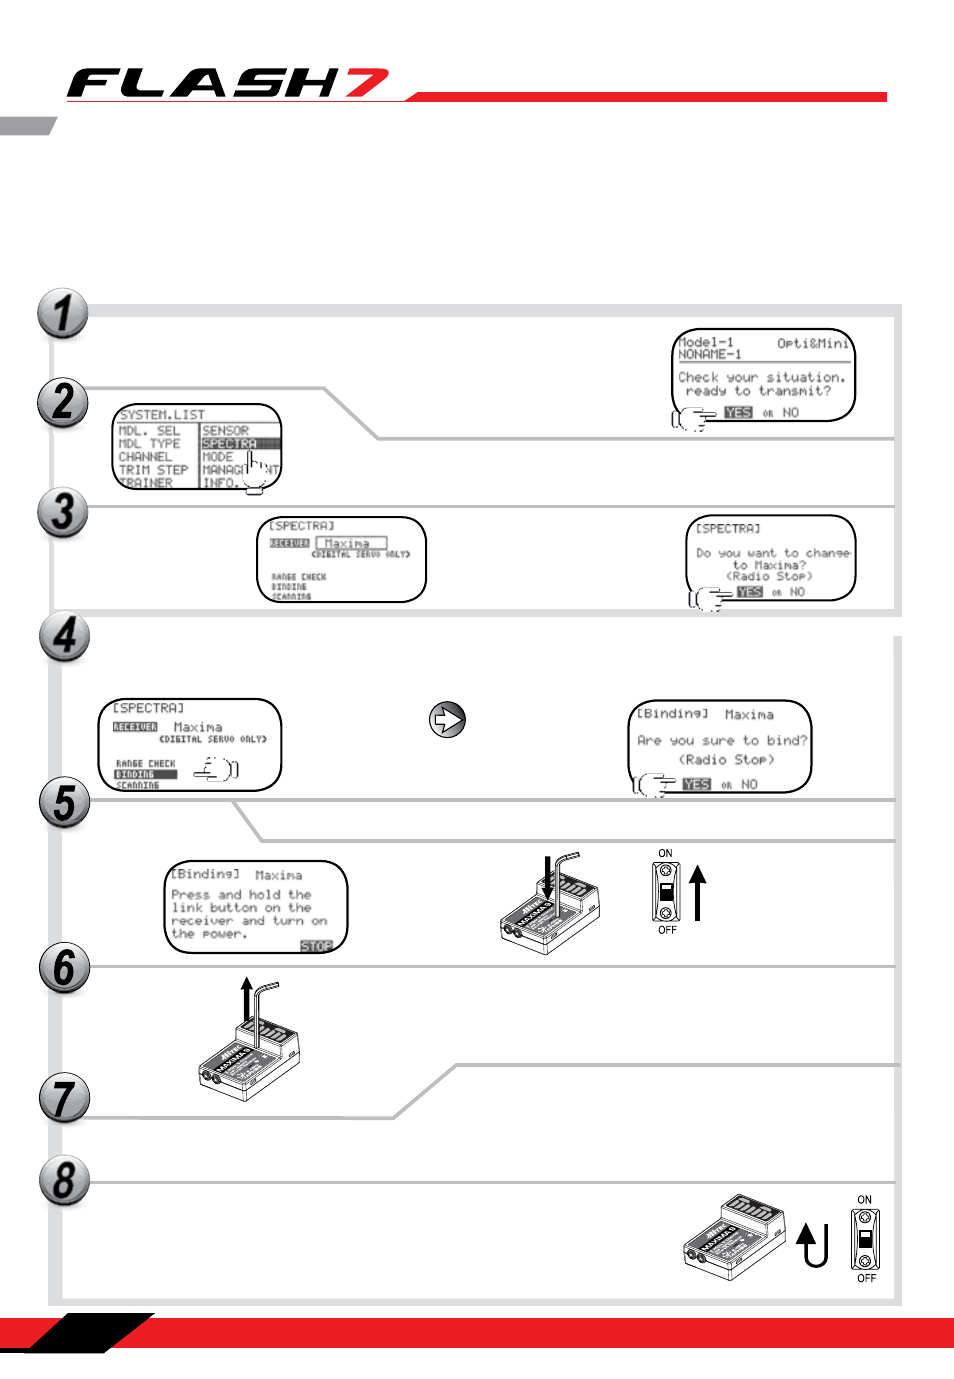
Press the jog dial and back button simultaneously to enter the System
Menu list. From here scroll to the SPECTRA function and press the jog
dial to enter the Spectra setup menu.
Press the jog dial to
activate the receiver
selection and scroll
to the “Maxima”
receiver.
Press the jog dial to save your
setting. When prompted to
change the receiver type select
yes and press the jog dial to
confirm your choice.
Your Hitec AFHSS system uses a communication protocol that links and binds the Hitec 2.4GHz receiver
to your transmitter. Once the receiver and transmitter are “bound”, no other transmitter can interfere with
your receiver during its operation. In the case of multiple model memory transmitters, you can bind as
many Hitec 2.4GHz receivers to your transmitter, one per model memory, as necessary. Each transmitter
and receiver set is paired at the factory for your convenience.
Turn on the transmitter and select “yes” to the “Ready to Transmit” prompt by
pressing the jog dial.
CH1 CH2
CH3 CH4
CH5 CH6
CH7
CH8
BAT/9
CH1 CH2
CH3 CH4
CH5 CH6
CH7
CH8
BAT
/9
CH1 CH2
CH3 CH4
CH5 CH6
CH7
CH8
BAT/9
8
Now when prompted if you are “Ready to Transmit” select “Yes” and push the jog dial to confirm your response.
Back at the receiver selection screen, scroll to BINDING and
press the jog dial to enter the binding screen.
Select “yes” if you would like to proceed
with the binding process.
Press and hold the link button on the Receiver and turn on the power.
Release the link button. Both RED and BLUE LEDs will be blinking rapidly to find
the transmitter’s signal.
When the LED stops blinking, press the jog dial to get to the next screen. The blue
LED will glow solid.
Turn the power to the receiver off, then back on. Check for a solid blue LED light . Once
it’s on, press the jog dial to FINISH the binding process. Make sure all functions are
working properly before flying your model.