4 how to install and power on the printer, 1 procedure, How to install and power on the printer -5 – AMT Datasouth 41AY89AR777 User Manual
Page 16
Attention! The text in this document has been recognized automatically. To view the original document, you can use the "Original mode".
1.4 HOW TO INSTALL AND POWER ON THE PRINTER
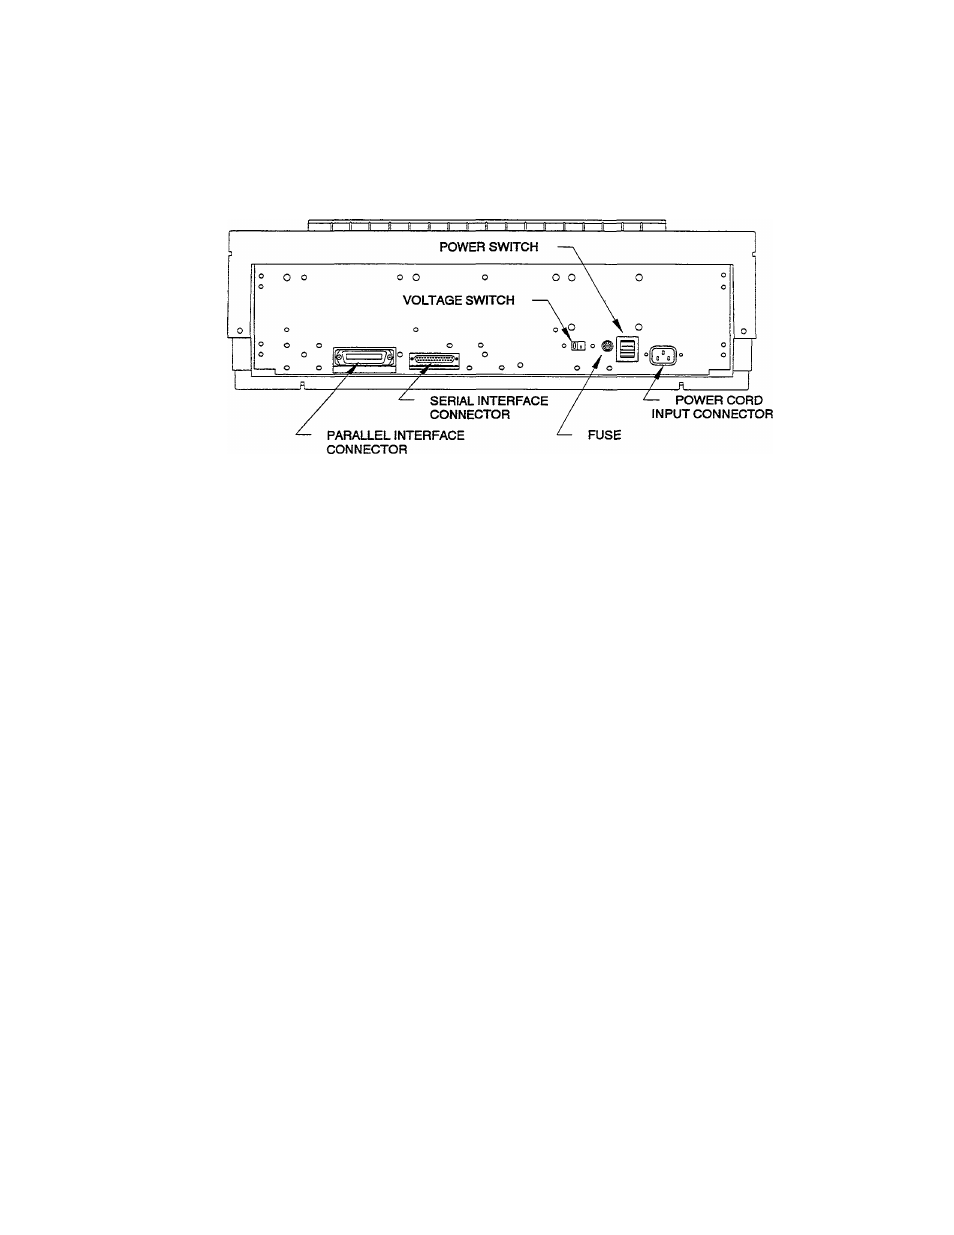
The power cord input connector and power switch are located on the left rear of
the printer, (see Figure 1.2).
REAR VIEW OF PRINTER
Figure 1.2 Power and interface Connections
1.4.1 Procedure
To install the power cord and apply power to the printer proceed as follows:
1.
Set power switch to off.
2.
Observe the input voltage setting label on the rear of the printer. Make sure th:
this voltage is correct for the iostallation. If not, proceed as follows:
Set the voltage select switch to the proper input voltage.
Install the proper fuse as directed by the voltage setting label.
3.
Remove the label and install the end of the power cord into the power cord
input connector. Make certain the power cord is properly seated.
4.
Plug the other end of the power cord into a grounded AC outlet (115 volts for
United States users).
5
.
NOTE
Plugging the printer into an outlet which is not grounded will
result in increased radio frequency noise generation
(see FCC Testing note in front of manual) and
may also cause erratic printer operation.
To send power to the printer, set the power switch to ON.
Result:
The carriage automatically resets to the left margin, the Paper out
indicator on the operator panel flashes continuously, and an audio alarm
sounds three short tones. This simply indicates there is no paper in the
printer.
1-5