N-8050ds/8540ds – Toa N-8000 Series Ver.1.41 User Manual
Page 114
3-18
Chapter 3: INSTALLATION & WIRING
N-8050DS/8540DS
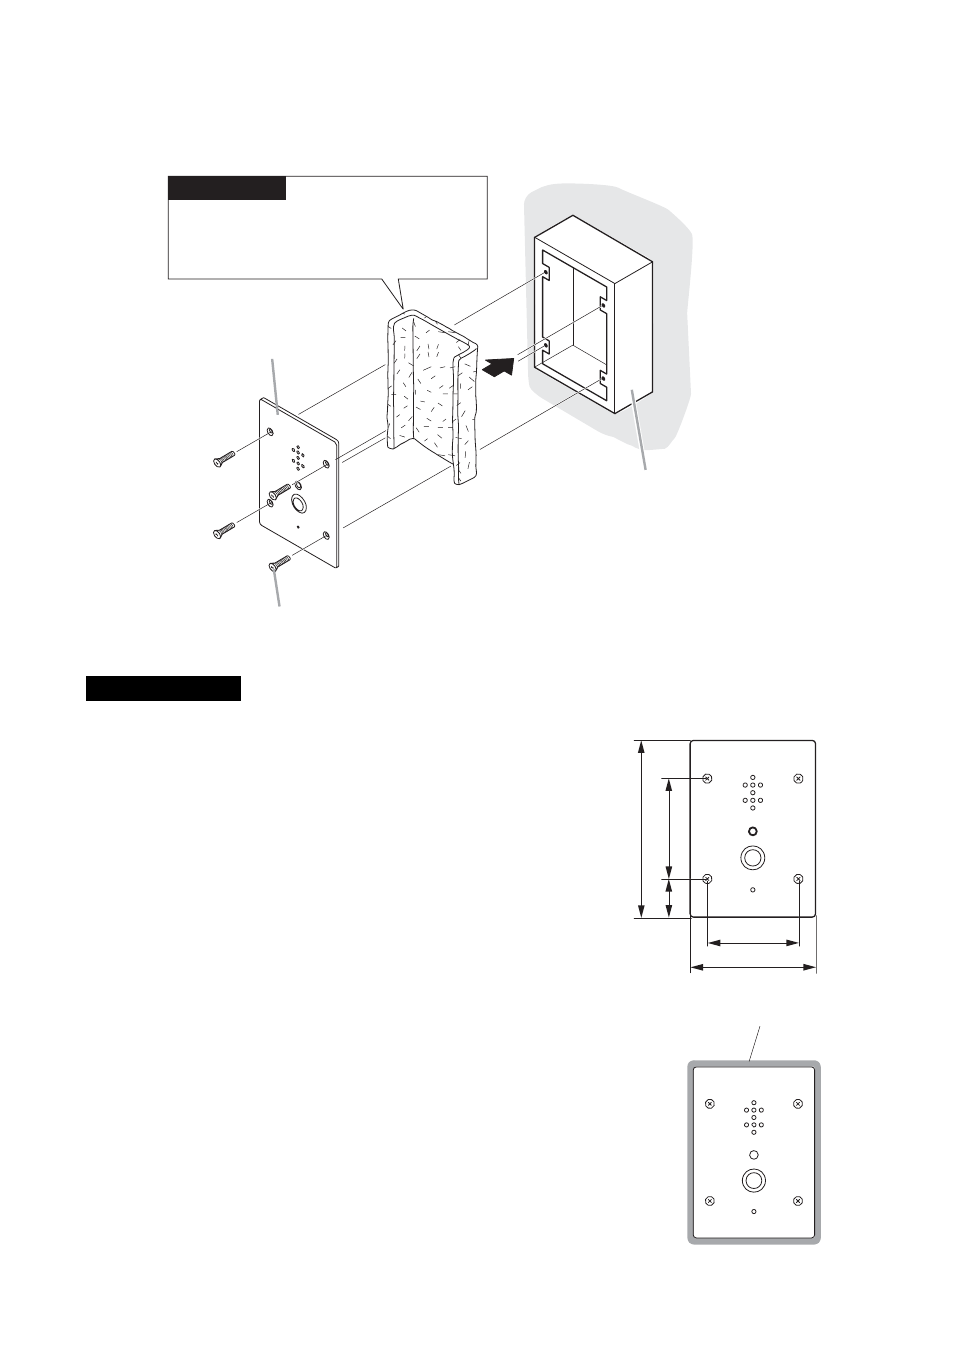
YS-13A Wall-mount box
Oval head combination screw M4 x 25
(supplied with the N-8050DS/8540DS)
Wall
surface
N-8050DS only
Acoustic material (
supplied with the N-8050DS
)
Note
Lay it down along the inside of the box.
The N-8050DS/8540DS comes with 2 types of screws: oval head
combination screw M4 x 25 and oval head slotted screw UNC No.6
x 18.
For the electrical box provided with unified threads, use the oval
head slotted screws UNC No.6 x 18.
Accessory screws
3.5.2. N-8050DS/8540DS
Attach the N-8050DS/8540DS to the YS-13A Wall-mount box installed on a wall.
Notes
• When controlling an electronic lock with the N-8050DS/8540DS unit, use
"Torx" screws to attach the unit at installation so that it cannot be detached
easily.
• When installing the N-8050DS/8540DS at outdoor or locations where it gets
wet with water, tightly seal the panel edges. Besides, provide a weep hole at
the underside of the mounting box to permit water to drain off.
• When installing the N-8050DS/8540DS under difficult environmental
conditions such as in coastal areas or at humid locations, cover the inside of
the N-8050DS/8540DS with coating. For the coating method, consult your
TOA dealer.
Seal the panel edges.
N-8500DS/8540DS's front panel
162
92
35
83.5
115
[Installation completion drawing]
Unit: mm