Wall mounting, Mounted to a wall. (refer to, P. 3-4 – Toa N-8000 Series Ver.1.41 User Manual
Page 100: The unit is mounted to a wall. (refer to
3-4
Chapter 3: INSTALLATION & WIRING
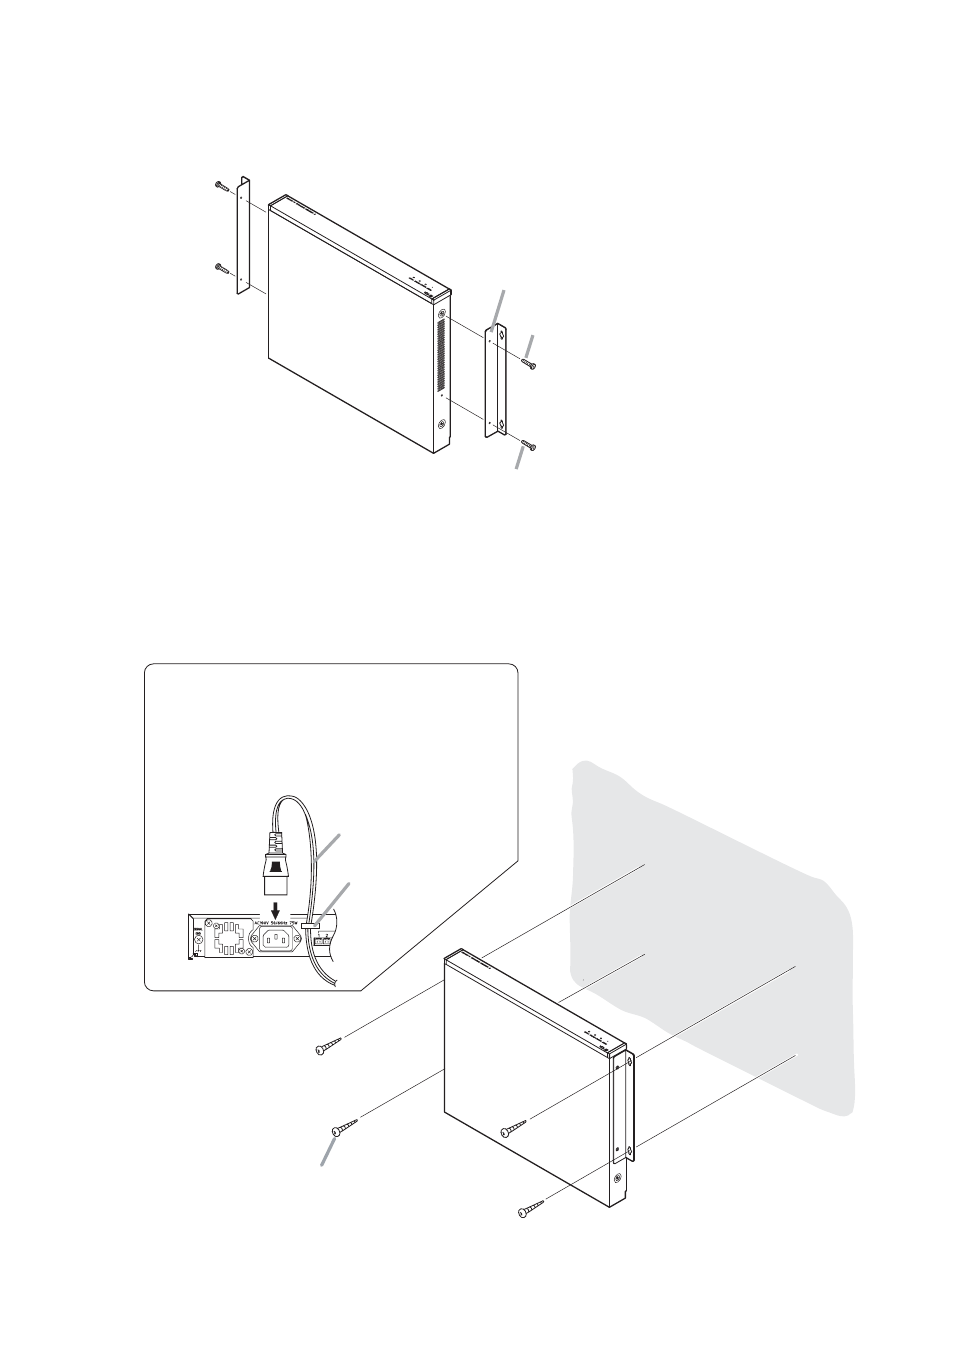
1.3. Wall Mounting
Step 1. Install the supplied wall-mounting bracket to the Exchange using each 2 supplied screws and
removed screws from the case.
Step 2. Mount the Exchange on the wall.
Notes
• Use appropriate screws for the construction of wall.
• Wood screws 3.5 x 20 are supplied with the N-8000EX/8010EX.
• The socket-outlet shall be installed near the equipment and shall be easily accessible.
Tapping screw 3 x 8
(supplied with the N-8000EX/8010EX)
N-8000EX/8010EX
Tapping screw 3 x 8
(removed from the case)
Wall mounting bracket
(supplied with the N-8000EX/8010EX)
Wall surface
Cable clip
Power supply cord
Wood screw 3.5 x 20
(supplied with the N-8000EX/8010EX)
Protect against disconnection (Power supply plug)
Unlock cable clip and run the power supply cord
through cable clip.
Note
Keep overall cable length between a power
supply plug and cable clip as short as possible.