N-8050ds/8540ds – Toa N-8000 Series Ver.1.41 User Manual
Page 112
3-16
Chapter 3: INSTALLATION & WIRING
3.4.2. N-8050DS/8540DS
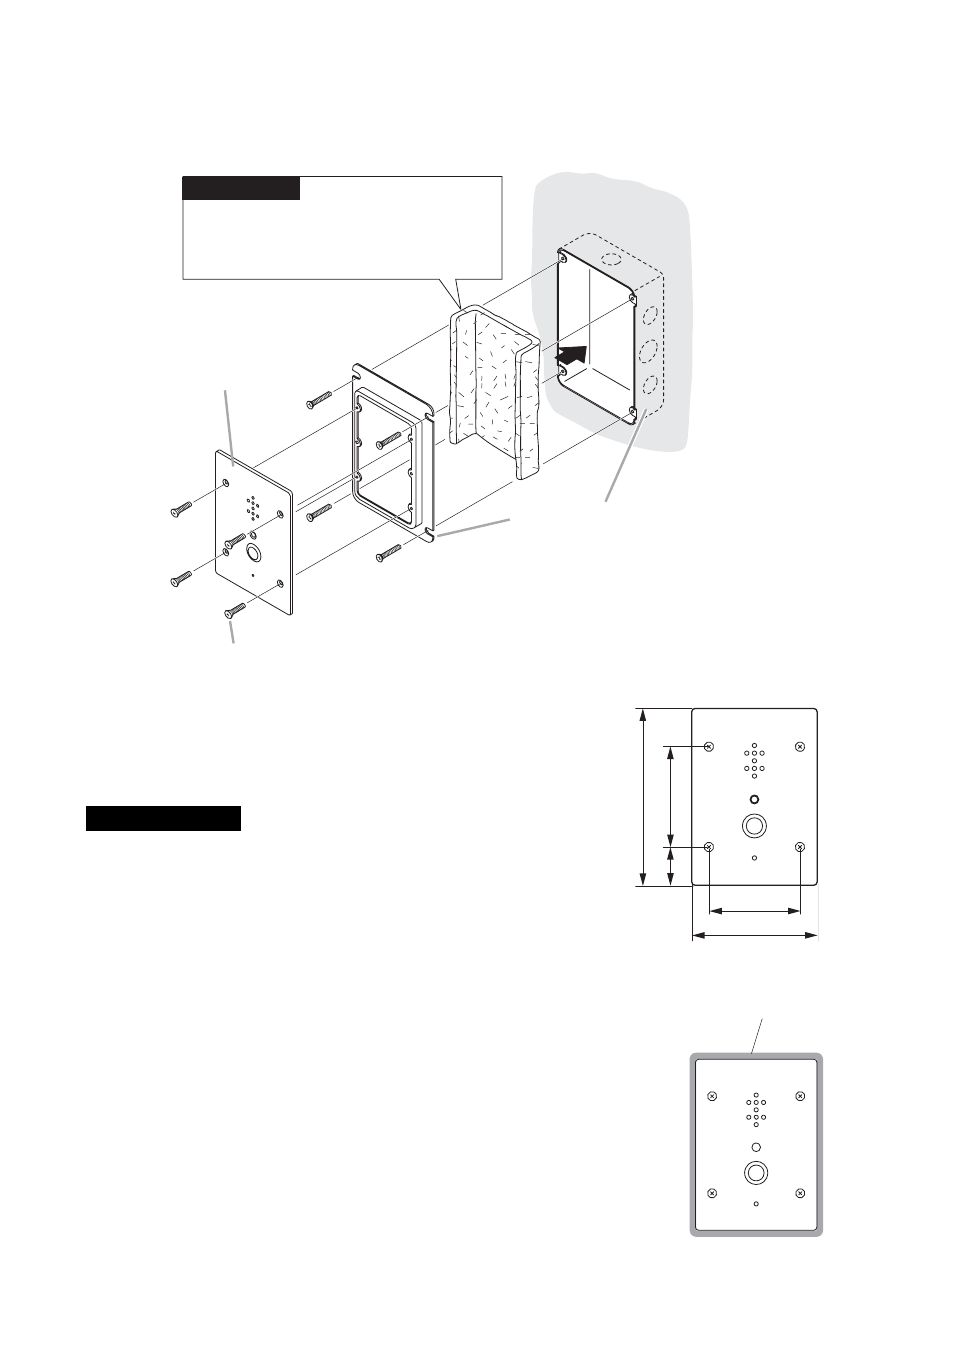
Attach the N-8050DS/8540DS to the YC-150 Back box or an electrical box installed in a wall.
N-8050DS only
Acoustic material (
supplied with the N-8050DS
)
Note
Lay it down along the inside of the box.
N-8050DS/8540DS
Wall surface
Oval head combination screw
M4 x 25 (supplied with the N-8050DS/8540DS)
YC-150 Back box
or 3-gang electrical box
Note
The wall should be over 12 mm thick, and the opening in the wall for
an electrical box should be under 115 mm (wide) by 162 mm (high).
The N-8050DS/8540DS comes with 2 types of screws: oval head
combination screw M4 x 25 and oval head slotted screw UNC No.6
x 18.
For the electrical box provided with unified threads, use the oval
head slotted screws UNC No.6 x 18.
Accessory screws
162
92
35
83.5
115
[Installation completion drawing]
Unit: mm
Notes
• When controlling an electronic lock with the N-8050DS/8540DS unit, use
"Torx" screws to attach the unit at installation so that it cannot be detached
easily.
• For the N-8050DS installation, be sure to ground the electrical box.
For the N-8540DS installation, be sure to ground the electrical box or the
frame ground terminal on the unit's rear (
• When installing the N-8050DS/8540DS at outdoor or locations where it gets
wet with water, tightly seal the panel edges. Besides, provide a weep hole at
the underside of the mounting box to permit water to drain off.
• When installing the N-8050DS/8540DS under difficult environmental
conditions such as in coastal areas or at humid locations, cover the inside of
the N-8050DS/8540DS with coating. For the coating method, consult your
TOA dealer.
Seal the panel edges.
N-8500DS/8540DS's front panel