Selecting a cable type from a cable type list, Figure 24 selecting the cable type from list, Setting the distance and units – Bird Technologies SA-6000XT-Manual User Manual
Page 47
31
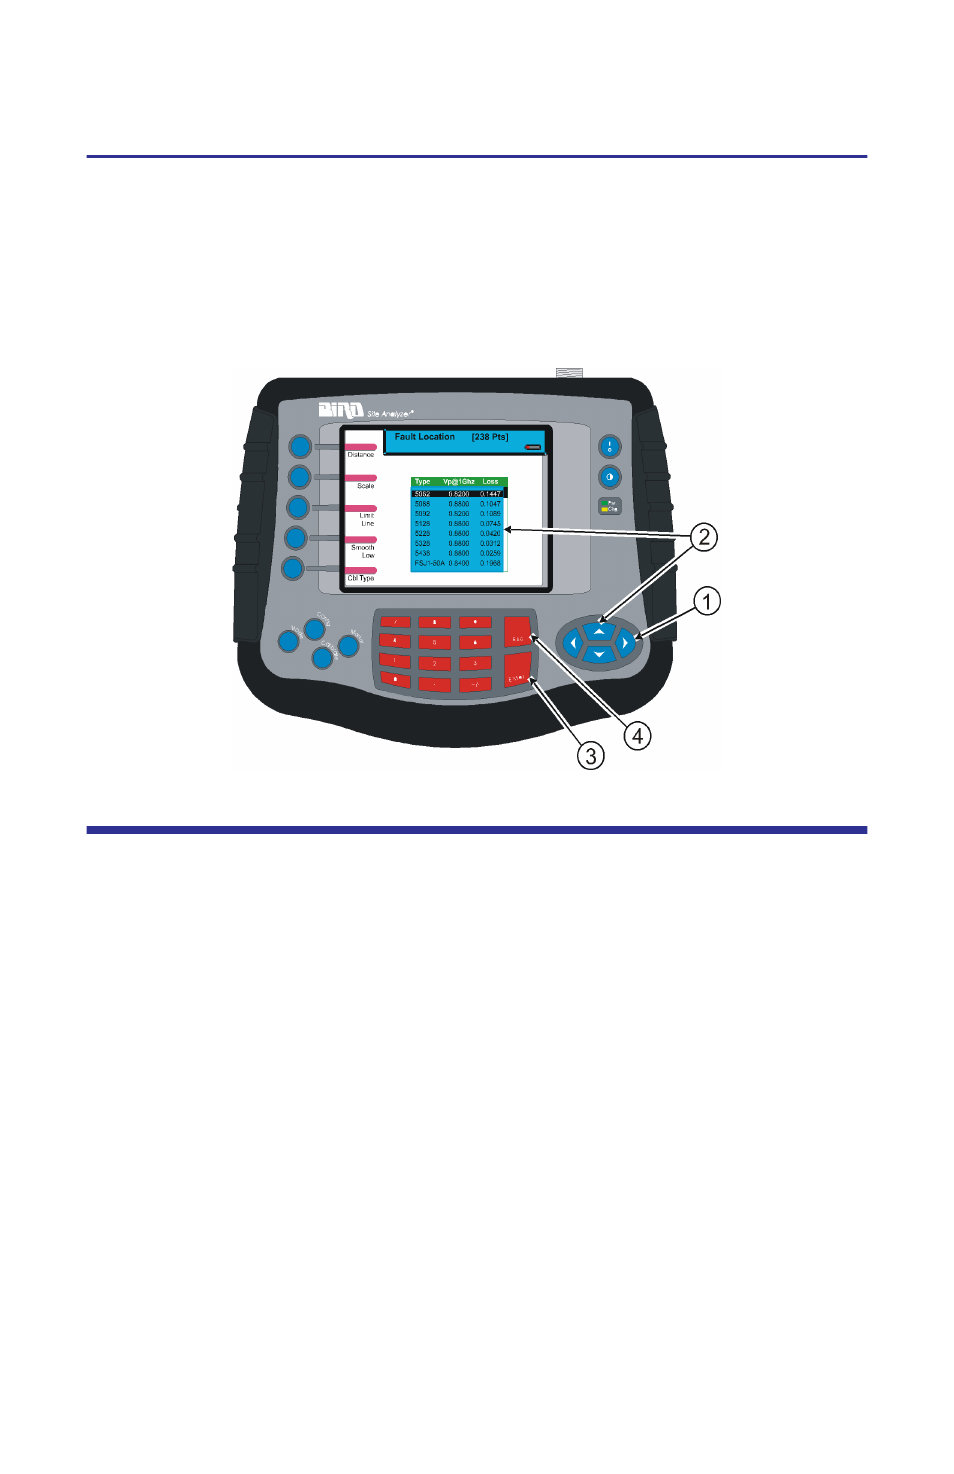
Selecting a Cable Type from a Cable Type List
1.
Press the right or left scroll keys to select and open Cable List.
2.
Press the up or down scroll keys to select an item on the list.
3.
Press the Enter key to accept the selection.
4.
Press the Esc key to exit the configuration screen.
Figure 24 Selecting the Cable Type from List
Setting the Distance and Units
The trace can display the entire length (distance) of the cable system being
measured or a smaller portion of the length for better detail.
If it is suspected that there might be a fault at a known distance along a cable,
set the display to show only that area by using the start and stop points. Think of
this as zooming in on a section of the cable. Both the start point (where to begin
the trace display) and the stop point (where to end the trace display) can be set.
Note: The stop point cannot be set to a value that is greater than the
maximum distance being measured.
Example - If a data point option, frequency span, and Vp
are selected and it results in a maximum distance of 100, a
stop point cannot be set to a value greater than 100 feet.
Follow the numbered steps in Figure 25, page 32 to set the start and stop distance.
For an antenna lead, typically set the start distance at 0, and the stop distance at a
few feet or meters greater than the tower height.
1.
Press the Config key.
2.
Press the Distance softkey.