Rockwell Automation 22-COMM-C ControlNet Adapter User Manual
Page 38
4-4
Configuring the I/O
6. Click Finish>>. The bridge is now configured for the ControlNet
network. It appears in the I/O Configuration folder. In our example, a
1756-CNBR/D bridge appears under the I/O Configuration folder
(
) with its assigned name.
Figure 4.5 RSLogix 5000: I/O Configuration Folder
Adding the Adapter and Drive to the I/O Configuration
To transmit data between the bridge and the adapter, you must add the
22-COMM-C adapter as a child device to the parent bridge.
1. In the project tree, right-click on the bridge and select New Module
to display the Select Module Type screen (
). For this
example, right-click on the 1756-CNBR/D bridge.
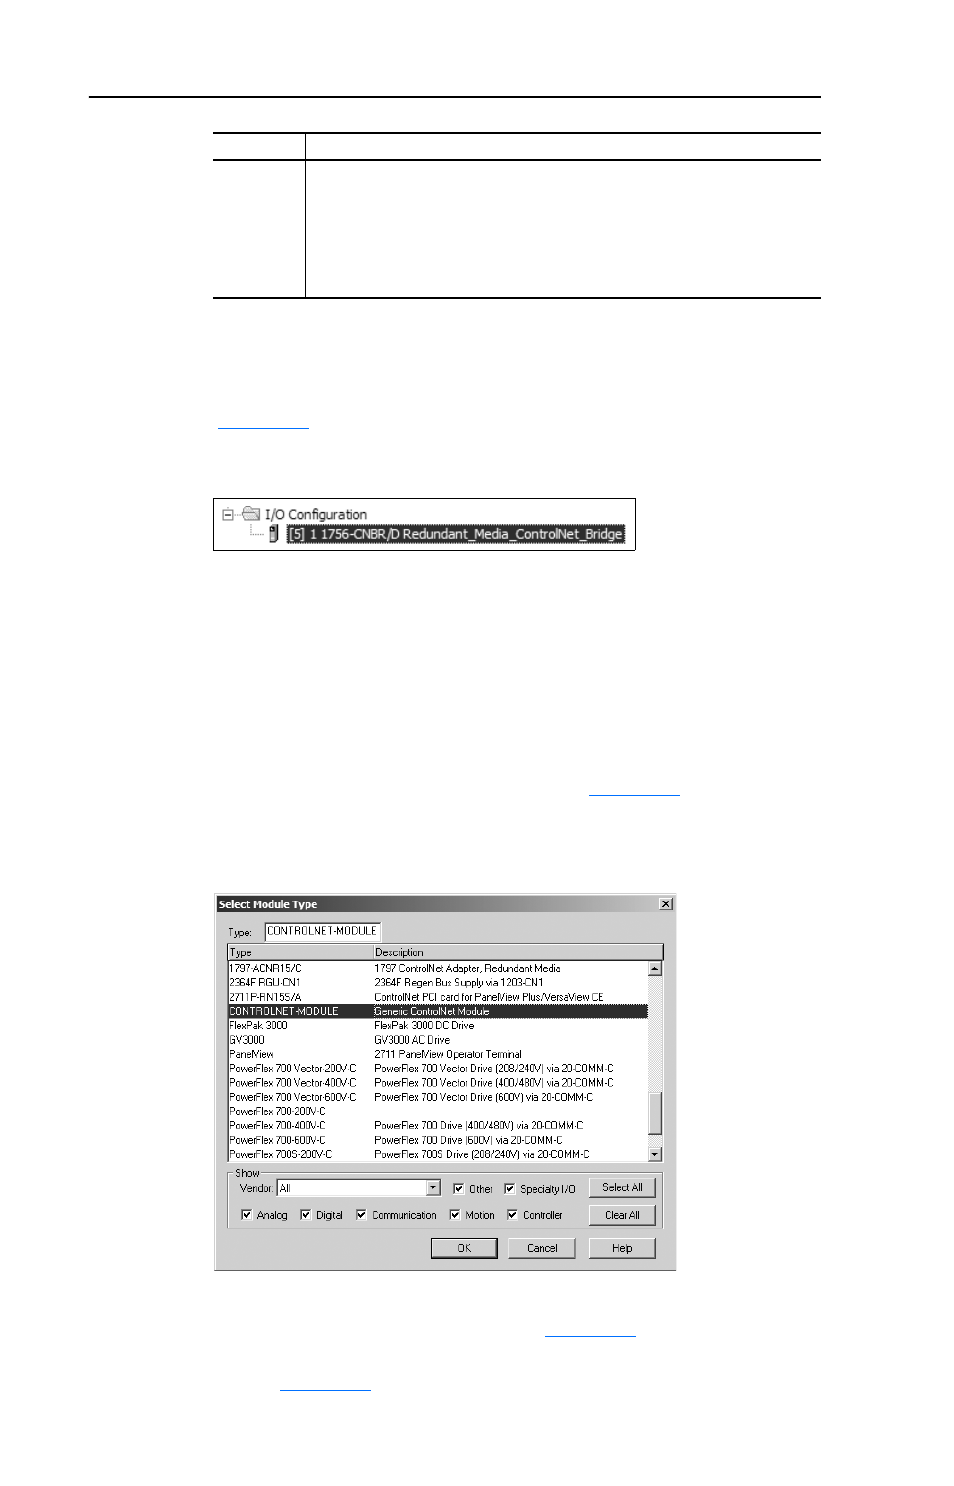
Figure 4.6 Select Module Type Screen
2. Select CONTROLNET-MODULE (
) to configure the
22-COMM-C adapter, and then click OK. The Module Properties
screen (
) appears.
Electronic
Keying
Compatible Module. The “Compatible Module” setting for Electronic
Keying ensures that the physical module is consistent with the software
configuration before the controller and bridge make a connection.
Therefore, ensure that you have set the correct revision in this screen.
Refer to the online help if the controller and bridge have problems
making a connection and you want to change this setting.
Box
Setting