Connecting wings, Attach universal fader wings to each other – ETC Eos Titanium, Eos, and Gio v2.0.0 User Manual
Page 442
424
Eos Titanium, Eos, and Gio Operations Manual
Connecting Wings
Up to three (3) Universal Fader Wings may be attached together and then connected to consoles
using a USB cable. Fader wings cannot be physically attached to an Eos, Eos Ti, or Gio console.
The best way to connect wings is to attach them in order from left to right.
Attach Universal Fader Wings To Each Other
Step 1:
Using a #1 Phillips head screwdriver, on the underside of the wing(s) remove the two
screws securing the bumpers that will be removed from the appropriate side or sides
of the wings. The bumpers will be removed in a later step.
a:
Carefully turn the wing over and place it faders-down on a clear, flat work
surface.
b:
Remove and save the two screws securing the bumper to the side of the wing.
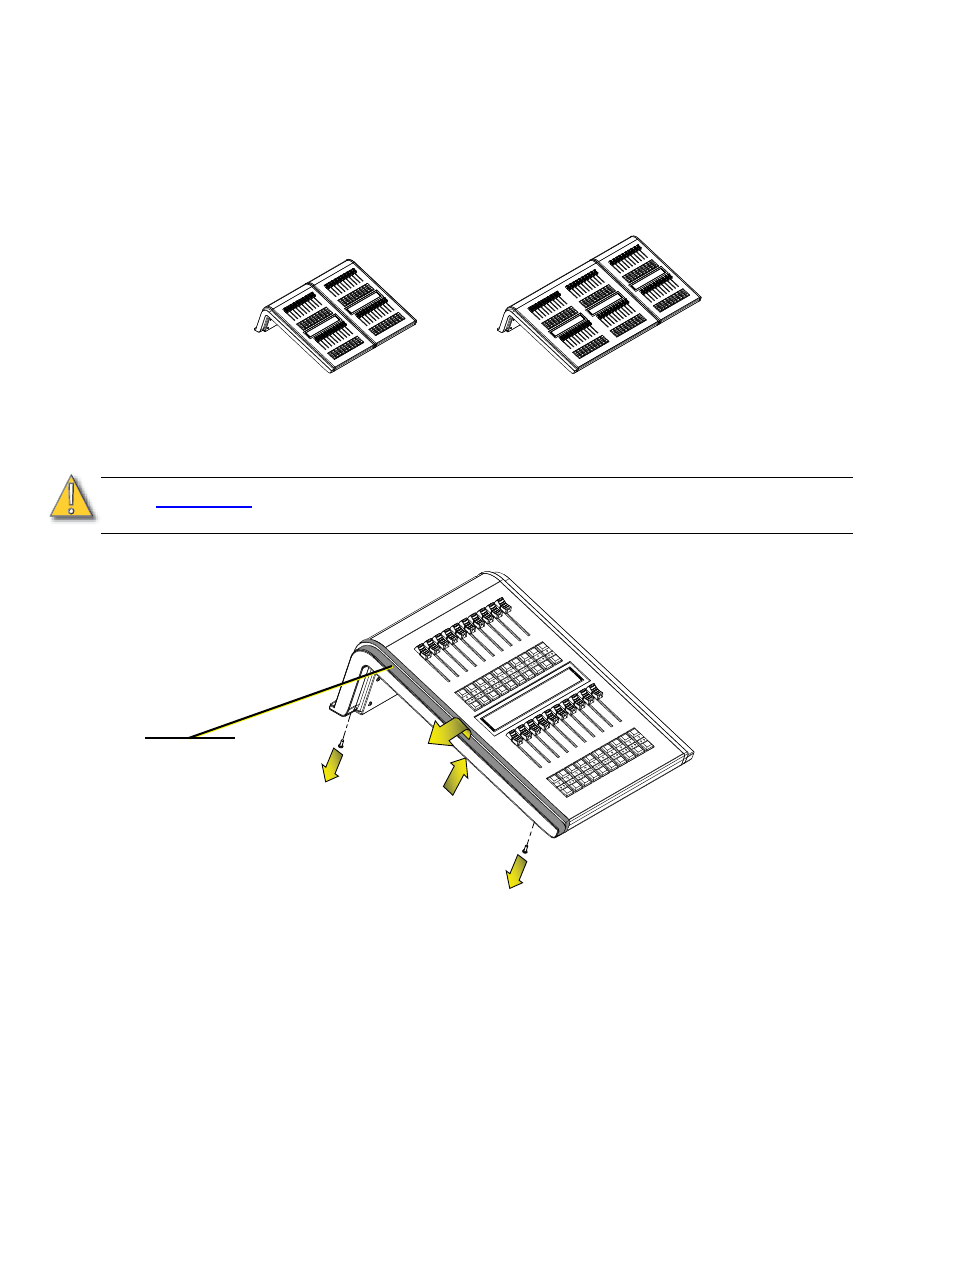
Step 2:
Turn the wing over again and return it to its upright position.
Step 3:
Remove the bumper(s) from the wing.
a:
Right Side - Gently pull the bumper up until it is flush with the facepanel.
Left Side -Gently push the bumper down until it loosens from the facepanel.
b:
Pull the bumper away from the facepanel until it is free from the wing.
Step 4:
Repeat steps 2 and 3 for each side of each wing that needs to be exposed.
Step 5:
Align the two wings. Lift the wing on the right and place it gently on the hooks provided
on the wing on the left. Check that the two wings are aligned properly front and back,
C A U T I O N :
Do not set the console on the connector side (rear panel). Instead, place it face
down on the faders.
OR
1
1
2
3
bumpers on
either side