Rpu3 and rpu start up, Software configuration, Front panel – ETC Eos Titanium, Eos, and Gio v2.0.0 User Manual
Page 421: N o t e
D
Using the RPU and RVI
403
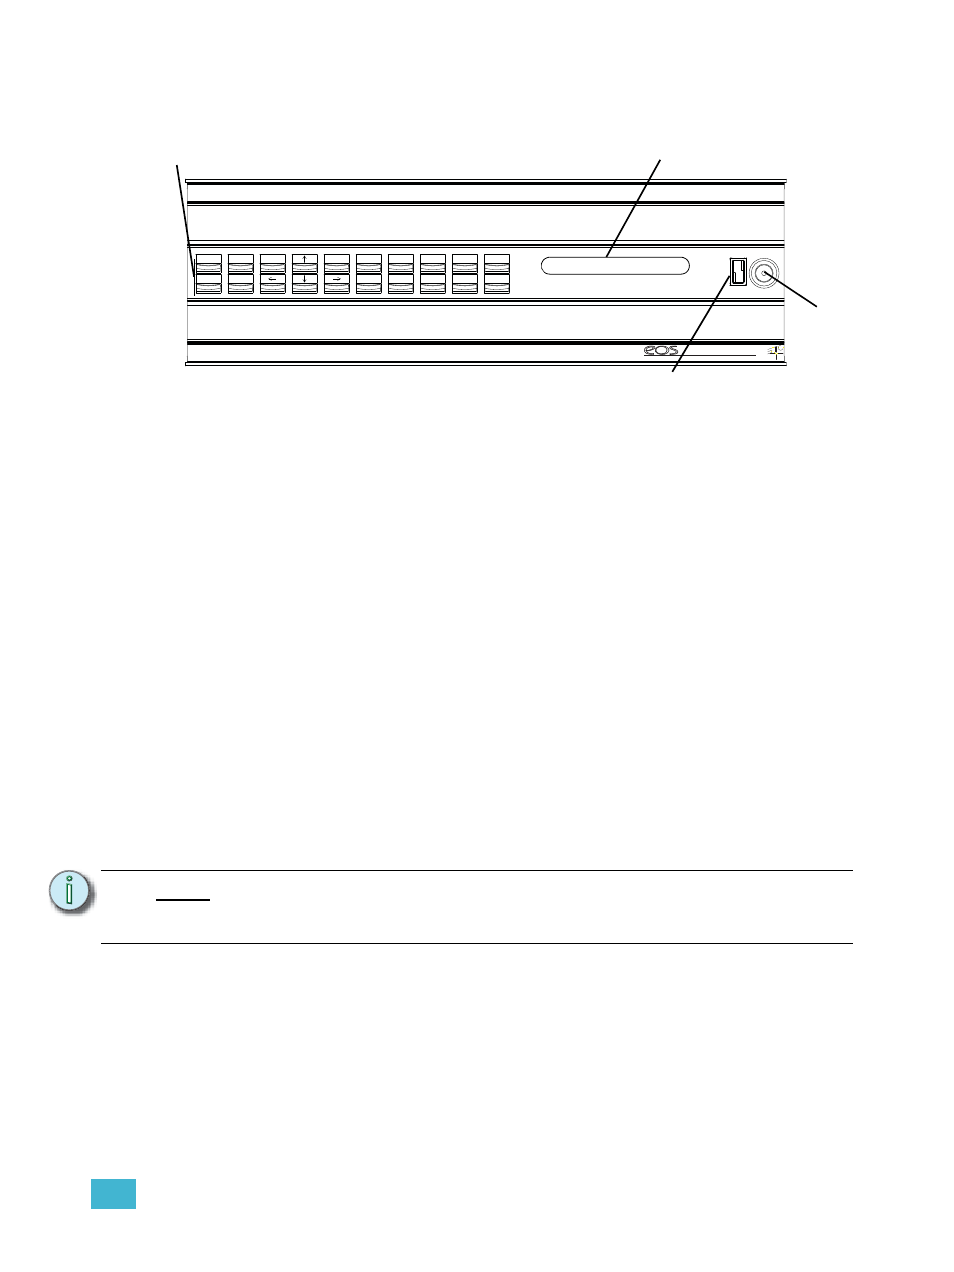
Front Panel
Step 1:
Press the soft power switch to activate the RPU (check rear panel to ensure power
is connected and hard power switch is on).
Step 2:
Backlit indicators identify the operating status (master, backup, client, and so on) of
the unit.
Step 3:
USB port is provided for easy show loading to or from a USB storage device.
Step 4:
20 buttons are configurable from the Eos Configuration Utility (ECU). They are set to
a default configuration. The label strips for these buttons are removable and
reversible. Any changes to the button configuration can be written on the opposite
side in pencil.
RPU3 and RPU Start Up
After connecting power to the unit, press the soft power button on the front of the console.
By default, the RPU will boot into the Eos environment as a primary. If you wish to designate your
RPU as something other than a primary, you must exit the Eos environment and choose a different
designation from the Eos Configuration Utility welcome screen.
For more information on multi-console terms such as “Primary” or “Backup”, please see
console and Synchronized Backup, page 389
Software Configuration
Settings for the RPU can be altered in the Eos Configuration Utility (ECU). The 20 buttons on the
front panel of the RPU are configurable from the “RPU” section of the ECU.
To configure the RPU buttons:
Step 1:
In the Eos browser, select File>Exit and confirm the selection. Eos will close and you
will enter the Eos welcome screen.
Step 2:
Click on the {Settings} button. This will open the ECU.
Step 3:
On the right side of the screen, click on {Buttons} to enter the RPU button setup. A
virtual display of the RPU buttons is displayed with the current button settings labeled
on each button.
Step 4:
Click on a button you wish to alter. A button popup window will open.
Step 5:
Click on the type of button you want it to be (Macro or Hard Key).
N o t e :
The buttons section of the ECU has two different areas, the RPU face panel
buttons and the Gio face panel buttons. You will want to make sure that you are
in the RPU face panel buttons area.
Blind
Live
Master
Primary
Expand
Client
Tracking
Backup
Tab
REMOTE PROCESSOR UNIT
TM
Escape
Select
M901
M902
M903
M904
Stop/Back
Scroll Lock
M905
M906
M907
Go
M908
Backlit
indicators
Soft Power
Switch
20 user-configurable buttons
(default shown)
USB Port