Apple Logic Express 9 User Manual
Page 829
• “Add to iTunes library” checkbox: Adds the encoded MP3 file to the iTunes library.
Setting M4A: AAC Format Options in the Bounce Window
Click the M4A: AAC name and select its checkbox in the Destination pane to access the
following options:
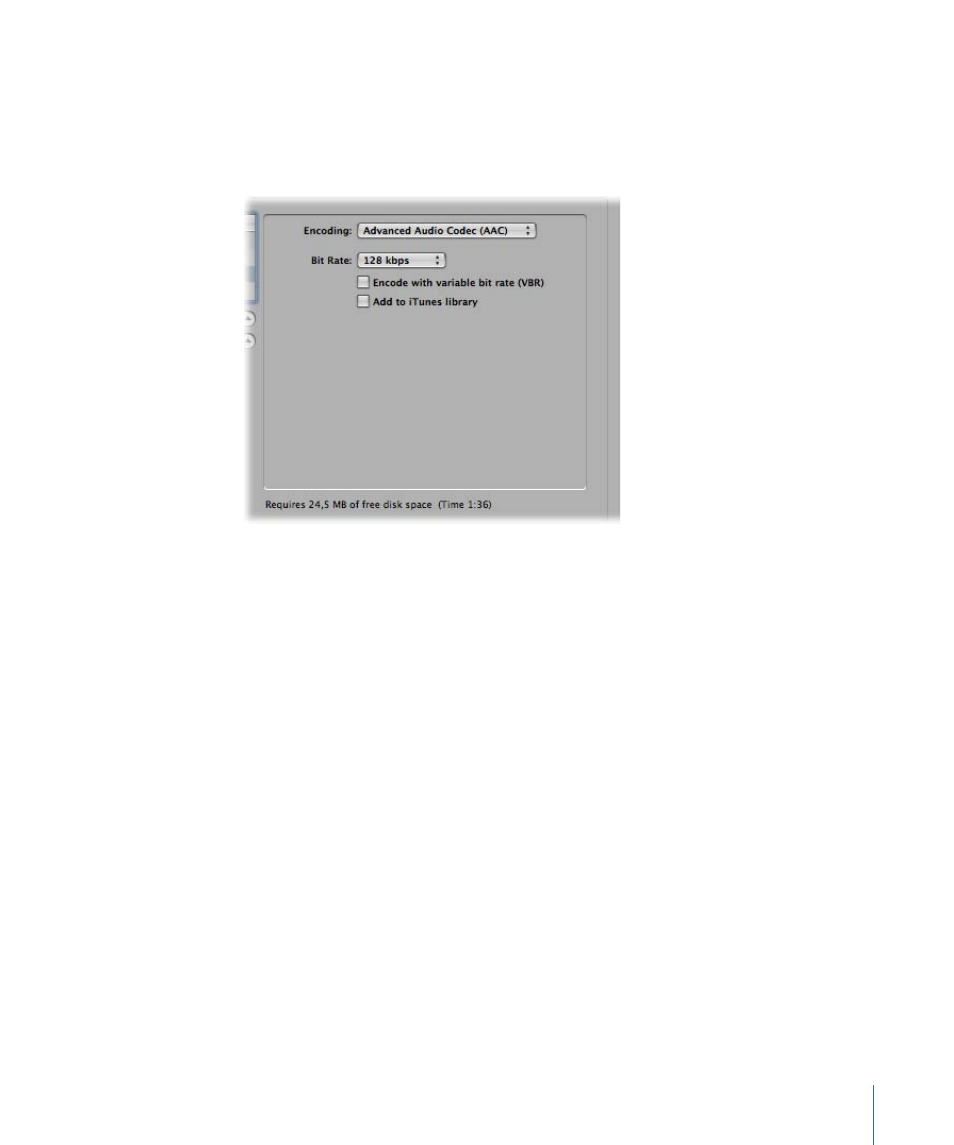
• Encoding pop-up menu: Choose Advanced Audio Codec (AAC) or Apple Lossless to
determine how your .m4a (commonly referred to as MP4) file will be encoded. Both
encoding algorithms provide high-quality audio; the AAC format uses a higher
compression ratio, resulting in smaller file sizes.
• Bit Rate pop-up menu: You can choose a rate between 16 kbps and 320 kbps.
Note: This parameter is only available when the AAC codec is chosen.
• “Encode with variable bit rate (VBR)” checkbox: Variable Bit Rate encoding compresses
simpler passages more heavily than passages that are (more) harmonically rich, generally
resulting in better-quality files.
Unfortunately, not all media players can accurately decode VBR-encoded files, which
is why this option is turned off by default. If you know that your target listeners can
decode VBR-encoded files, you can turn this option on.
Note: This parameter is only available when the AAC codec is chosen.
• “Add to iTunes library” checkbox: Adds the encoded file to the iTunes library.
If the selected sample rate is higher than 48 kHz, a copy of the bounced PCM file is
created (with an automatic sample rate conversion to 48 kHz) before encoding. This
conversion takes place because the M4A: AAC format does not support sampling rates
higher than 48 kHz.
829
Chapter 29
Bouncing Your Project