Using the dedust tool – Apple Macintosh PhotoFlash User Manual
Page 98
Try fairly low settings first, and check the Before and After views to see their
effect. The lower the Size setting, the smaller the specks that PhotoFlash
recognizes as dust. The lower the Sensitivity setting, the more different a
speck’s color must be from surrounding colors for PhotoFlash to recognize it
as dust. Lower sensitivity also tends to reduce the number of image elements
that PhotoFlash recognizes as dust.
4
When you’re ready to try removing the dust, click Enhance.
PhotoFlash attempts to remove the dust as you specified. Because PhotoFlash
can’t always distinguish between dust and part of the original image, it may
not always be able to remove dust successfully without altering the image
itself.
Using the DeDust tool
To remove dust from part of an image by using the DeDust tool, follow
these steps:
1
Select the part of the image from which you want to remove dust.
For instructions on using the Selection tools, see Chapter 3, “Working
With Selections.”
2
If you want to adjust the dust size and sensitivity settings for the DeDust tool, double-
click it; otherwise, skip to step 4.
The Remove Dust Options dialog box appears.
88
Chapter 5
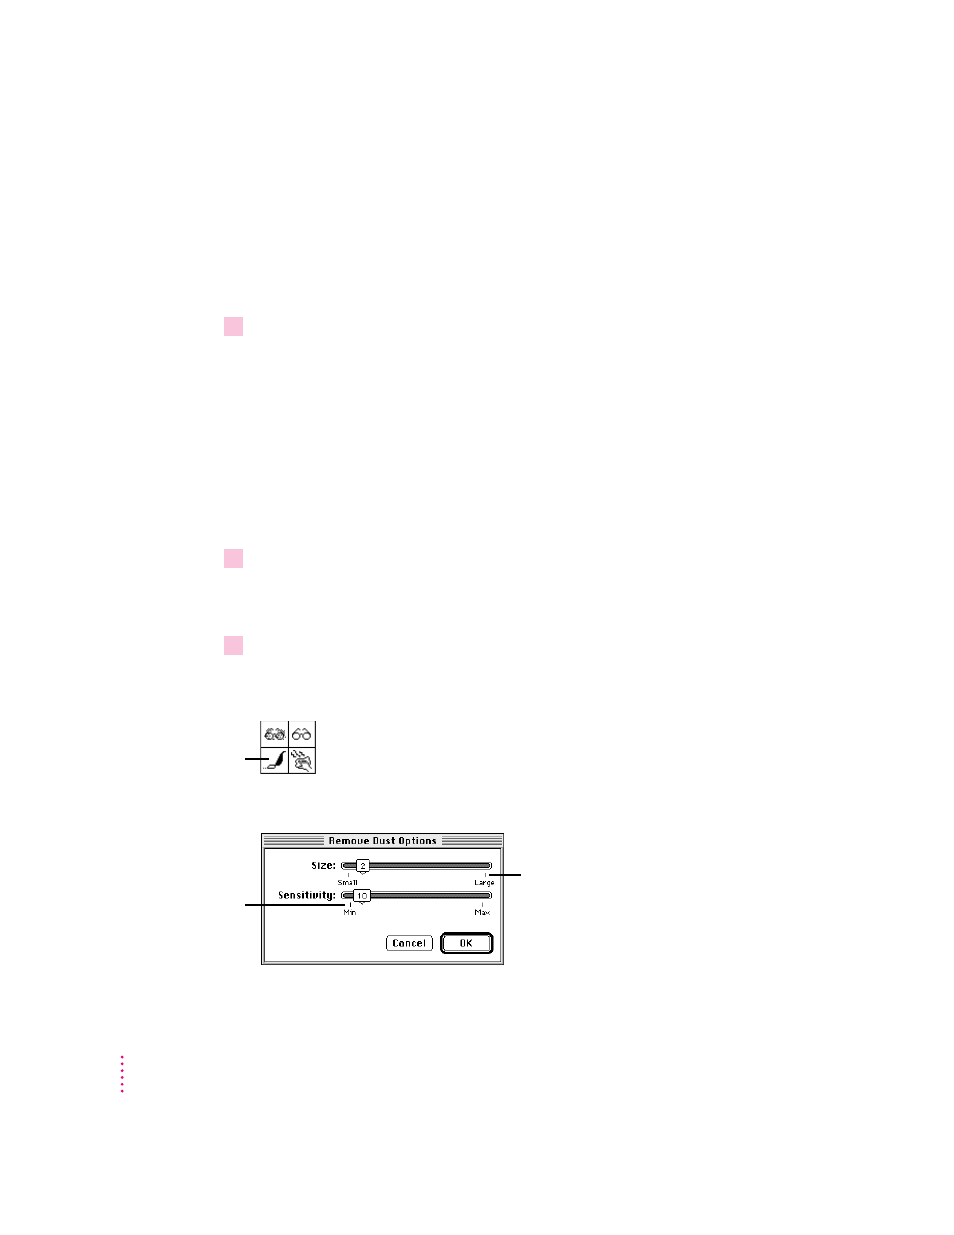
Double-click the
DeDust tool in the
Tool palette to adjust
its settings.
Drag this slider to increase or
decrease the size of the spots
that PhotoFlash interprets as dust.
Drag this slider to
increase or decrease
the sensitivity of the
DeDust tool.