Using the descratch tool – Apple Macintosh PhotoFlash User Manual
Page 101
4
When you’re ready to try removing the scratch, click Enhance.
PhotoFlash attempts to remove the scratch as you specified.
Using the DeScratch tool
To remove a scratch from part of an image by using the DeScratch tool,
follow these steps:
1
Select the part of the image from which you want to remove a scratch.
For instructions on using the Selection tools, see Chapter 3, “Working
With Selections.”
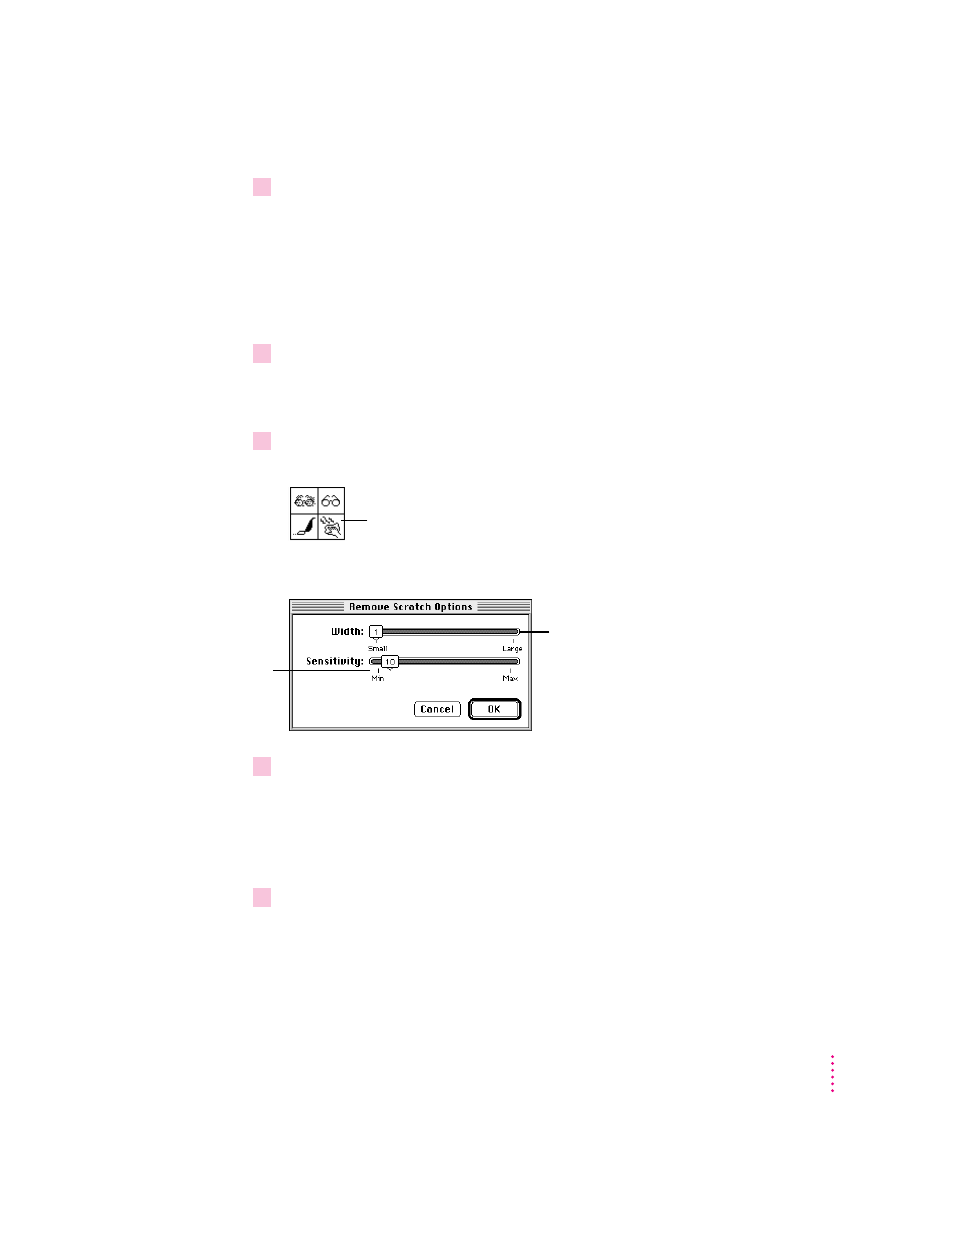
2
If you want to adjust the Width and Sensitivity settings for the DeScratch tool, double-
click it; otherwise, skip to step 4.
The Remove Scratch Options dialog box appears.
3
Adjust the Width and Sensitivity settings as necessary, then click OK .
Try fairly low settings first, increasing them only if the scratch doesn’t
disappear when you click the selection. To learn more about the effects
different settings have, use the Remove Scratch command as described in the
next section.
4
If it’s not already selected, click the DeScratch tool in the Tools palette to select it.
The DeScratch tool becomes highlighted when it’s selected.
91
Enhancing Images
Double-click the DeScratch tool in
the Tool palette to adjust its settings.
Drag this slider to increase or
decrease the width of the marks that
PhotoFlash interprets as scratches.
Drag this slider to
increase or decrease
the sensitivity of the
DeScratch tool.