Apple Macintosh PhotoFlash User Manual
Page 71
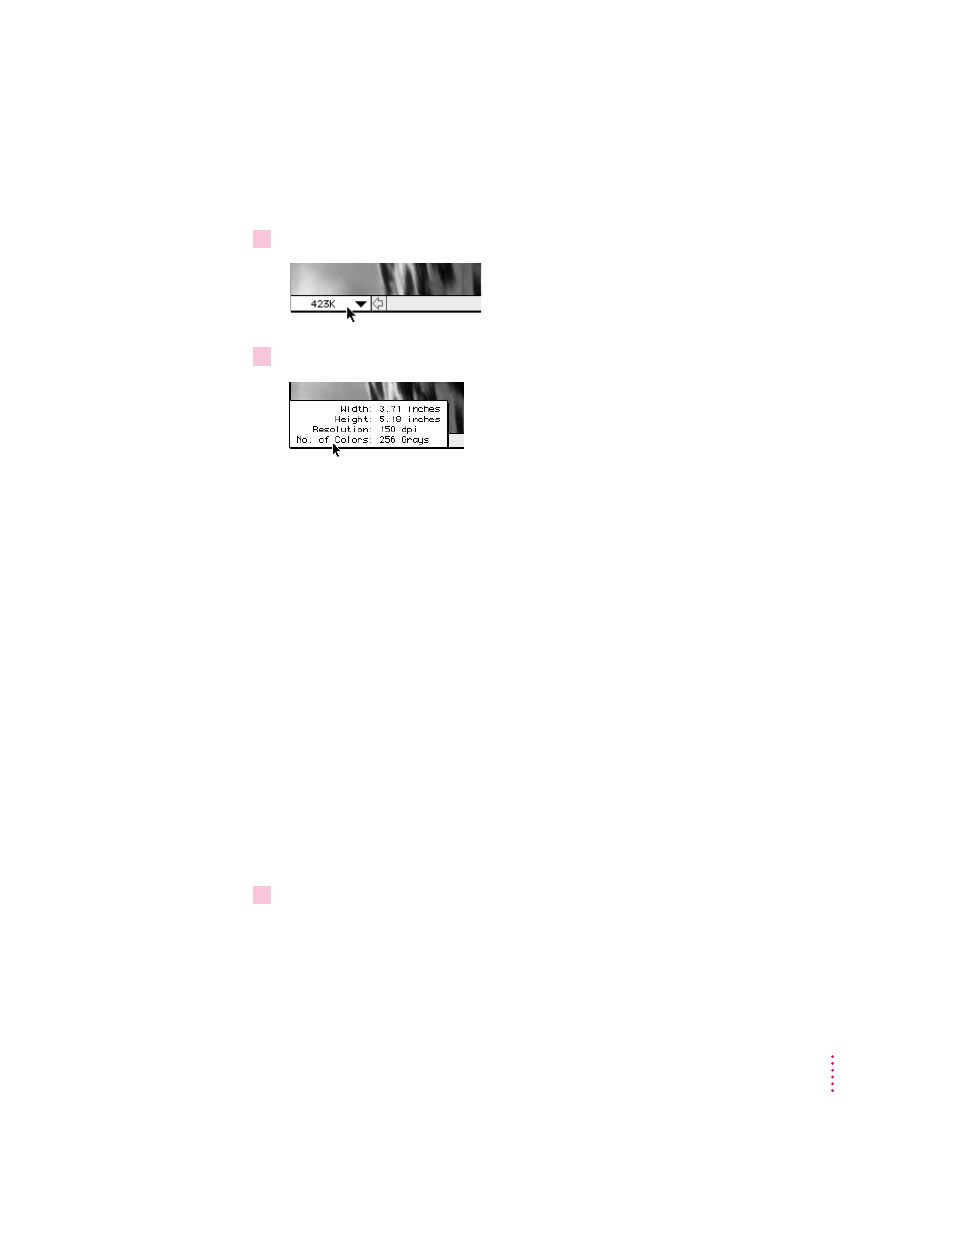
To confirm that the new dimensions of an image have been set as you
intended, follow these steps:
1
Position the pointer over the number in the lower-left corner of the image window.
2
Press the mouse button.
Changing the dimensions of an image’s work area
An image file can include an extra space around the image itself called the
work area.
The work area is actually part of the image; the only difference is
that its pixels are a uniform color determined by a setting in the Preferences
dialog box (white by default). You can use the Resize command to change the
dimensions of the work area. For example, if you want to include two pictures
in one image file, you might want to enlarge the work area to make room for
the second picture.
If you make the work area larger, white pixels are added around the
boundaries of the image. If you make the work area smaller than the image
itself, the image is cropped accordingly. Changing the dimensions of an
image’s work area always changes the uncompressed size of the image file.
You can only change the work area of a single image; you can’t change the
work area of images represented by selected catalog thumbnails.
To resize a single image’s work area, make sure the window you want the
command to affect is the frontmost window, then follow these steps:
1
Choose Resize from the Image menu.
The Resize dialog box appears.
61
Manipulating Images