Changing ssh and sftp settings, Secure shell settings dialog – HP Integrity NonStop J-Series User Manual
Page 70
4.
To dismiss the Add or Remove Connection Configurations dialog, select OK. The system or IP
address you entered appears in the System: combo box.
TIP:
If this is the first configured connection, enter the system name in the System: combo.
However, you must select Add/Remove... to add additional systems.
5.
Enter a user name or alias in the User name: field.
6.
Select the preferred protocol. To always use secure, encrypted authentication and for encrypted
file transfers and remote program launches, select SSH/SFTP. For information on changing
protocol settings, see one of the sections below.
7.
To apply changes and dismiss the Preferences dialog, select OK .
Changing SSH and SFTP settings
To change SSH and SFTP settings, from the NonStop Development perspective:
1.
To open the Network Connections preference page (
), select NonStop
Tools
→Configure Connections....
2.
Use the System: combo box to select the connection configuration to change.
3.
Open the Secure Shell Settings dialog (
) by selecting the Settings... button
to the right of the SSH/SFTP button.
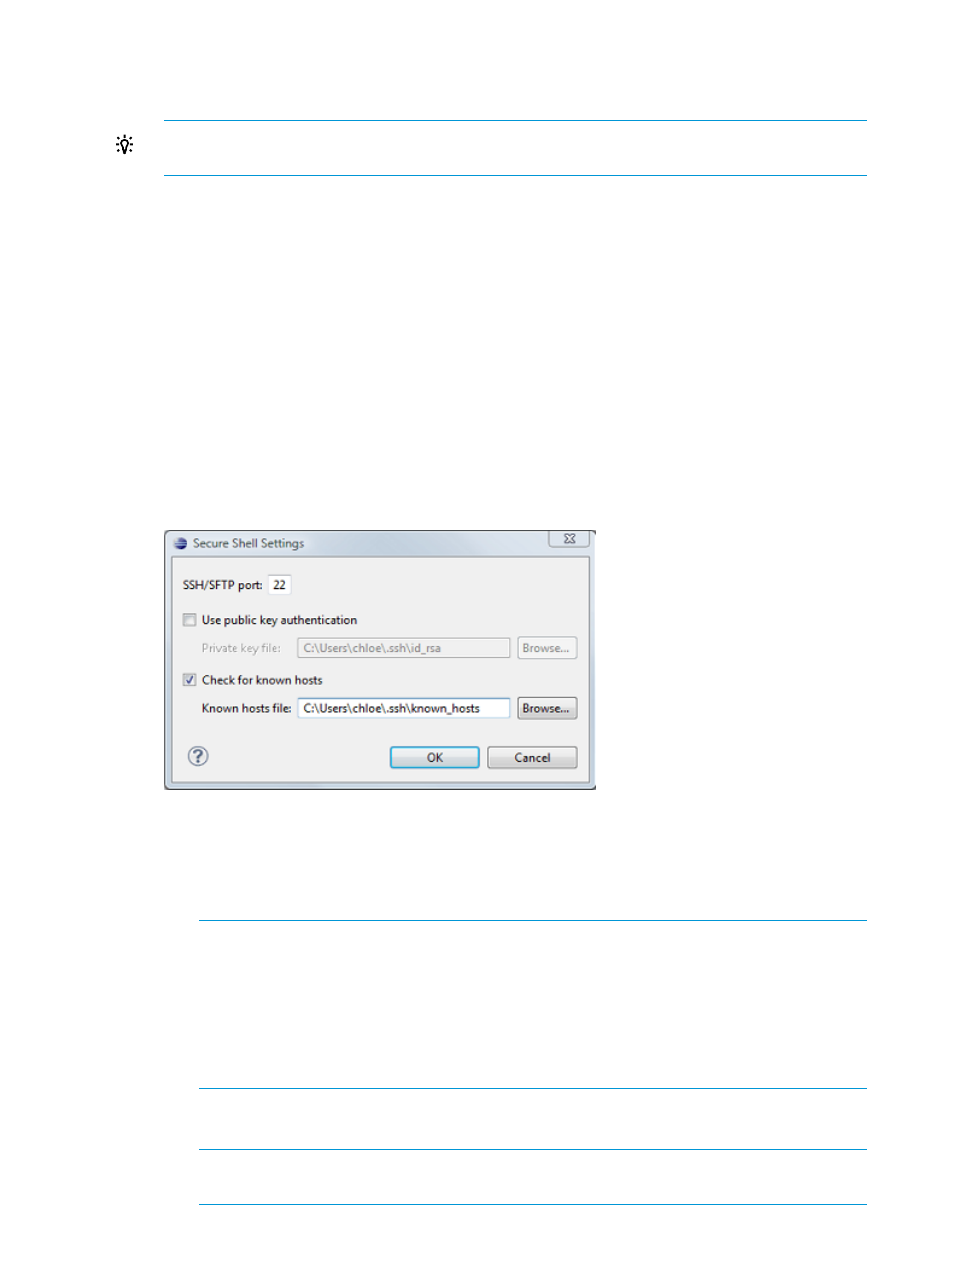
Figure 22 Secure Shell Settings dialog
4.
Actions available in the Secure Shell Settings dialog:
•
Enter a different port (the default for SSH is 22).
•
Select the Use public key authentication check box for public key authentication and
specify the location of your private key file in the Private key file: field.
NOTE:
Using public key authentication requires creating public/private key pairs and
registering the public key on the connecting NonStop system. For details on how to use
SSHCOM's alter command to add and register a public key, see the NonStop SSH
Reference Manual.
NSDEE does not provide a facility for generating a public/private key pairs. However,
this capability is available from the SSH2 preference page for Eclipse by selecting
Window
→Preferences→General→Network Connections.
•
Change the location of the known_hosts file or disable checking the known hosts file
for trusted hosts.
NOTE:
If you deselect Check for known hosts, you are prompted to verify the trusted
status of the host during every login.
70
Tasks