13 seed contorl – Seed Hawk 30 SERIES: 600C & 800C 2013 User Manual
Page 43
SEED HAWK® 30 SERIES OPERATOR’S MANUAL
43
4.13 SEED CONTORL
Seed control can be used in extreme conditions if certain seed types are pressing too hard
against the rotor, causing uneven operation.
NOTE: When sowing slow‐moving seeds such as grass seed or clover and grass mixes, seed
control must never be installed, as the seed can otherwise become compacted against the seed
control plate and, in the worst case scenario, stop the flow.
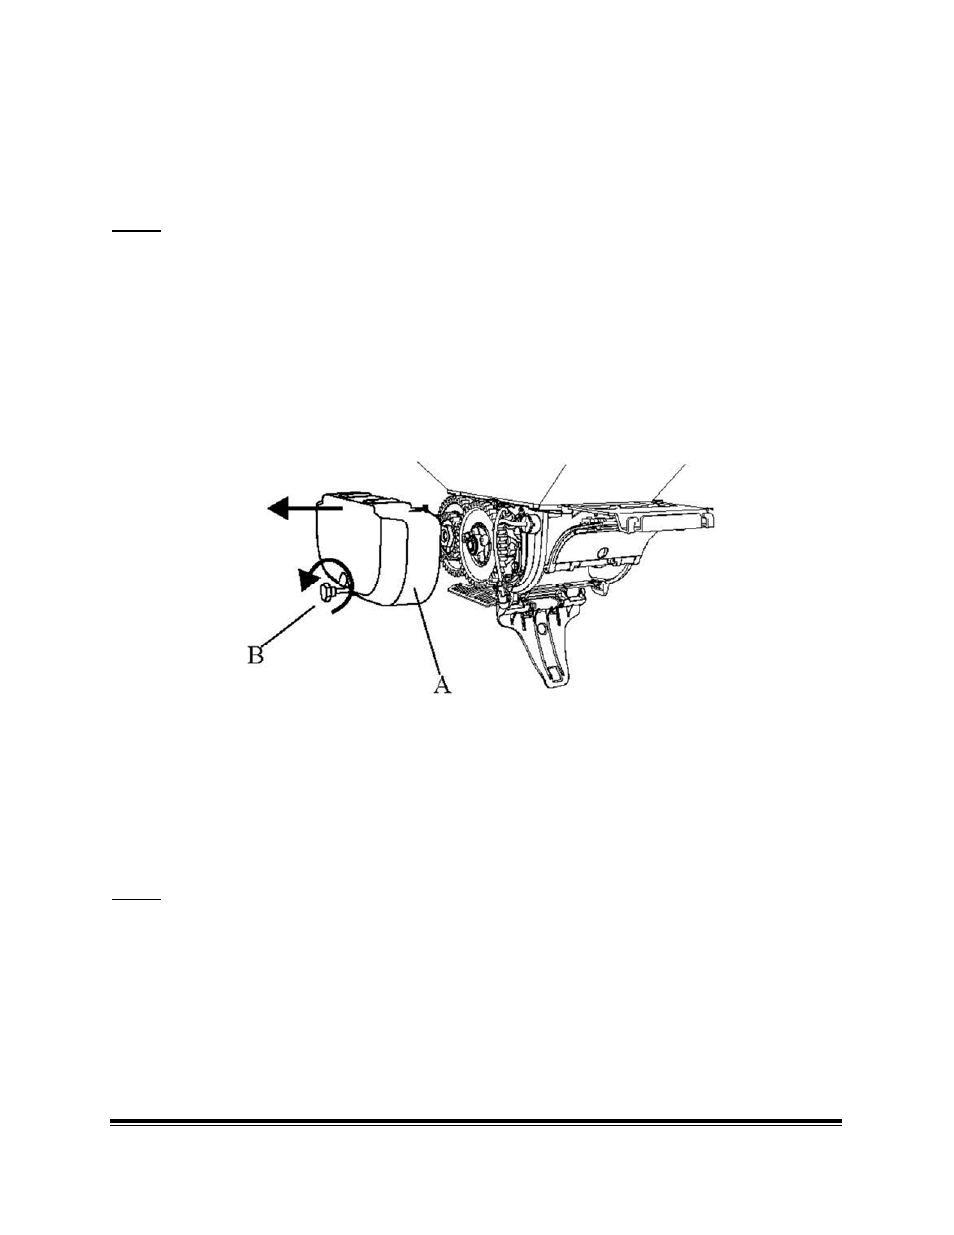
4.13.1 INSTALLATION/REMOVAL OF THE SEED CONTROL PLATE
1. Remove the rotor, SEE “4.11 ROTOR REPLACEMENT” ON PAGE 40.
2. Remove the cover (A) by first undoing the knob (B).
3. Remove the spring (E) from the latch clamp (D).
4. Grip the seed control plate (C).
5. Pull out the latch clamp (D) and install or remove the seed control plate (C).
NOTE: When installing, the seed control plate (C) is inserted with the straight, thin side at the
top and the locking hooks towards the bottom/rear as shown in FIGURE 4.22. Insert the plate
upwards and towards the rear until it comes into contact with the edge and the mounting
holes are in the correct position for installing the latch clamp (D).
FIGURE 4.21