Manual sampling mode – PASCO Xplorer-GLX Users’ Guide User Manual
Page 66
60 S e n s o r s
S c r e e n
Manual Sampling Mode
In Manual Sampling mode, the GLX records a single sample from each measure-
ment only when you trigger it by pressing
. Follow these steps to set up Man-
ual Sampling mode and record data.
Set Up
1.
Press
+
to go to the Sensors screen.
2.
Press
to open the Mode menu.
3.
Use the arrow keys to highlight Manual and press
.
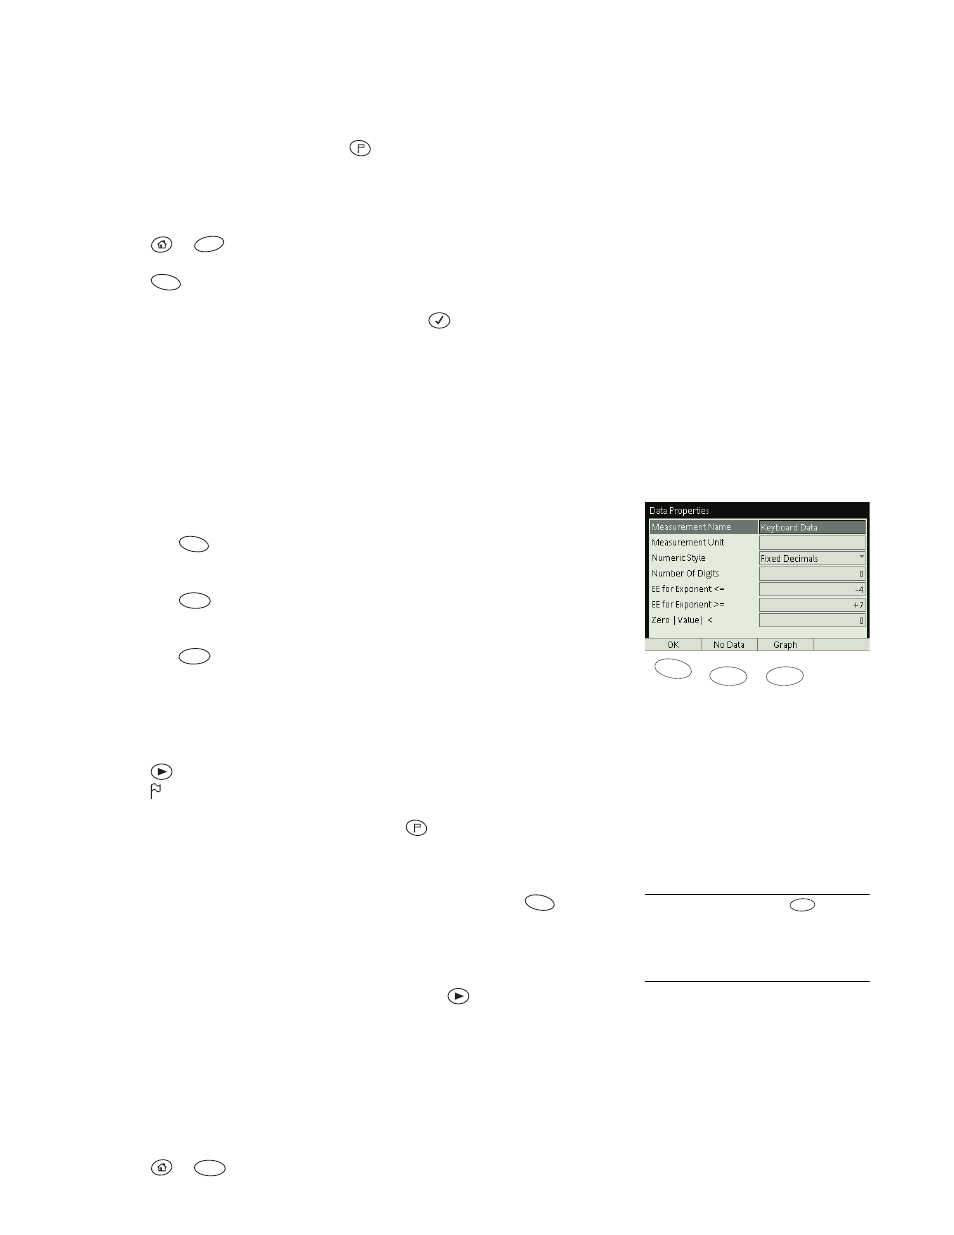
The Data Properties dialog box appears. This box specifies the name and
units of the (optional) manually entered data. By default, the name is “Key-
board Data” and the units are unnamed.
4.
If you plan to manually enter data to go with each sample, enter the name
and units of this data in the Data Properties box. (See page 69 for instruc-
tions on using the Data Properties box.)
5.
Do one of the following:
•
Press
(OK) to enter Manual Sampling mode with the manually
entered data option.
•
Press
(No Data) to enter Manual Sampling mode without the
option of manually entering data.
•
Press
(Graph) to enter Manual Sampling mode with a Graph dis-
play automatically set up to display a sensor measurement on the verti-
cal axis and manually entered data on the horizontal axis.
Sampling
1.
Press
. The GLX starts measuring, but not recording. A blinking flag
icon (
) appears in the upper right-hand corner of the screen.
2.
When you are ready to take a data point, press
. The GLX instantly
records a single sample from each measurement.
3.
If you have selected the manually entered data option, the GLX prompts you
to enter data. Type in the data (either numeric or text
12
) and press
(OK).
4.
Repeat steps 2 and 3 to record additional samples.
5.
When you have finished recording all samples, press
.
Cell-selective Sampling
You can collect data in manual sampling mode while viewing any display; how-
ever, using the Table display allows additional flexibility. After setting up the
GLX in manual sampling mode as described above, follow these steps to record
data into specific table cells.
1.
Press
+
to open the Table display.
F4
F1
F3
F2
F1
F1
F2
F3
12
To type text data, press
to dis-
able Num Lock. The first time the GLX
detects non-numeric data, it will ask you
to confirm that the data should be treated
as text.
F3
F1
F2