Analysis – PASCO Xplorer-GLX Users’ Guide User Manual
Page 120
114
H e a t T r a n s f e r b y R a d i a t i o n
2.
Set the sampling periods of both probes to 10 seconds.
a)
Press
to return to the Home Screen; press
to open the Sensors
screen.
b)
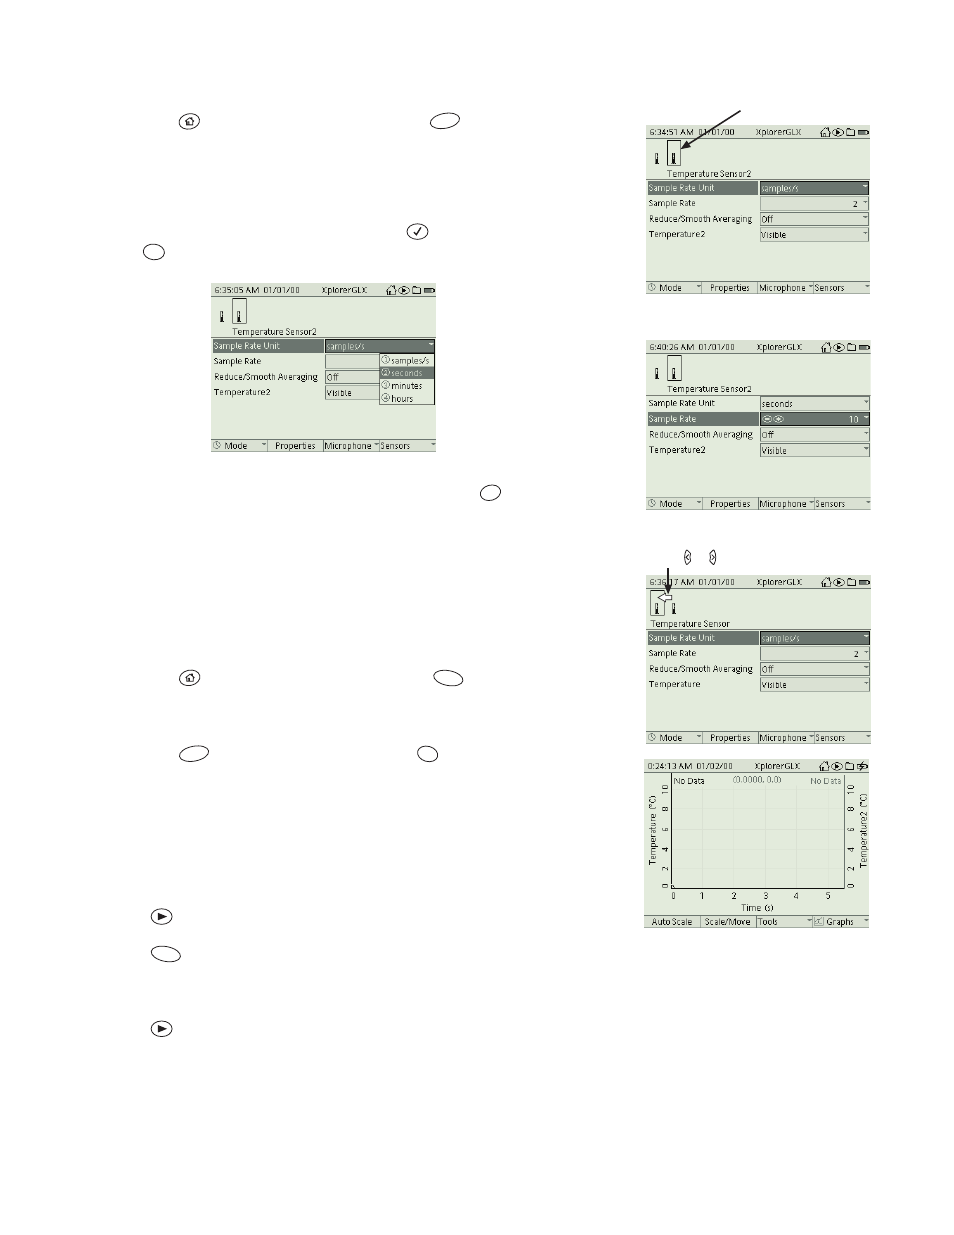
Observe the top part of the screen and note which sensor (“Temperature
Sensor” or “Temperature Sensor 2”) is selected.
c)
With Sample Rate Unit highlighted, press
to open the menu; press
to select seconds.
Select seconds from the Sample Rate Unit menu
d)
Press the down arrow to highlight Sample Rate; press
until the
value is set to 10 seconds.
e)
Press the left or right arrow to select the other sensor.
f)
Repeat steps c and d to set the sampling rate for the newly selected sen-
sor to 10 seconds.
3.
Set up the Graph to display both temperatures.
a)
Press
to return to the Home Screen; press
to open the Graph.
The Graph is automatically set up to display data from the first tempera-
ture probe.
b)
Press
to open the Graphs menu; press
to select Two Measure-
ments mode. The second temperature measurement will be added to the
Graph.
Data Collection
1.
Fill both cans with equal amounts of hot water.
2.
Press
to start data collection.
3.
Press
to automatically scale the Graph.
4.
Gently swirl the cans as data will be collected for about 15 minutes.
5.
Press
to stop data collection.
Analysis
Which can cooled faster? Why?
F4
Observe which sensor is selected
2
tuv
Set the Sample Rate to 10 seconds
+
Press or to select the other sensor
Graph prepared to display both tem-
perature measurements
F1
F4
4
ghi
F1