Data collection, Analysis – PASCO Xplorer-GLX Users’ Guide User Manual
Page 134
128
I n d u c e d E l e c t r o m o t i v e F o r c e
GLX Set-Up
1.
Connect the voltage probe to the GLX.
a)
Connect the voltage probe to the voltage port on the left side of the
GLX.
b)
If there are other sensors connected to the GLX, remove them.
2.
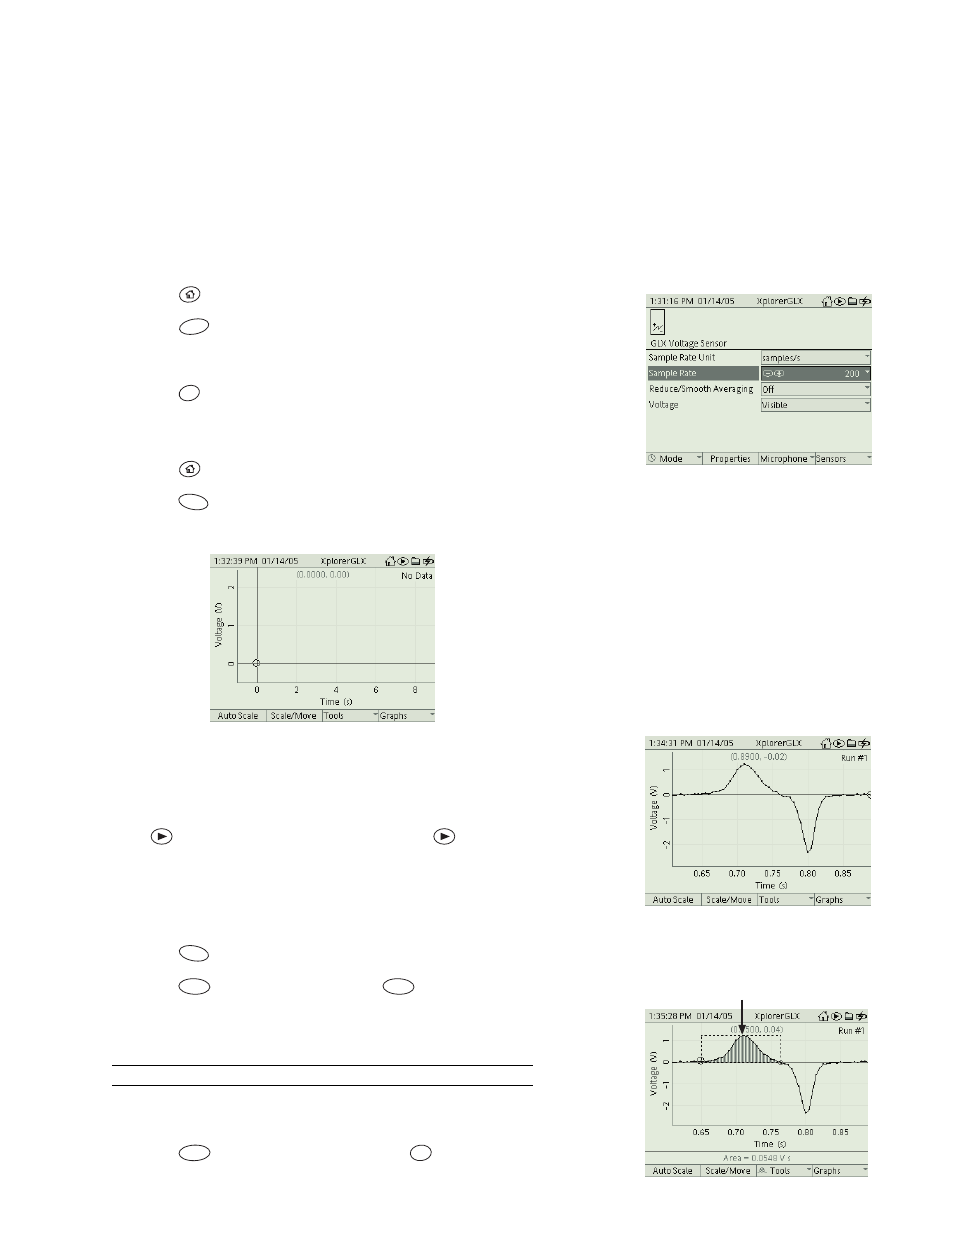
Set the sampling rate to 200 Hz.
a)
Press
to return to the Home Screen.
b)
Press
to open the Sensors screen.
c)
Press the down arrow key to highlight Sample Rate.
d)
Press
repeatedly to set the Sample Rate to 200 Hz.
3.
Open the Graph display.
a)
Press
to return to the Home Screen.
b)
Press
to open the Graph display. The display will be automatically
set up to graph Voltage versus Time.
Data Collection
1.
Hold the magnet about 2 cm above the coil.
2.
Press
; drop the magnet through the coil; press
again.
Analysis
1.
Scale the Graph.
a)
Press
to automatically scale the Graph.
b)
Press
to enter Scale mode, press
again to enter Move mode.
Use the left and right arrow keys in both modes to zoom in on the posi-
tive and negative peaks.
See page 16 for detailed instructions on using Move and Scale modes.
2.
Find the area under the first peak.
a)
Press
to open the Tools menu; press
to select the Area Tool.
F4
+
F1
F1
F2
F2
Place the dashed box
around the first peak
F3
6
mno