Procedure – PASCO Xplorer-GLX Users’ Guide User Manual
Page 122
116
N e w t o n ’ s L a w o f C o o l i n g
Procedure
Equipment Set-Up
1.
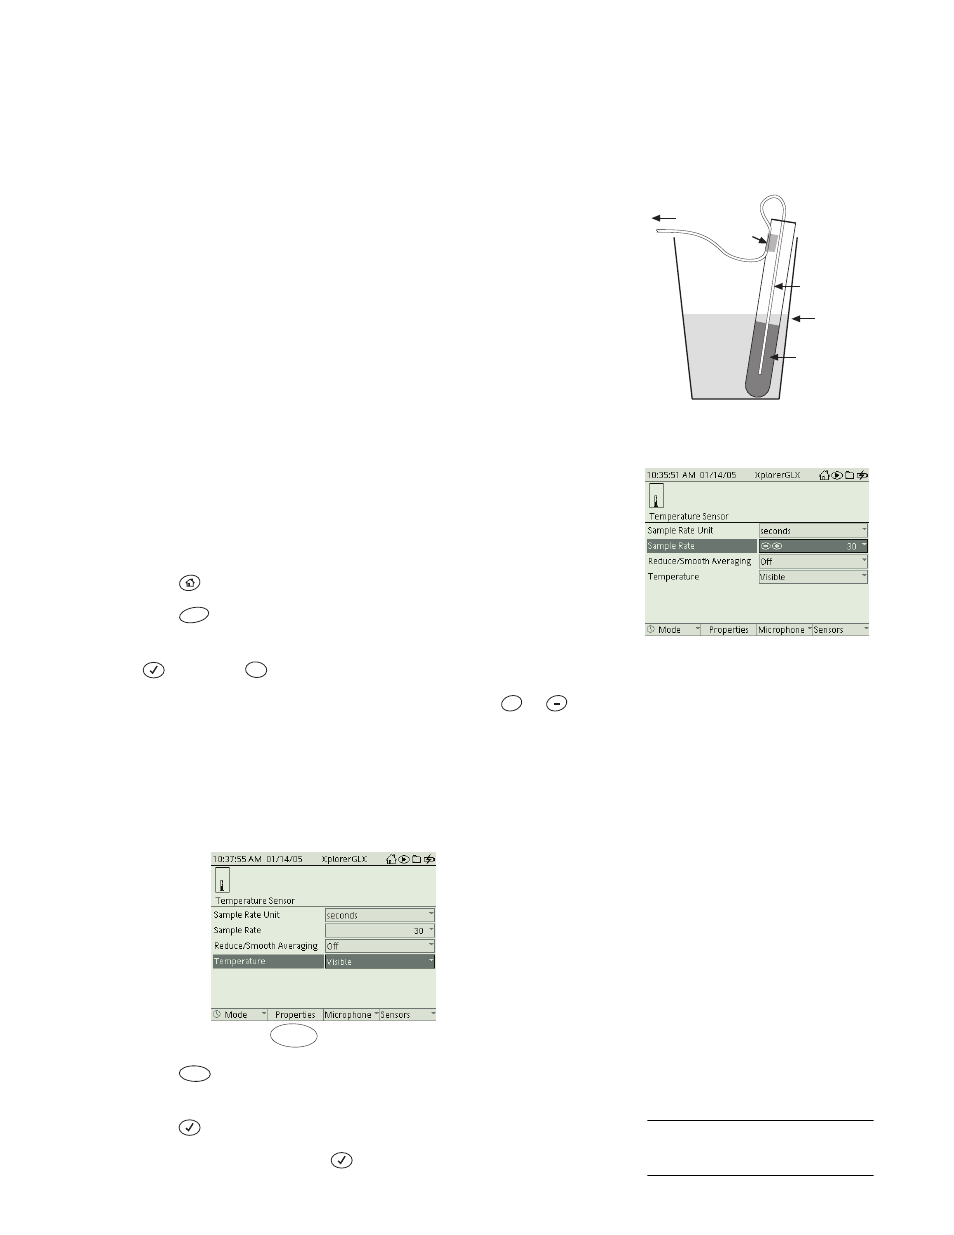
Place the end of a fast-response temperature probe in the test tube, then fill
the test tube about one-third full of sand, as pictured to the right. The probe
should be embedded in the sand. Use tape to secure the probe.
2.
Partially fill a cup with hot water (50 to 70 °C) and immerse the sand-filled
portion of the test tube. Let the sand warm up for a few minutes while you
set up the GLX.
3.
Tape a second temperature probe to the inside wall of an empty cup. (This
probe will be used to measure the temperature of the surrounding air.)
GLX Set-Up
1.
Connect the first temperature probe to the GLX.
a)
Connect the temperature probe that is in the test tube to Temperature
Port 1 on the left side of the GLX.
b)
If there are other sensors connected to the GLX, remove them.
2.
Set the sampling rate to 30 seconds between samples.
a)
Press
to go to the Home Screen.
b)
Press
to open the Sensors screen.
c)
Use the up and down arrow keys to highlight Sample Rate Unit. Press
, then press
to select “seconds.”
d)
Press the down arrow key to highlight Sample Rate. Press
or
to
set the time between samples to 30 seconds.
3.
Rename the measurement.
a)
In the Sensors screen, use the arrow keys to highlight the measurement
named “Temperature”
b)
Press
to open the Data Properties box.
c)
Use the up and down arrow keys to highlight Measurement Name and
press
to make it editable.
d)
Type “object temp” and press
.
water
sand
to the GLX
temperature
probe
tape
Immerse the sand-filled portion of
the test tube in hot water
Set the sampling rate to 30 s
between samples
F4
2
tuv
+
F2
F2
1
To enter text, use multipress text entry
(see page 90) or an attached USB key-
board (see page 90).