Manually entered data, Entering a new data set – PASCO Xplorer-GLX Users’ Guide User Manual
Page 38
32 T a b l e
of one column will cause all of them to change.
To turn Lock Run Selection off
or on, select it from the Tables menu.
Export All Data
If you have a USB storage device
27
(such as a USB flash
drive), you can use this option to export data in tab-delimited text format. The
GLX creates a text file on the storage device that you can open on a computer in
a spreadsheet, mapping software, DataStudio, and other programs.
See page 83 for other ways to save and open data on a USB storage device.
Connect the storage device to the GLX’s USB port and select Export All Data
from the Tables menu. A dialog box appears showing which data sets will be
exported. Highlight any of these data sets and press
to exclude it. To select
other data sources for exporting press
to add a single data source or press
to add all data sources that have been set to “visible” in the Sensors screen.
Press
(OK) to create the export file on the USB storage device.
Before exporting data for use with mapping software, display time in the first
column and turn on the Date/Time option (see page 31).
To view the exported data, disconnect the storage device from the GLX and con-
nect it to a computer. You will find the text file at the root level of the storage
device. Its filename encodes the date and time at which the data was exported; for
instance, if you exported data on October 28, 2005 at 11:22:53 AM, the filename
will be “Export10282005112253.txt”. You can open this file in a text editor,
spreadsheet, or other program designed to import tab-delimited data.
If there is a printer connected to the GLX, select Print to print one page of
data. The GLX will print the data that are visible on the screen, plus as much
additional data as will fit on one page.
30
Print All
Select Print All to print the entire contents of the displayed data sets,
including data that are not currently visible on the screen (data that you would
have to scroll up or down to see). If necessary, the GLX will print multiple pages.
Manually Entered Data
In addition to collecting data from sensors, the GLX allows you to enter data in
the Table display via the keypad or an attached keyboard. Any data that you have
entered can later be edited.
Entering a New Data Set
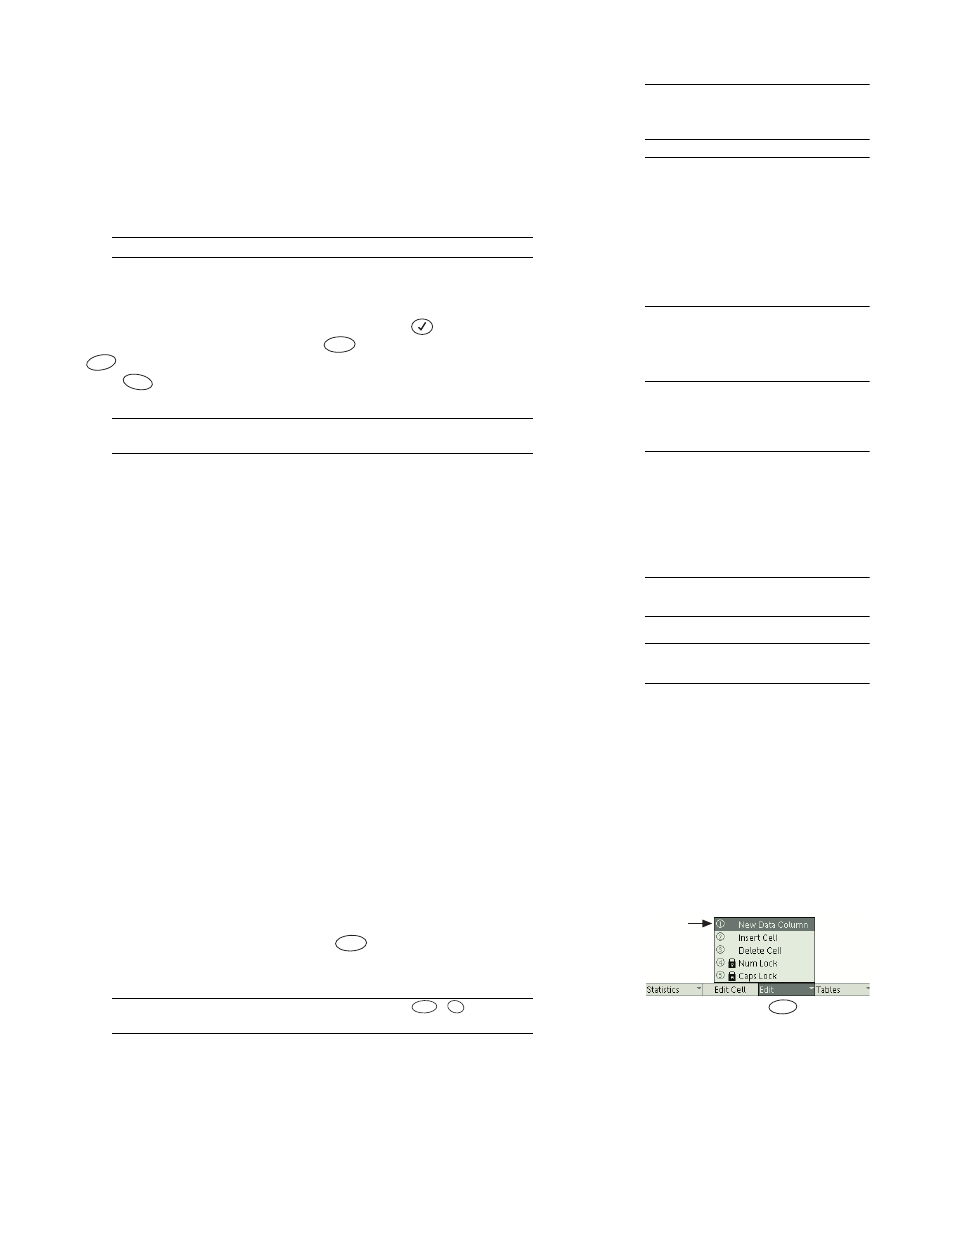
Creating a New Data Column
Before you can enter data, an editable data
column must exist. To create one, press
to open the Edit menu and select
New Data Column.
The keypad shortcut for creating a new data column is
,
, pressed in
sequence.
The new editable column takes the place of the first blank column in the Table. If
there is no blank column, and there are three or fewer other columns, the new
editable column is added on the right side of the table. If the Table is already dis-
playing four columns, the new editable column replaces the fourth column.
26
See “Run Number” on page 29 for
instructions on changing the run number
displayed in a column.
The USB storage device must be for-
F3
F4
F1
28
If you export data while data collection
is in progress, the text file will contain the
data collected up to that point, and the
GLX will continue to collect data.
29
To import the file into DataStudio, open
the File menu and select Import Data.
30
For more information on printing, see
Create
an editable
data column
F3
F3
F3
1
pqrs