Analysis – PASCO Xplorer-GLX Users’ Guide User Manual
Page 114
108 C a l o r i m e t r y
GLX Set-Up
1.
Connect the temperature probes.
1
a)
Connect the probe in Cup 1 to one of the temperature ports on the left
side of the GLX.
b)
Connect the probe in Cup 2 to the other temperature port.
c)
If there are other sensors connected to the GLX, remove them.
2.
Set up the Graph to display both temperatures versus time.
a)
Press
to return to the Home Screen; press
to open the Graph.
b)
The Graph will automatically be set up for the first temperature probe.
Press
to open the Graphs menu, press
to select Two Measure-
ments mode. The second temperature probe will be added to the Graph.
Data Collection
1.
Press
to start data collection.
2.
Remove the masses from the hot water. Lower one mass into Cup 1; lower
two masses into Cup 2.
3.
Gently stir the water in both cups.
4.
Press
to automatically scale the Graph.
5.
After both temperature measurements have stabilized, press
to stop data
collection.
Analysis
1.
Use the Delta Tool to find the temperature change in Cup 1.
a)
Press
to open the Tools menu; press
to turn on the Delta
Tool.
b)
Press the up arrow to move one of the cursors to the first data point.
c)
Hold
and press
to swap control to the other cursor; press the
down arrow key to move that cursor to the last data point.
The Delta Tool should now show the changes in temperature and time
from the first to the last data point.
Cup 1 temperature change = _____________________
1
Optional: after connecting the probes,
perform the alignment calibration
described on page 77.
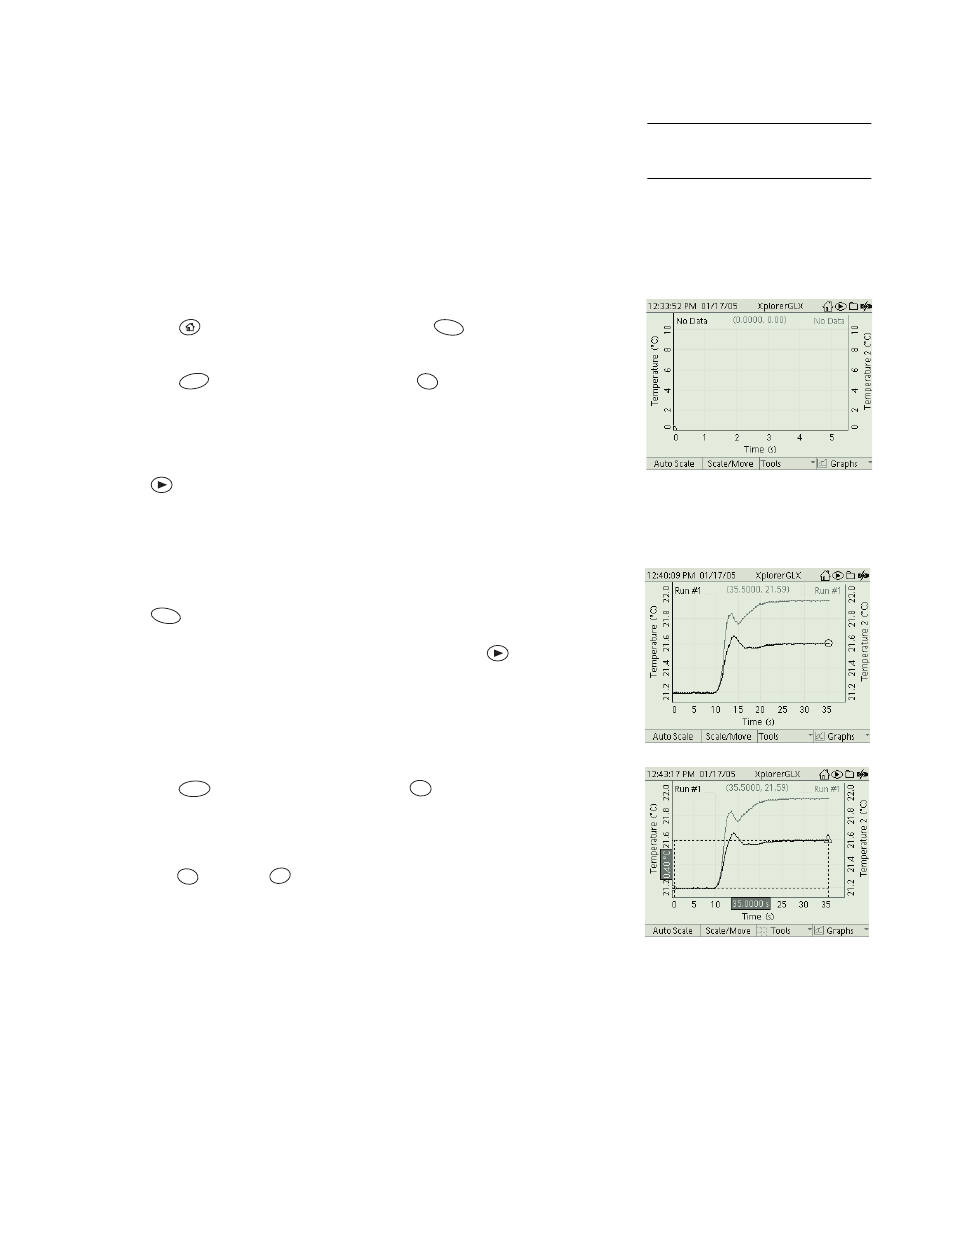
Graph in Two Measurements mode
F1
F4
4
ghi
F1
F3
2
tuv
Esc
Х