5 configuring ospf interfaces, Figure 104 ospf interface, Table 68 ospf interface – ZyXEL Communications ZyXEL Dimension ES-4024 User Manual
Page 175
ES-4024A User’s Guide
174
Chapter 28 OSPF
28.5 Configuring OSPF Interfaces
To configure an OSPF interface, first create an IP routing domain in the IP Setup screen (see
for more information). Once you create an IP routing domain, an OSPF
interface entry is automatically created.
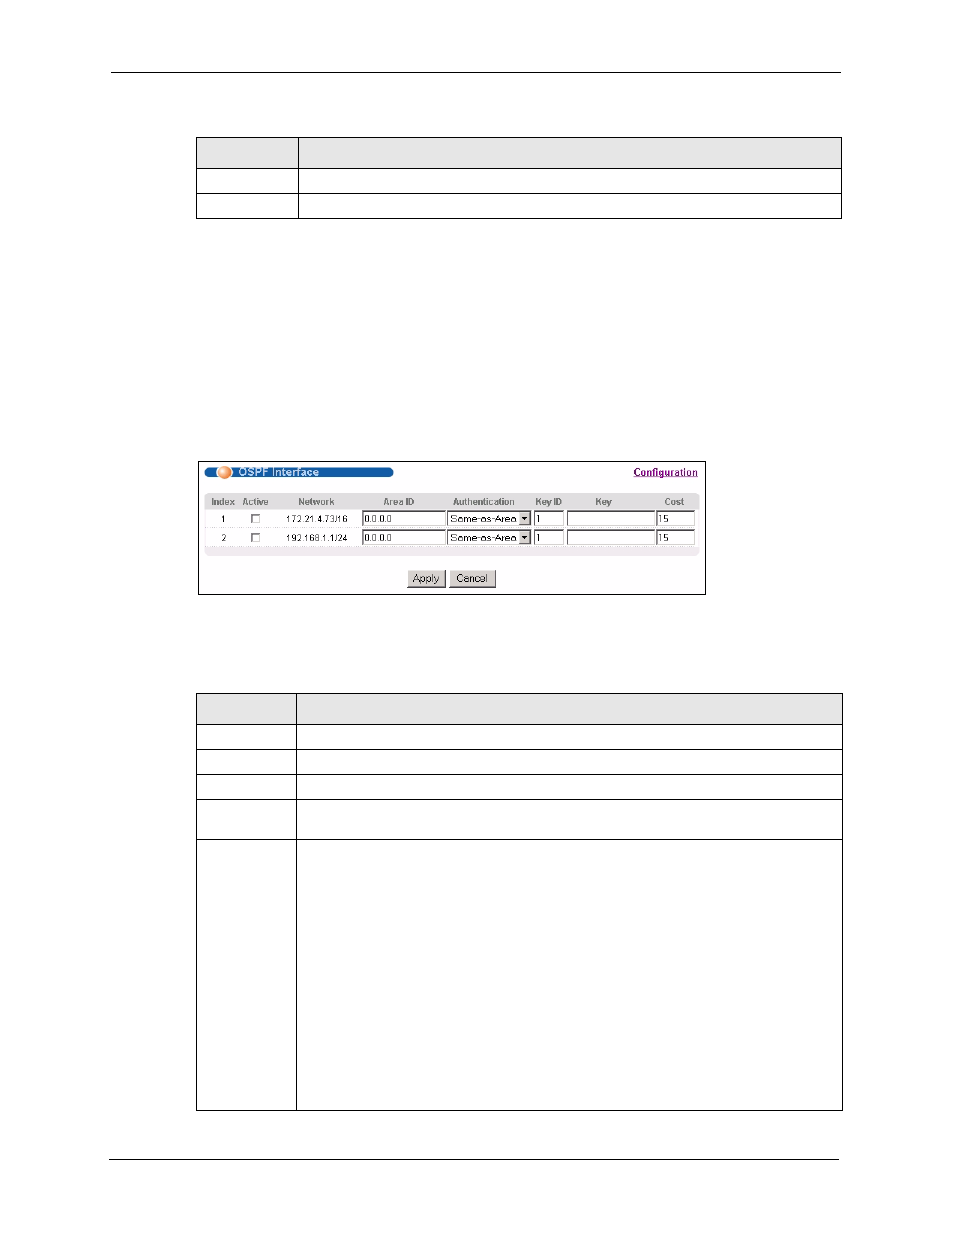
In the OSPF Configuration screen, click Interface to display the OSPF Interface screen.
Figure 104 OSPF Interface
The following table describes the labels in this screen.
Delete
Click Delete to remove the selected entry from the summary table.
Cancel
Click Cancel to clear the Delete check boxes.
Table 67 OSPF Configuration: Summary Table (continued)
LABEL
DESCRIPTION
Table 68 OSPF Interface
LABEL
DESCRIPTION
Index
This field displays the index number for an interface.
Active
Select this option to enable an interface.
Network
This field displays the IP interface information.
Area-ID
Enter the area ID (that uses the format of an IP address in dotted decimal notation) of
an area to associate the interface to that area.
Authentication
Note: OSPF Interface(s) must use the same authentication method
within the same area.
Select an authentication method. Choices are Same-as-Area, None (default), Simple
and MD5.
To participate in an OSPF network, you must set the authentication method and/or
password the same as the associated area.
Select Same-as-Area to use the same authentication method within the area and set
the related fields when necessary.
Select None to disable authentication. This is the default setting.
Select Simple and set the Key field to authenticate OSPF packets transmitted through
this interface using simple password authentication.
Select MD5 and set the Key ID and Key fields to authenticate OSPF packets
transmitted through this interface using MD5 authentication.