Installing and removing the smart battery, Installing and removing the smart battery” on – Gateway 9715 User Manual
Page 134
129
www.gateway.com
Installing and removing the ROMB (RAID on Motherboard) activation key and dedicated
5
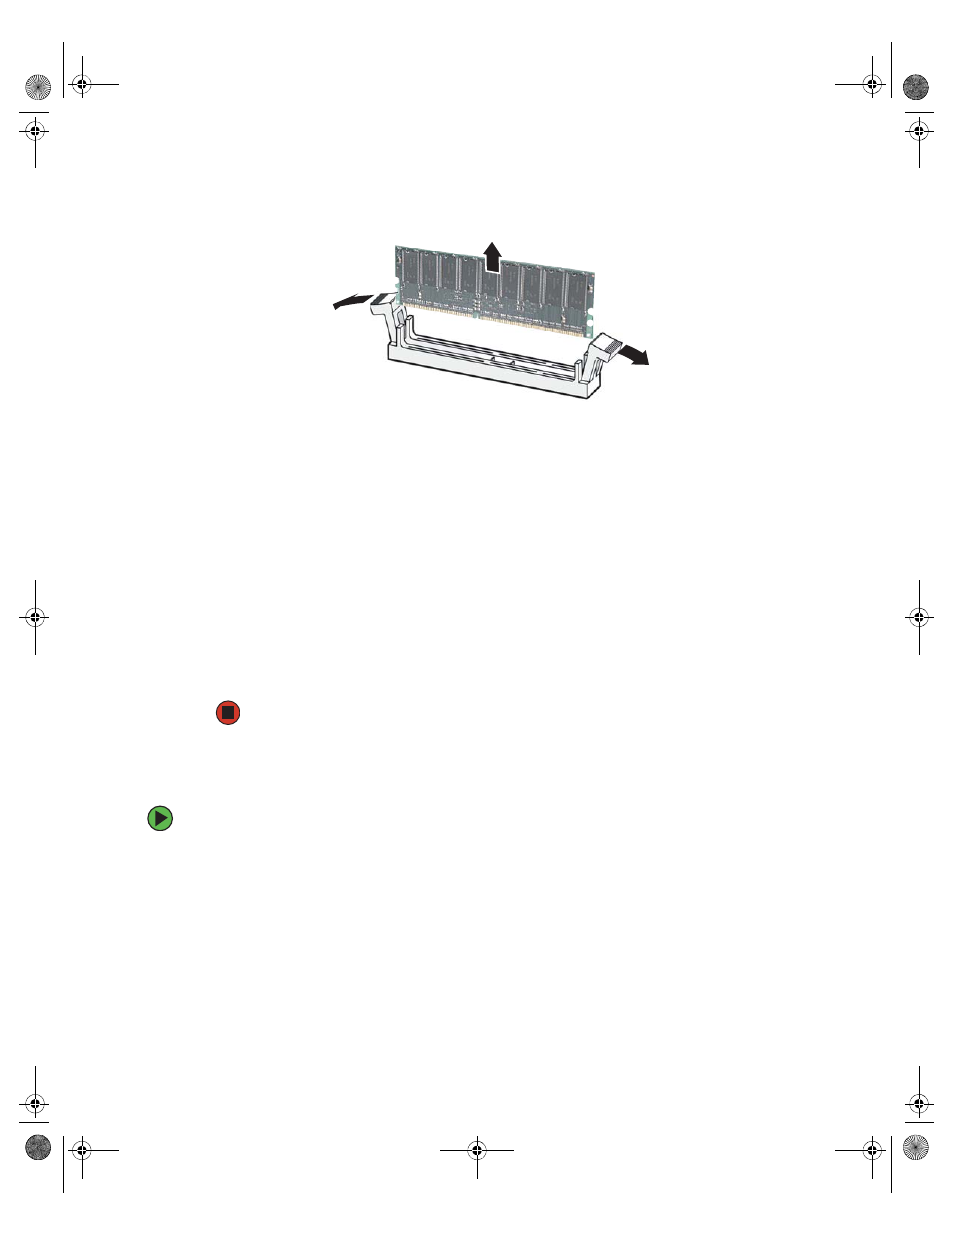
Gently spread the retaining clips at each end of the RAID DIMM socket causing the
DIMM to lift from the socket.
6
Holding the DIMM by the edges, lift it from the socket.
7
Place the RAID activation key and the RAID DIMM into anti-static bags for storage.
8
Reinstall the PCI expansion card into PCI slot 7 (if removed) by following the
instructions in
“Cold installation or removal of PCI expansion cards” on page 104
.
9
Reinstall the memory board or memory board air baffle for slot C by following the
instructions in
“Installing and removing memory boards” on page 85
.
10
Replace the processor air baffle by following the instructions in
installing the processor air baffle” on page 67.
11
Follow the instructions in
“Closing the server case” on page 72
.
12
Configure the BIOS settings to disable the ROMB option.
Installing and removing the Smart Battery
To install the smart battery:
1
Follow the instructions in
“Preventing static electricity discharge” on page 65
.
2
Follow the instructions in
“Opening the server case” on page 66
.
3
Remove the processor air baffle by following the instructions in
installing the processor air baffle” on page 67
.
4
Remove the memory board or memory board air baffle from slot D by following the
instructions in
“Installing and removing memory boards” on page 85
.
8510702.book Page 129 Thursday, July 7, 2005 11:21 AM