Cut marks – PreSonus Notion 6 - Notation Software (Boxed) User Manual
Page 199

11.18
If there is a section of a score you want playback to skip over, you could remove it by deleting . But then the
deleted measures are gone and must be re-Entered if you discover you need to re-instate this section (or a
portion of it) . With the
Cut Marks
feature you place text marks in the score where you want Notion to skip
during playback (both play and perform) . This way, you have the equivalent of a delete, but you retain the
original notation in the file if you ever need to access it anytime in the future (simply delete the cut marks) .
The “skip” pertains to all instruments (all staves) in the system . The cut start and end marks appear
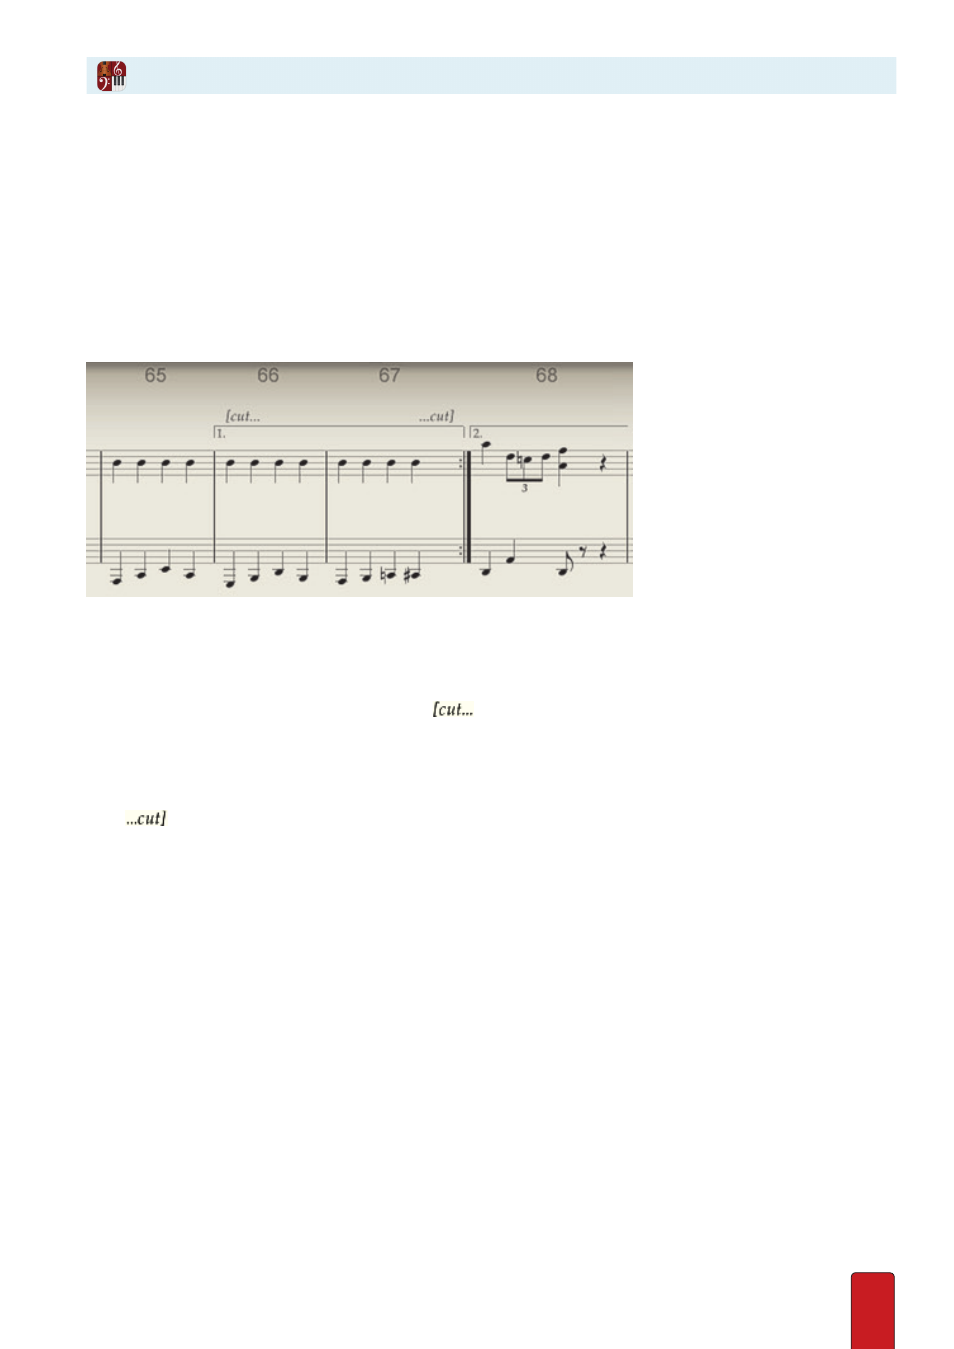
above the topmost staff in the system . In the example below, the first ending will always be
skipped in playback (you proceed directly to measure 68 after completing measure 65 .
NOTE: This unique feature can be confused with a more common
cut
(remove) feature where you
remove a portion of your score to either discard or to paste in another place in your score .
Cut marks over the start of measure 66 and the end of measure 67.
Add a Cut
You must place both a Cut start mark and a Cut end mark for this feature to work .
1 . Ensure you are in Edit mode .
2 . Press Shift + 7 (the & character) once .
» Your Music Cursor now displays a start mark:
.
3 . Position the leftmost edge of your Music Cursor on the first note or rest you want skipped in playback . This does not
have to be the first beat in a measure .
4 . Either click your mouse or press Enter .
» The Cut start mark appears on your score at this location . And now your Music Cursor displays a Cut end mark:
.
5 . Position the gray highlight on your Music Cursor on the first note or rest that comes
after
the cut . This can be at any
beat in a measure .
6 . Either click your mouse or press Enter .
» Now, in playback, everything between the cut marks is skipped over across all parts .
Cut Marks
