Toshiba – Toshiba LF434 User Manual
Page 51
Attention! The text in this document has been recognized automatically. To view the original document, you can use the "Original mode".
TOSHIBA
6 F 8 A 0 7 7 0
To change the meter size:
IMPORTANT
Meter size is factory set when shipped. Do not chfnigc the meter sii^e unless it differs
fram the specified value.
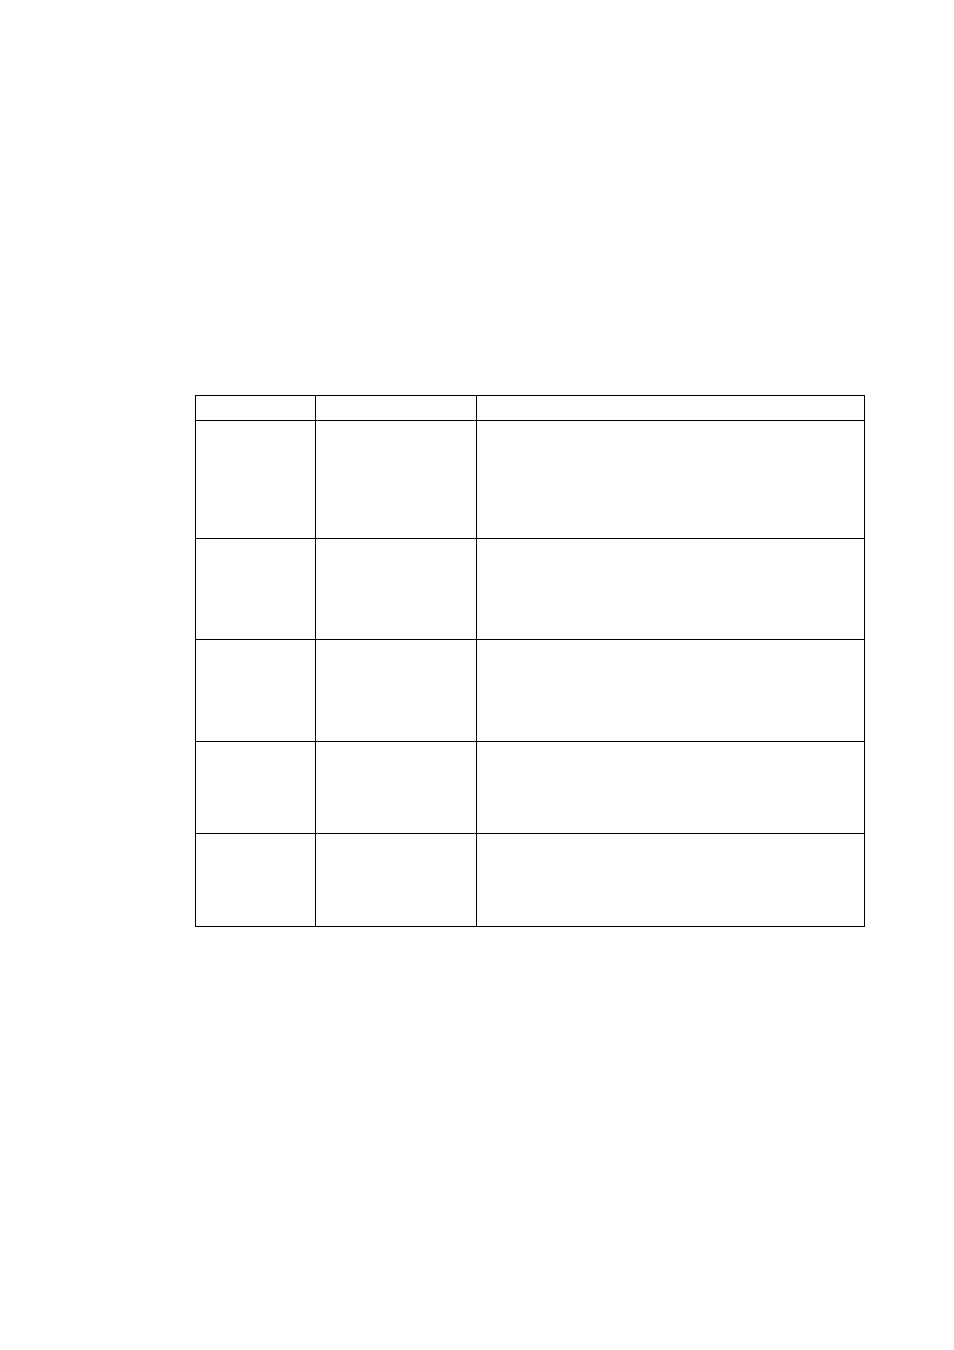
The following example shows how to change the meter size from 50 mm to 100 mm.
Key operation
Display example
DeiiCription
SET
□
AZ: METER SIZE
SO mu
Press [SET] first to start the items selection
sequence and select A2: MEITUISIZE from among
(he configuration items using [ ► ] and [-
a
. ] keys.
Press [iiHT’J again to display the current meter size
Í50 mm in this example).
►
□
A2: METER SIZE
SO nn
Pressing [ ► j, the cursor appears.
□
AZ: METER SIZE
100 mm
Select "T(X) nun” by pressing [
a
] as many times
as necessary. (Note)
S E T
□
A2: METER SIZE
100 itn
Pressing [SE T], the cursor disappears and the changed
display flickers, Press [SE TJ again to save the value.
SET
□
A2: METER SIZE
Pressing [SET], the system returns to the items
selection sequence.
Nole: The meter size is changed as shown below by pressing [ ^ ].
-► 2,5 mm 15mm-^LUi)mm 6fH)mm^0.1in 0,5 in ^4 in- ■ 24 in
□
If the meter si/e has been changed, other setting values (such as span and counting rale)
will be affected depending on the measuring unit used. Therefore, check those setting
values if you have changed the mctci size.
- 5D -