Toshiba – Toshiba LF434 User Manual
Page 34
Attention! The text in this document has been recognized automatically. To view the original document, you can use the "Original mode".
TOSHIBA
6 F 8 A 0 7 7 0
6 , 2 Zero Adjustment
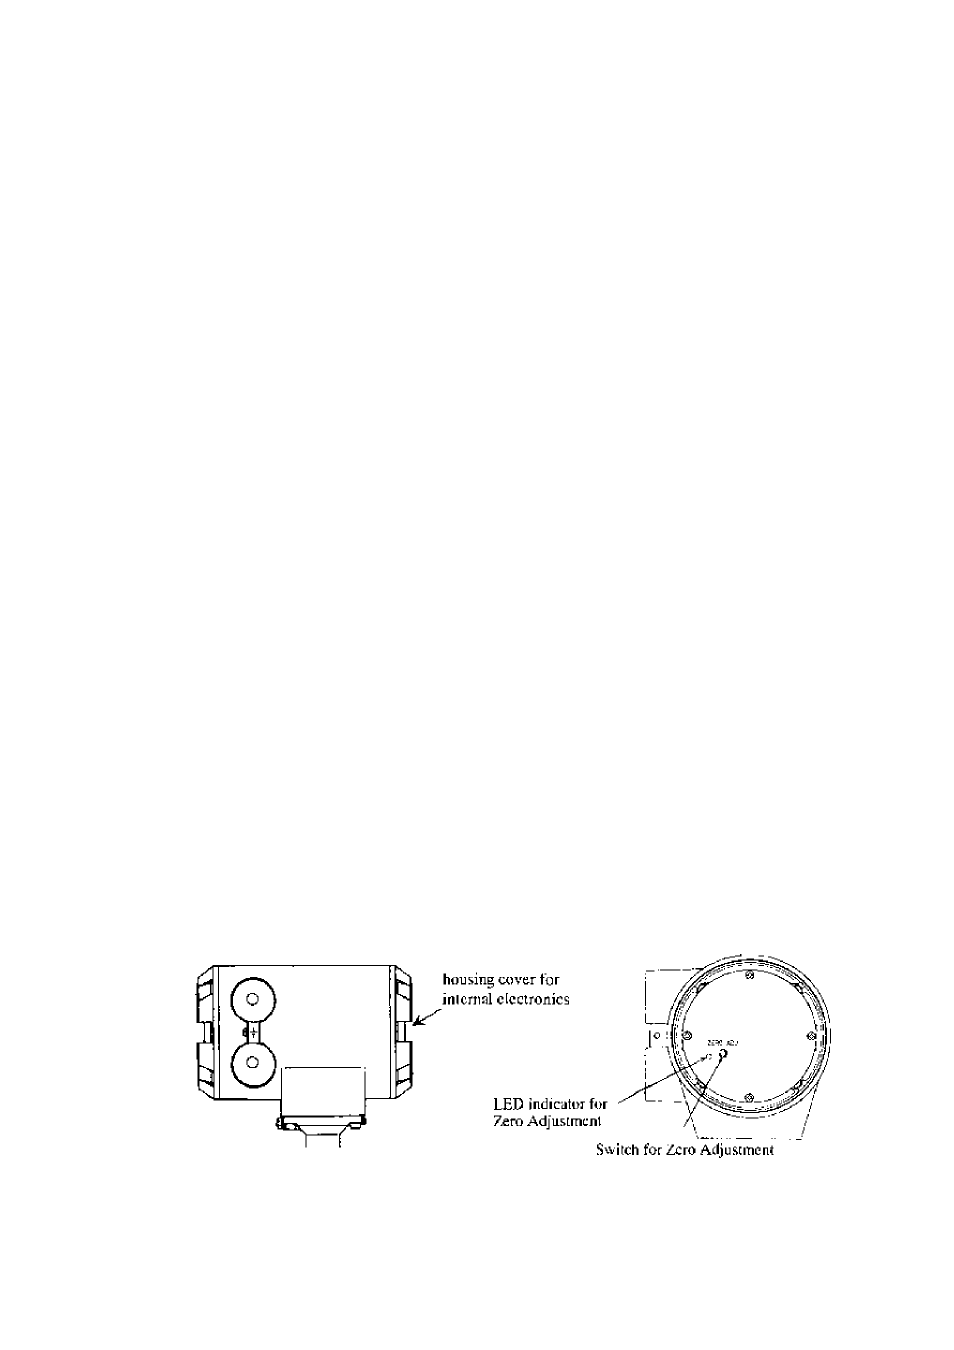
To conduct /oro adjustJiieitl of the flowmeter, iho fluid in the delector pipe must be held still.
There arc three different ways to slatl the zero adjustment:
(1) Pressing the zero adjustment switch for the model without LCD display
(2) Pressing a combination of control keys for the model with LCD display
(see 8,2-ii, "Zero Adjust men I'')
(3) Sending a command signal from a HART communications device
(such as the AFIOO hand-held terminal),
The following is the procedure for starting the zero adjustment for the model without LCD
display,
■ Press the zero adjustment switch for more than 3 seconds.
(Note that once the 7ero adjustment is started, there is no way to cancel the zero
adjustment sequence.)
Then the Li3D indicator lights and the zero adjustment sequence will start. The zero
adjustment sequence lasts about 3 to 6 seconds, (Zero adjustment duration depends on
the excitation current frequency. It lakes about 3 seconds for 24 Hz selling and about 6
seconds for 12 Hz and 6 Hz settings.)
When the zero adjustment sequence ends, the LED indicator goes off.
I’o conduct the zero adjustment, it is necessary to open the cojtverter housing cover for
internal electronics and press the switch. Observe the following precautions w'hcn you
open the housing cover:
(1) Do not open the cover in the open air unprotected against rain or wind.
If yon adjust the flowmeter in ihe rain, this can cause electric shock or damage to the
llow'meler electronics. If wind blow's against the internal circuitry of the converter, output
may flticttiate and fail to indicate correct measuring values.
(2) Do not conduct the zero adjustment when the ambient humidity is higli. By opening the
cover in high humidity conditions, the measuring accuracy may be reduced or damage
caused to the flowmeter electronics.
-
3 3
-