Enable and configure routing, Enable connected routing only, Enable both static and connected routing – Rockwell Automation 1783-BMxxx Stratix 5700 Ethernet Managed Switches User Manual User Manual
Page 148
148
Rockwell Automation Publication 1783-UM004E-EN-P - June 2014
Chapter 4 Manage the Switch via the Device Manager Web Interface
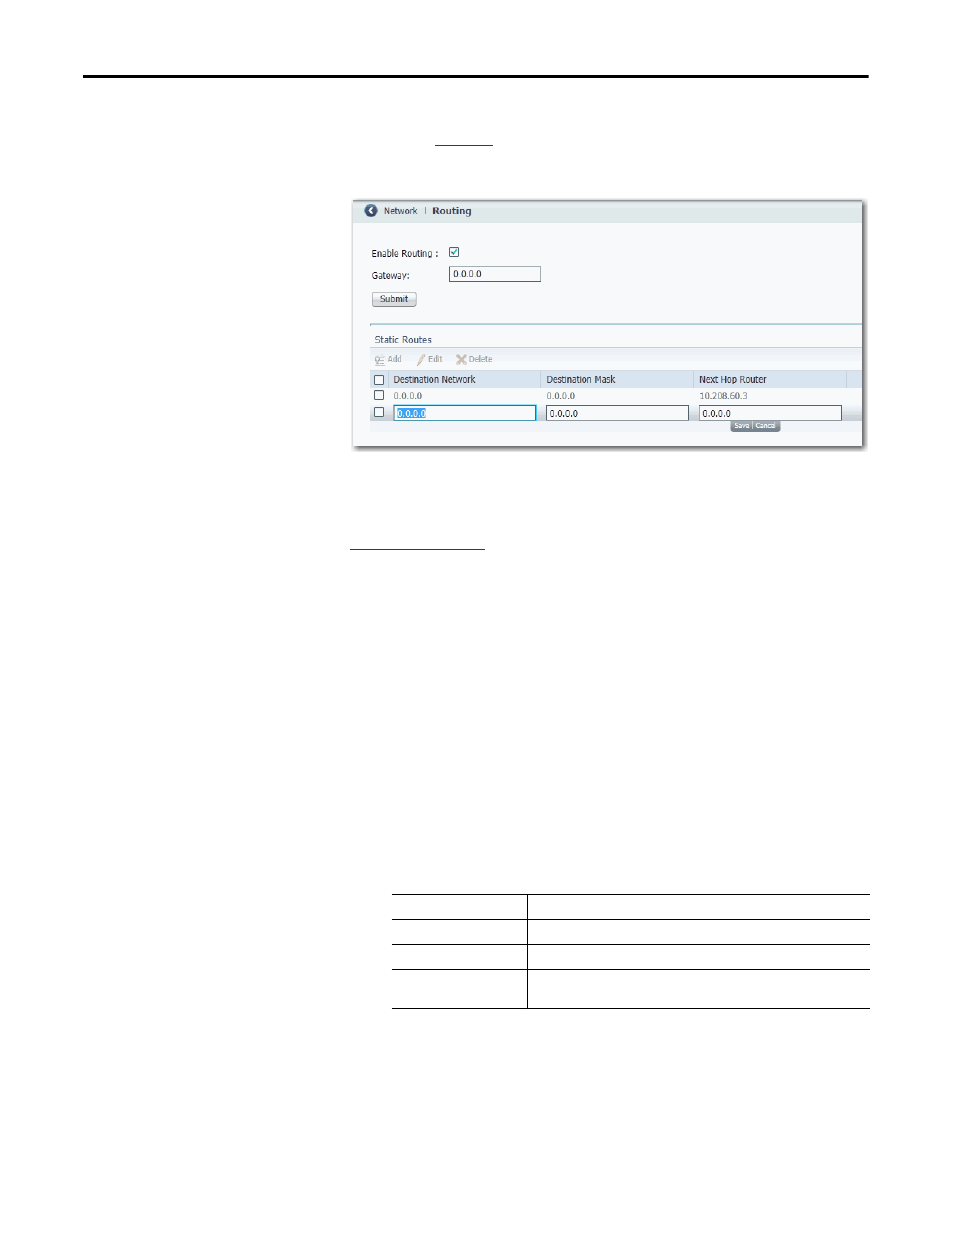
Enable and Configure
Routing
Before you can enable routing, you must reallocate switch memory for routing, as
described on
.
To enable routing, from the Configure menu, choose Routing.
From the Routing window, you can enable connected routing only or both static
and connected routing. When static routing is enabled, connected routing is
enabled by default. For more information about these routing types, refer to
Enable Connected Routing Only
To enable connected routing only, check Enable Routing and click Submit.
No further configuration is required for connected routing.
Enable Both Static and Connected Routing
To enable both static and connected routing, follow these steps.
1. Check Enable Routing and click Submit.
2. Configure static route information as described below.
Field
Description
Destination Network
The IP address of the destination.
Destination Mask
The subnet mask of the destination.
Next Hop Router
The IP address of the router where this device will send the packets for the
specified destination.