Pulsafeeder Pulsar DLCM User Manual
Page 115
109
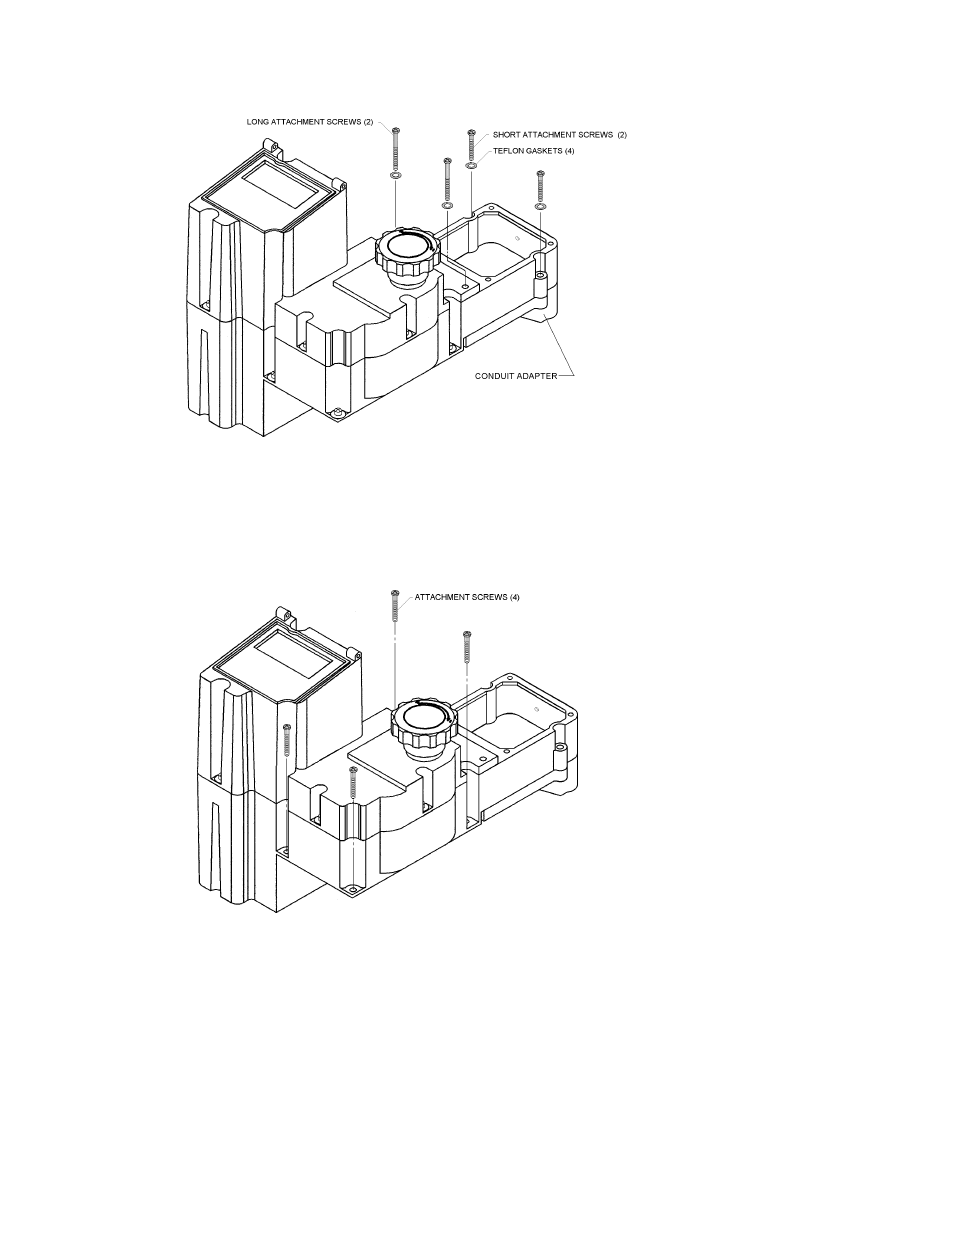
7. Remove the four screws and Teflon Gaskets that retain the conduit adapter(refer to Figure 28).
Figure 28 – Conduit Adapter Screw Removal
When removing the DLCM in Step 8, the conduit adapter will stay with the wire and conduit. It plugs
into the bottom of the DLCM. When lifting the DLCM off the Conduit Adapter, it may be necessary to
have a second person hold the Adapter and associated conduit while the DLCM is 'un-plugged' from it.
8. Remove the four screws that hold the DLCM to the PULSAR gearbox (refer to Figure 29).
Figure 29 – DLCM Removal for Replacement
9. Remove the DLCM from the gear box by lifting vertically. Store it in the returnable packaging.
10. Bring the replacement DLCM to the installation site.
If you are planning to re-wire the DLCM during replacement, skip to step 12.
11. Remove the Conduit Adapter from the replacement DLCM by performing step 7. Attach the conduit
adapter to the unit being returned.