Adding the disk to a disk group, Handling fiber optic cables, Disk drive status indicators – HP 3000 Enterprise Virtual Array User Manual
Page 56: Figure 19
•
Check the following using Command View EVA.
• Navigate to the disk drive and check the operational state. It should be
.
• Record the Model number and the Firmware version. Check the firmware version against the
supported disk firmware in the HP StorageWorks Enterprise Virtual Array release notes. The
most current edition of the release notes can be downloaded from the following website:
Click Technical documentation.
If the disk drive is using an unsupported version of firmware, download the correct firmware from
the following website and install it using the instructions included with the firmware file. Use the
disk drive model number to locate the correct firmware file. Do not add the disk drive to a disk
group if it using an unsupported firmware version.
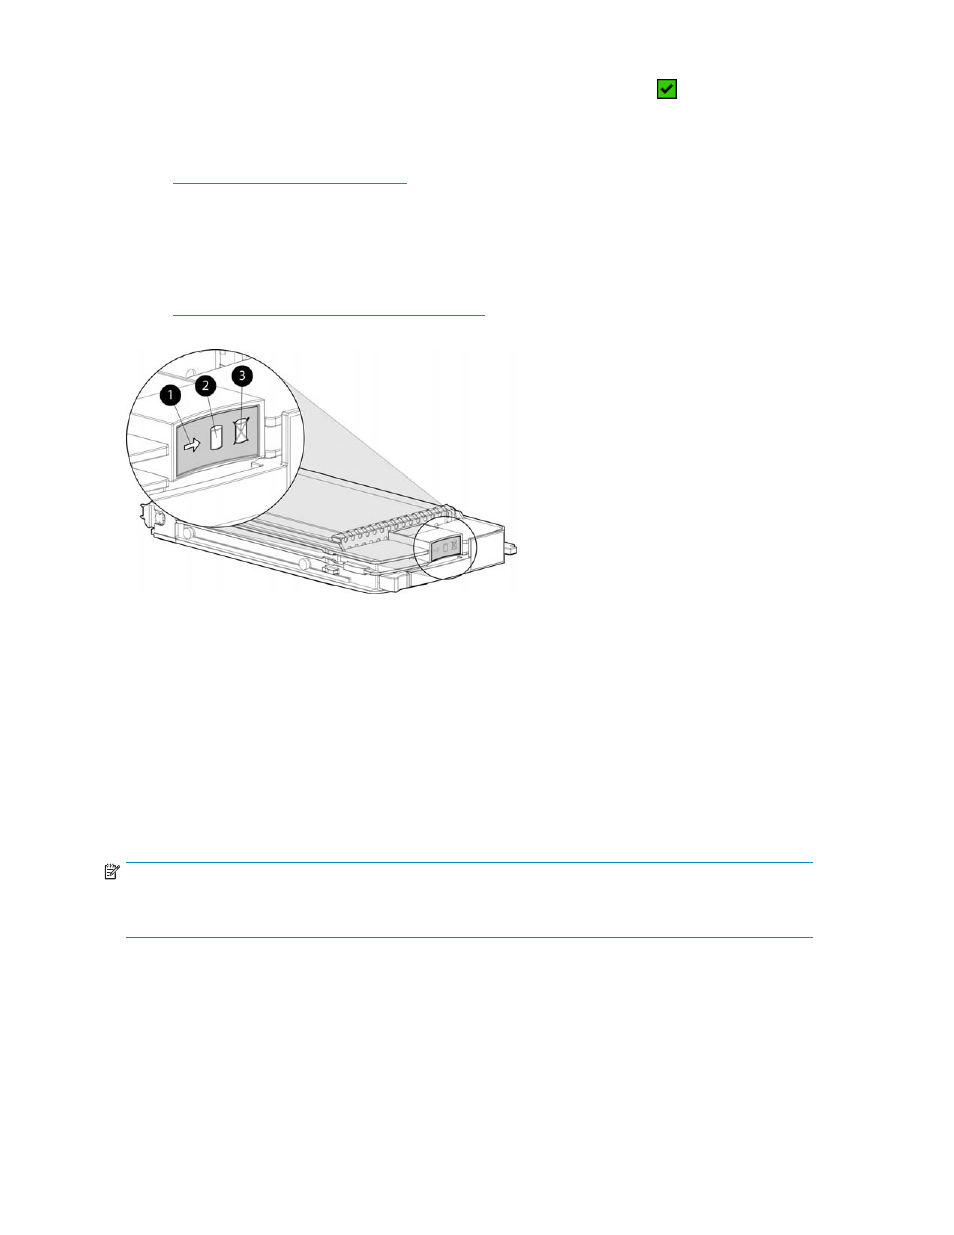
Figure 19 Disk drive status indicators
1. Activity
2. Online
3. Fault
Adding the disk to a disk group
After replacing the disk, it should be added to a disk group.
1.
In the Navigation pane, select Storage system > Hardware > Rack > Disk enclosure > Bay
2.
In the Content pane, select the Disk Drive tab.
3.
Click Group to initiate the process for adding the disk to a disk group.
NOTE:
If the Device Addition Policy is set to automatic, the disk will automatically be added to a disk group. In
this case the Group option will not be available.
Handling fiber optic cables
This section provides protection and cleaning methods for fiber optic connectors.
Contamination of the fiber optic connectors on either a transceiver or a cable connector can impede
the transmission of data. Therefore, protecting the connector tips against contamination or damage
is imperative. The tips can be contaminated by touching them, by dust, or by debris. They can be
damaged when dropped. To protect the connectors against contamination or damage, use the dust
56
Enterprise Virtual Array operation