Badger Meter ReadCenter User Manual
Page 45
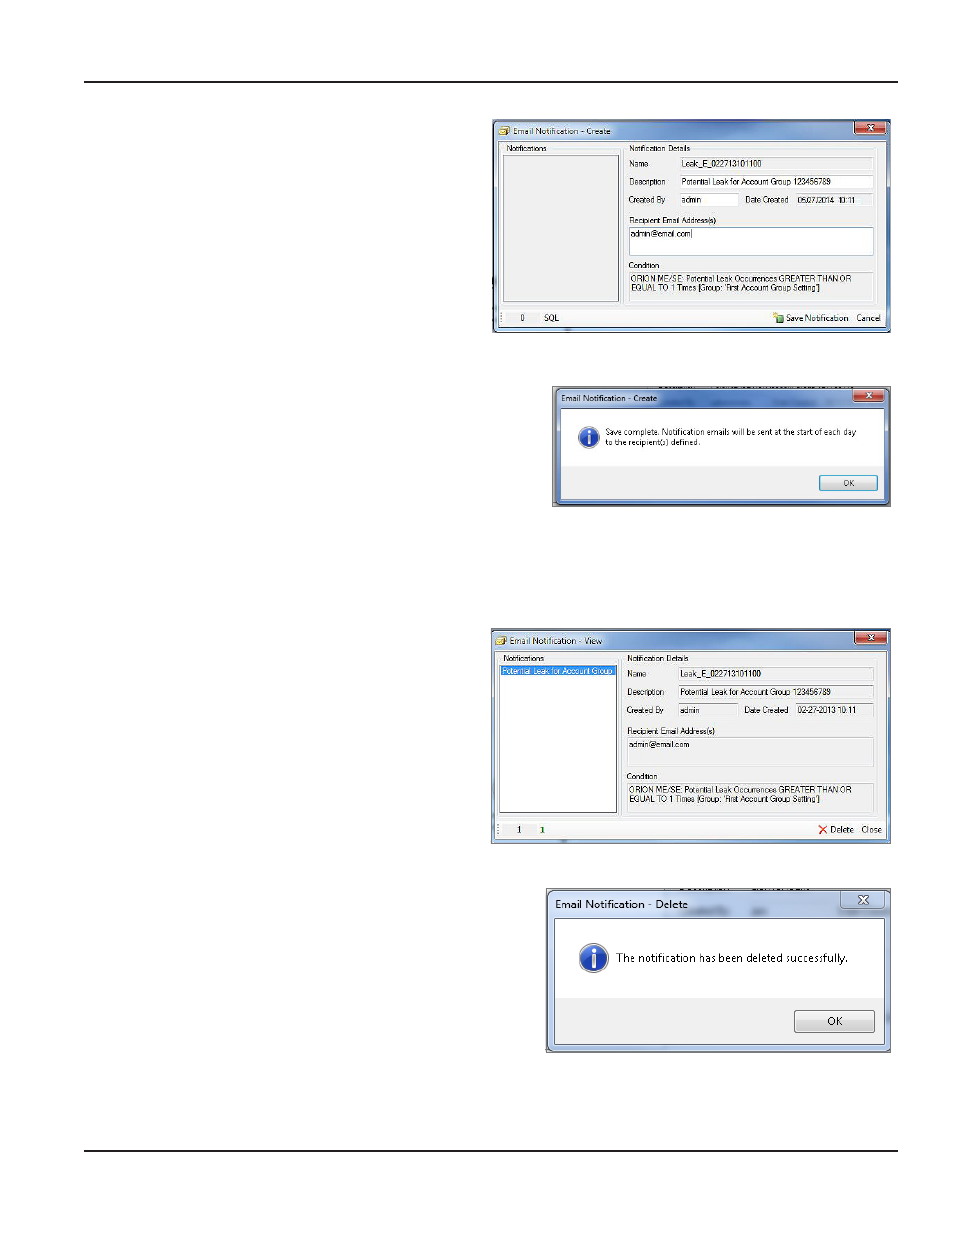
4 Click OK
Result: The Email Notification Create screen
opens as shown in the example here.
5 Enter a description of the Notification (up to 50
characters) in the Description field
6 The user name automatically fills in the Created
By field This field can be changed to a different
name or initials
7 Enter one or more email addresses for the
Notifications in the Recipient Email Address(s)
field If you enter more than one email address,
separate the addresses with a semi-colon ( ; )
8 Click Save Notification
Result: The Email Notification confirmation
window opens as shown here.
9 Click OK.
Result: The Email Notification is saved and
active. The first email will be sent the next day.
Viewing and Deleting Email Notifications
1 Click Email Notification> View Existing Notifications in the lower tool bar of the Account Analytics screen
Result: The Email Notification View window opens with any email notifications that have been created.
2 Click the Notification in the list on the left side
of the screen to view the details
3 To delete the notification, make sure the
notification you want to delete is selected in
the list
Then click the Delete button
Result: A confirmation window pops up.
4 Click Yes to delete the notification
Result: A window pops up to confirm the deletion.
5 Click OK
Result: The Email Notification is deleted.
6 Click Close to close the Email Notification View
window
User Manual
Page 45
June 2014