Proface GP4600R - 12.1 Standard HMIs with Rear Mounting Options" User Manual
Page 232
232
10
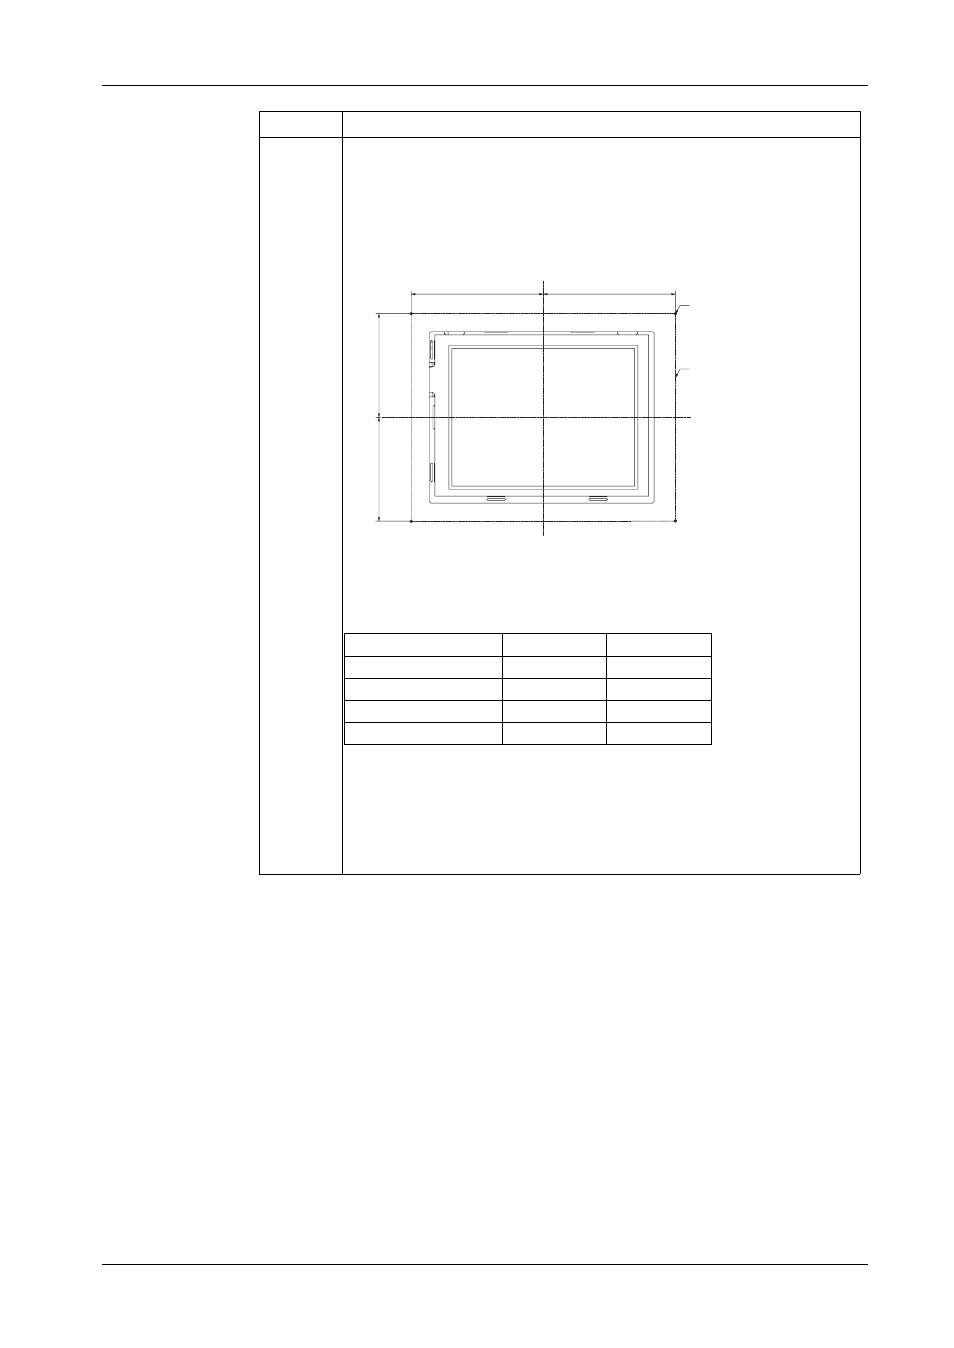
When installing the GP unit with the flat mount orientation, affix the
Overlay
to
the front of the GP unit.
In advance, align the four corners of the
Overlay
outline on the panel as
shown in the figure, and then mark these corners.
Peel off the removable paper layer from the
Overlay
, align the
Overlay
with
the four marks, and then affix the
Overlay
to the panel.
1) Locations to mark (four locations)
2)
Overlay
outline
e) Display area
Note: Use the
Overlay
manufactured by Pro-face. Use one of the following
models.
z
PFXZGPFSR6W1 (for the PFXGP4301TADR)
z
PFXZGPFSR7W1 (for the PFXGP4401TADR)
z
PFXZGPFSR10W1 (for the PFXGP4501TADR)
z
PFXZGPFSR12W1 (for the PFXGP4601TADR)
Step
Procedure Details
);
);
)<
)<
H
mm(in.)
(dimensional tolerance:
±0.2mm [0.01 in.])
FX
FY
PFXGP4301TADR
84.0 (3.31)
66.0 (2.60)
PFXGP4401TADR
99.7 (3.93)
78.6 (3.09)
PFXGP4501TADR
133.3 (5.25)
105.5 (4.15)
PFXGP4601TADR
158.5 (6.24)
118.7 (4.67)
- GP4500R - 10.4 Standard HMIs with Rear Mounting Options" GP4400R - 7.5 Standard HMI with Rear Mounting Options" GP4300R - 5.7 Standard HMI with Rear Mount" GP4300M - 5.7 Modular HMI" GP4200M - 3.5 Modular HMI" GP4500 - 10.4 W Model HMI" GP4400 - 7.0 W Model HMI" GP4300 - 5.7 W Model HMI" GP4200 - 3.5 W Model HMI" GP4600 - 12.1 Standard HMIs" GP4500 - 10.4 Standard HMIs" GP4400 - 7.5 Standard HMI" GP4300 - 5.7 Standard HMI" GP4200 - 3.5 Standard HMIs"