Slots – Proface GP4600R - 12.1 Standard HMIs with Rear Mounting Options" User Manual
Page 138
Installation and Wiring
138
Step
Action
1
Place the GP unit on a clean and level surface with the display facing
downward.
2
Check that the GP unit’s gasket is seated securely into the gasket’s groove,
which runs around the perimeter of the GP unit frame.
3
Cut a hole in the installation panel as defined by the GP unit’s panel cutout
dimensions.
GP-4200 Series (see page 63)
GP-4300 Series (see page 81)
GP-4400 Series (see page 96)
GP-4500 Series (see page 116)
GP-4600 Series (see page 133)
4
Insert the GP unit into the panel-cut.
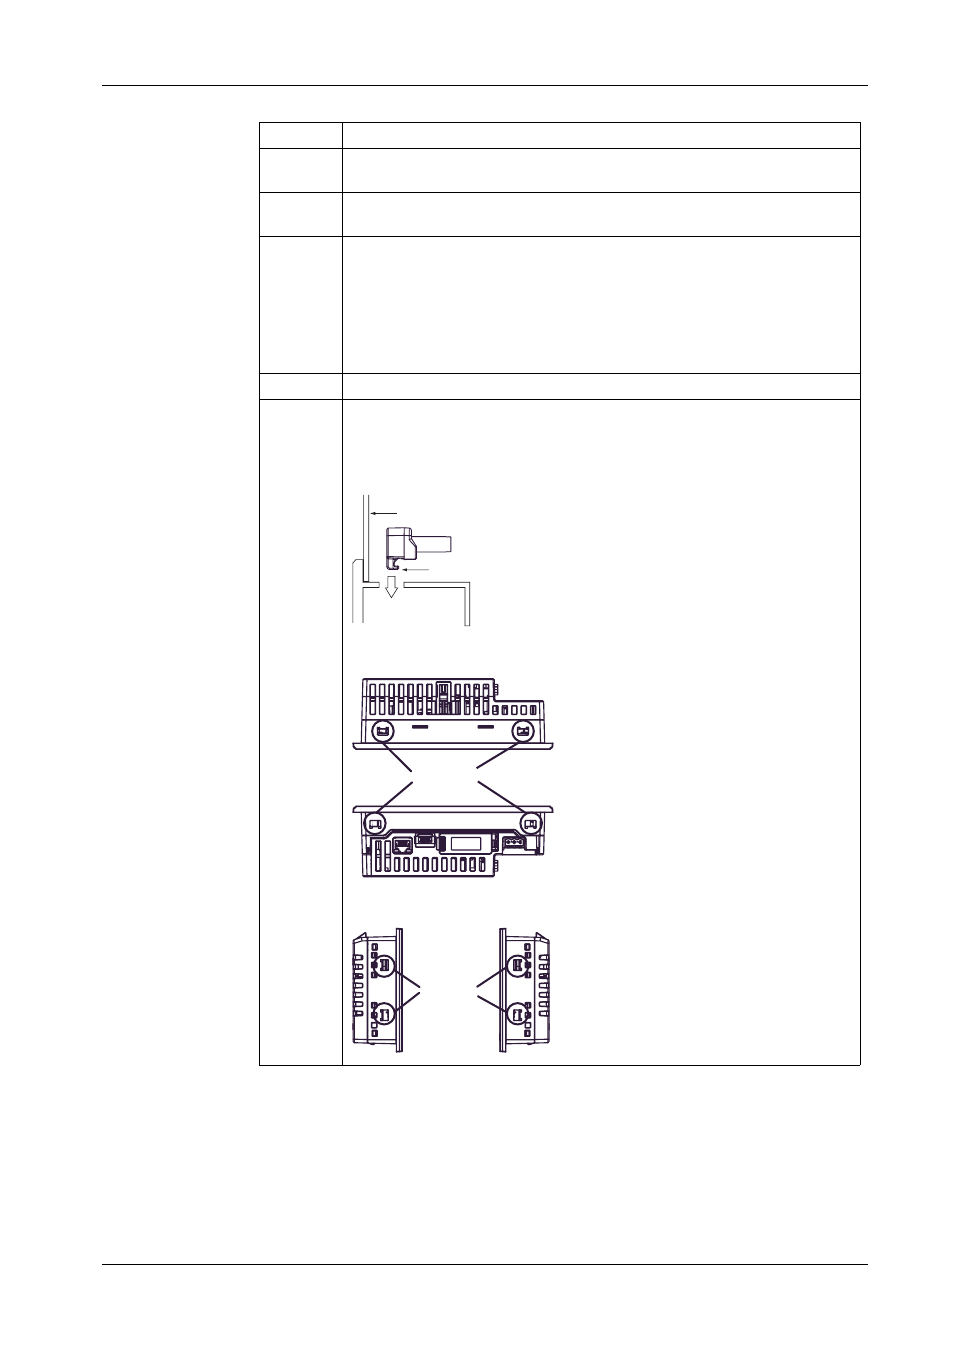
5
Insert the installation fasteners into the GP unit’s insertion slots on the top and
bottom sides (left and right sides for the GP-4200 Series). Slide the fasteners
to the back. If the fasteners are not correctly attached, the GP unit may shift or
fall out.
GP-4301T
GP-4201T
Installation Panel
Hook
Slots
Slots
- GP4500R - 10.4 Standard HMIs with Rear Mounting Options" GP4400R - 7.5 Standard HMI with Rear Mounting Options" GP4300R - 5.7 Standard HMI with Rear Mount" GP4300M - 5.7 Modular HMI" GP4200M - 3.5 Modular HMI" GP4500 - 10.4 W Model HMI" GP4400 - 7.0 W Model HMI" GP4300 - 5.7 W Model HMI" GP4200 - 3.5 W Model HMI" GP4600 - 12.1 Standard HMIs" GP4500 - 10.4 Standard HMIs" GP4400 - 7.5 Standard HMI" GP4300 - 5.7 Standard HMI" GP4200 - 3.5 Standard HMIs"